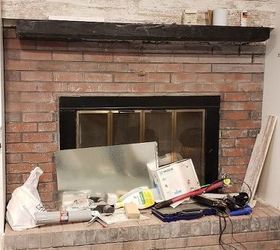
When I inherited my grandfather’s 1950s ranch house, the brick fireplace was buried under decades of soot, smoke stains, and accumulated grime that made it look beyond saving. What started as a simple cleaning project became a passionate restoration journey that taught me everything about proper brick maintenance and care. Through trial and error, research, and conversations with restoration experts, I discovered techniques that transformed my neglected fireplace into the stunning focal point it was meant to be. The process required patience, the right materials, and respect for the craftsmanship that created this beautiful architectural feature.
Understanding Brick Types and Conditions
My first lesson involved identifying the specific type of brick used in my fireplace, as different materials require distinct cleaning approaches and care techniques. I discovered my fireplace featured common red clay bricks from the 1950s, which are more porous than modern alternatives but respond well to gentle cleaning methods. The mortar joints showed significant deterioration in several areas, requiring repair before aggressive cleaning could begin safely. Understanding these material characteristics prevented damage that harsh chemicals or inappropriate techniques could have caused to my irreplaceable vintage brickwork.
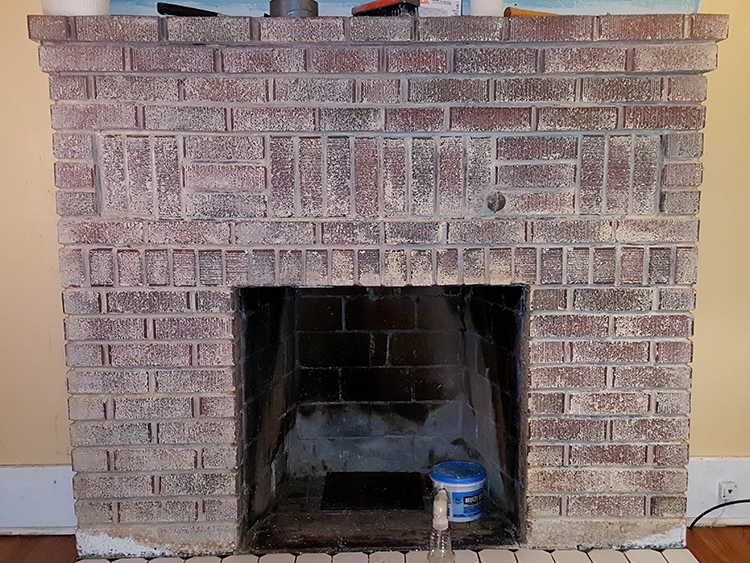
Assessing the extent of damage and staining helped me develop a realistic cleaning plan and timeline for this restoration project effectively. I found three distinct types of discoloration: surface soot that wiped away easily, embedded smoke stains requiring deeper treatment, and white efflorescence deposits from moisture infiltration. Each problem demanded different solutions and techniques to achieve optimal results without damaging the underlying brick structure. Taking detailed photos before beginning work provided reference points for tracking progress throughout the multi-stage cleaning process.
Moisture testing revealed hidden problems that could have sabotaged my cleaning efforts if left unaddressed during the initial assessment phase. I used a simple plastic sheet test to identify areas where moisture was still infiltrating through damaged mortar joints and chimney cap issues. Addressing these structural problems before cleaning prevented future staining and ensured my hard work would last for years to come. The investment in proper preparation saved both time and frustration during the actual cleaning phases that followed.
Essential Tools and Materials
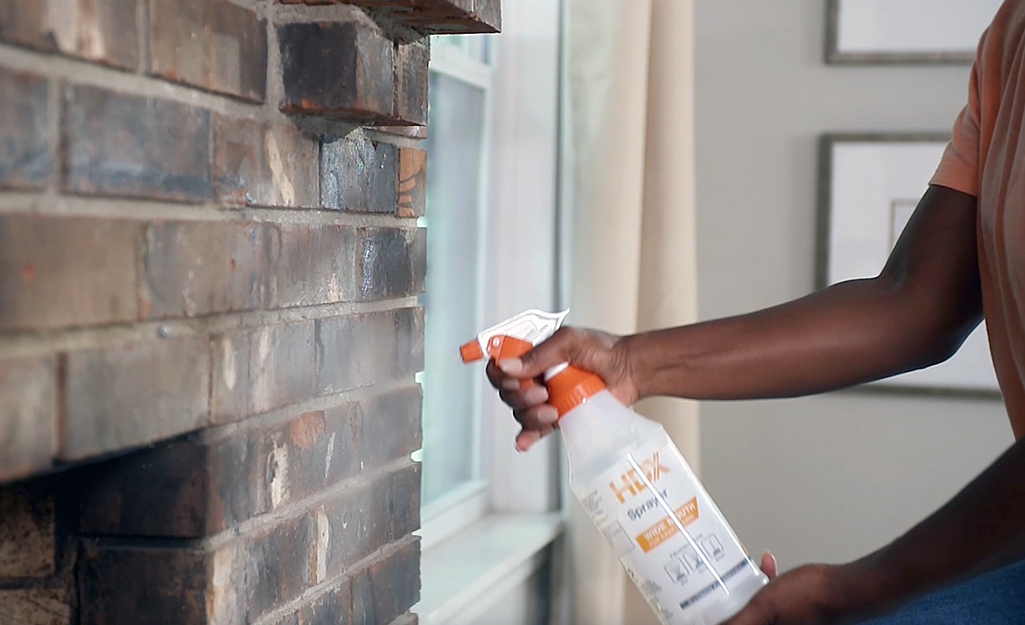
Gathering the right tools proved crucial for achieving professional results while protecting both myself and my valuable brick fireplace from potential damage. I assembled an arsenal including wire brushes of various sizes, plastic scrapers, spray bottles, protective tarps, and plenty of old towels for cleanup work. Safety equipment became equally important, with dust masks, safety glasses, and rubber gloves protecting me from harsh chemicals and brick dust throughout the process. Quality tools made the work more efficient and produced better results than the cheaper alternatives I initially considered purchasing.
Chemical selection required careful research to find products effective against stubborn stains while remaining safe for both my family and the environment around my home. I discovered that muriatic acid, though powerful, required extreme caution and proper ventilation to use safely on brick surfaces. Gentler alternatives like trisodium phosphate and specialized brick cleaners provided excellent results with less risk and easier application procedures. Testing all products on inconspicuous areas first prevented disasters that could have permanently damaged visible fireplace surfaces.
Professional-grade equipment rental became worthwhile for the most challenging aspects of my fireplace restoration project, particularly pressure washing and final sealing applications. I rented a low-pressure washer specifically designed for masonry work, avoiding high-pressure units that could damage mortar joints and brick surfaces. Specialized brushes and extension tools allowed me to reach difficult areas safely without requiring scaffolding or dangerous ladder work. The rental costs proved minimal compared to potential repair expenses from using inappropriate equipment or causing accidental damage.
Step-by-Step Cleaning Process
My cleaning process began with thorough preparation that protected surrounding surfaces and ensured safe working conditions throughout the multi-day restoration project. I covered nearby furniture, floors, and walls with plastic sheeting, learning from professionals that overpreparing prevents costly cleanup and damage repairs later. Removing all decorative items, fireplace screens, and tools created clear access to all brick surfaces requiring attention. Opening windows and using fans provided adequate ventilation for chemical applications while maintaining comfortable working conditions in my living room.
Surface cleaning started with dry brushing using stiff bristles to remove loose soot, dirt, and debris accumulated over decades of use and neglect. I worked systematically from top to bottom, allowing gravity to help remove loosened materials without redistributing dirt to already-cleaned areas. This initial step revealed the true extent of staining and identified areas requiring more aggressive treatment techniques. The dry cleaning phase removed approximately 40% of the surface discoloration, encouraging me to continue with more intensive cleaning methods.
Chemical treatment required patience and careful application to achieve optimal results without damaging the delicate brick and mortar surfaces throughout my fireplace structure. I applied cleaning solutions in small sections, allowing adequate dwell time for chemicals to penetrate stubborn stains before scrubbing and rinsing. Multiple applications proved necessary for heavily stained areas, with each treatment cycle producing incremental improvements rather than dramatic transformations. The methodical approach prevented over-treatment that could have lightened or damaged the natural brick coloration I wanted to preserve.
Dealing with Stubborn Stains
Creosote deposits presented my biggest challenge, requiring specialized techniques and products designed specifically for these tar-like substances that accumulate in heavily used fireplaces. I discovered that heat application using a hair dryer softened these deposits enough for careful scraping with plastic tools that wouldn’t scratch brick surfaces. Commercial creosote removers proved effective when combined with patient scrubbing using brass brushes that provided adequate abrasion without damaging masonry materials. Multiple treatment cycles gradually eliminated these stubborn deposits that initially seemed impossible to remove completely.
White efflorescence stains required different approaches than organic deposits, responding best to acidic solutions applied carefully to avoid damaging surrounding materials and surfaces. I learned that these mineral deposits result from water infiltration carrying dissolved salts to the surface, where they crystallize upon evaporation. Removing efflorescence involved addressing both the visible stains and underlying moisture problems to prevent recurrence after cleaning completion. Wire brushes effectively removed crystallized deposits, while chemical treatments neutralized residual minerals embedded in the porous brick structure.
Smoke stains embedded deep within porous brick surfaces demanded persistence and multiple treatment approaches to achieve satisfactory results without causing surface damage. I experimented with various techniques, including steam cleaning, chemical strippers, and abrasive method,s before finding combinations that worked effectively. Poultice treatments using powdered cleaners mixed with water created paste-like applications that drew stains from deep within brick pores. These intensive treatments required covering with plastic wrap and allowing overnight penetration for optimal stain removal effectiveness.

Restoration and Protection
Mortar joint repair became essential before final cleaning and sealing, as deteriorated pointing allowed moisture infiltration that would undermine my restoration efforts over time. I carefully removed loose and crumbling mortar using appropriate tools, avoiding damage to surrounding brick edges and surfaces during the removal process. Matching mortar color and composition required research and experimentation to achieve seamless repairs that complemented the original construction materials and techniques. Professional consultation ensured my repointing work would provide lasting protection and maintain the fireplace’s structural integrity.
Sealing applications provided long-term protection against future staining and moisture damage while preserving the natural appearance of my restored brick fireplace surfaces. I selected breathable masonry sealers that prevent water infiltration without trapping moisture within the brick structure that could cause freeze-thaw damage. Application timing proved crucial, with adequate curing time between cleaning and sealing preventing trapped moisture and chemical interactions. The invisible protection maintains the natural brick appearance while significantly reducing future maintenance requirements and stain susceptibility.
Final polishing and detail work transformed my cleaned fireplace into a stunning focal point that exceeded my initial restoration expectations and goals significantly. I used soft brushes and microfiber cloths to remove residual cleaning residue and highlight the natural brick textures and color variations throughout the structure. Careful attention to mortar joints and corners ensured every surface received proper treatment and protection for long-lasting results. The completed restoration revealed beautiful brick patterns and colors that had been hidden under decades of accumulated grime and stains.
Ongoing Maintenance Tips
Regular maintenance schedules prevent the accumulation of heavy staining that made my initial restoration project so challenging and time-consuming to complete successfully. I now perform monthly inspections and light cleaning to address problems before they become deeply embedded in the porous brick surfaces. Simple dusting with soft brushes and occasional damp cleaning maintains the restored appearance while preventing major cleaning projects in future years. Early intervention saves both time and effort compared to allowing stains to accumulate and penetrate deeply into masonry materials over extended periods.
Seasonal preparations help protect my fireplace from weather-related damage and staining that could compromise the restoration work I invested months completing. I ensure proper chimney cap function and inspect for water infiltration points before each heating season begins. Covering unused fireplaces duringthe summer months prevents dust accumulation and pest infiltration that could create additional cleaning challenges. These preventive measures preserve my investment while maintaining the beautiful appearance I worked so hard to achieve.
Professional inspections provide expert assessment of my fireplace’s condition and early identification of problems requiring attention before they become expensive repair issues. I schedule annual chimney and fireplace evaluations to ensure safe operation and identify maintenance needs before they compromise the structure or appearance. Professional advice helps me make informed decisions about cleaning products and techniques for specific situations that arise. This partnership approach combines my hands-on maintenance with expert knowledge for optimal long-term fireplace care and preservation.
What’s the safest way to clean soot and smoke stains from brick fireplaces?
Start with gentle methods like dry brushing and mild detergent solutions before progressing to stronger chemicals if necessary for stubborn stains. I’ve found that trisodium phosphate mixed with warm water effectively removes most smoke stains without damaging brick surfaces when applied carefully. Always test cleaning products on inconspicuous areas first and ensure adequate ventilation when using any chemical cleaners. Patience with multiple light treatments produces better results than aggressive single applications that risk permanent damage to irreplaceable masonry materials.
Can I use a pressure washer to clean my brick fireplace?
Pressure washing can damage mortar joints and brick surfaces if not done carefully with appropriate equipment and techniques designed for masonry applications. I recommend using low-pressure settings specifically designed for masonry work, keeping the nozzle at least 12 inches from surfaces to prevent damage. High-pressure washing can force water deep into brick pores, potentially causing freeze-thaw damage and structural problems over time. Hand cleaning with brushes and appropriate chemicals often produces better results with less risk of permanent damage to valuable fireplace materials.
How often should I clean my brick fireplace to maintain its appearance?
Regular light maintenance every few months prevents heavy stain accumulation that requires intensive cleaning projects like my initial restoration experience. I perform monthly dusting and inspect for new stains or damage that need immediate attention before they become embedded permanently. Annual deep cleaning addresses seasonal accumulation while maintaining the restored appearance I worked so hard to achieve. Frequency depends on usage patterns, with heavily used fireplaces requiring more attention than decorative units that see occasional operation during heating seasons.
What should I do about white stains that keep appearing on my brick?
White efflorescence stains indicate moisture problems that must be addressed to prevent recurring deposits and potential structural damage to your fireplace system. I learned that these mineral deposits result from water infiltration carrying dissolved salts to the surface where they crystallize upon drying. Cleaning removes visible stains temporarily, but addressing underlying moisture sources through proper sealing and repair work prevents recurrence effectively. Professional evaluation may be necessary to identify and correct complex moisture infiltration problems.

Is it safe to use muriatic acid on fireplace bricks?
Muriatic acid can be effective for stubborn stains but requires extreme caution, proper ventilation, and protective equipment to use safely on brick surfaces. I prefer gentler alternatives like specialized brick cleaners that provide excellent results with less risk to both user safety and masonry materials. When muriatic acid becomes necessary, always dilute according to manufacturer instructions and test on inconspicuous areas first to prevent damage. A professional application may be advisable for inexperienced users dealing with valuable or historic fireplace installations.
How can I prevent future staining and maintain my restored fireplace?
Preventive maintenance, including regular cleaning, proper ventilation, and moisture control, significantly reduces staining and extends the time between major cleaning projects. I apply breathable masonry sealers that prevent water infiltration while allowing natural moisture evaporation from brick structures. Monthly inspections and prompt attention to spills or new stains prevent problems from becoming deeply embedded in porous surfaces. Professional chimney maintenance ensures proper operation while reducing excessive smoke and creosote deposits that create the heaviest staining problems in fireplace systems.

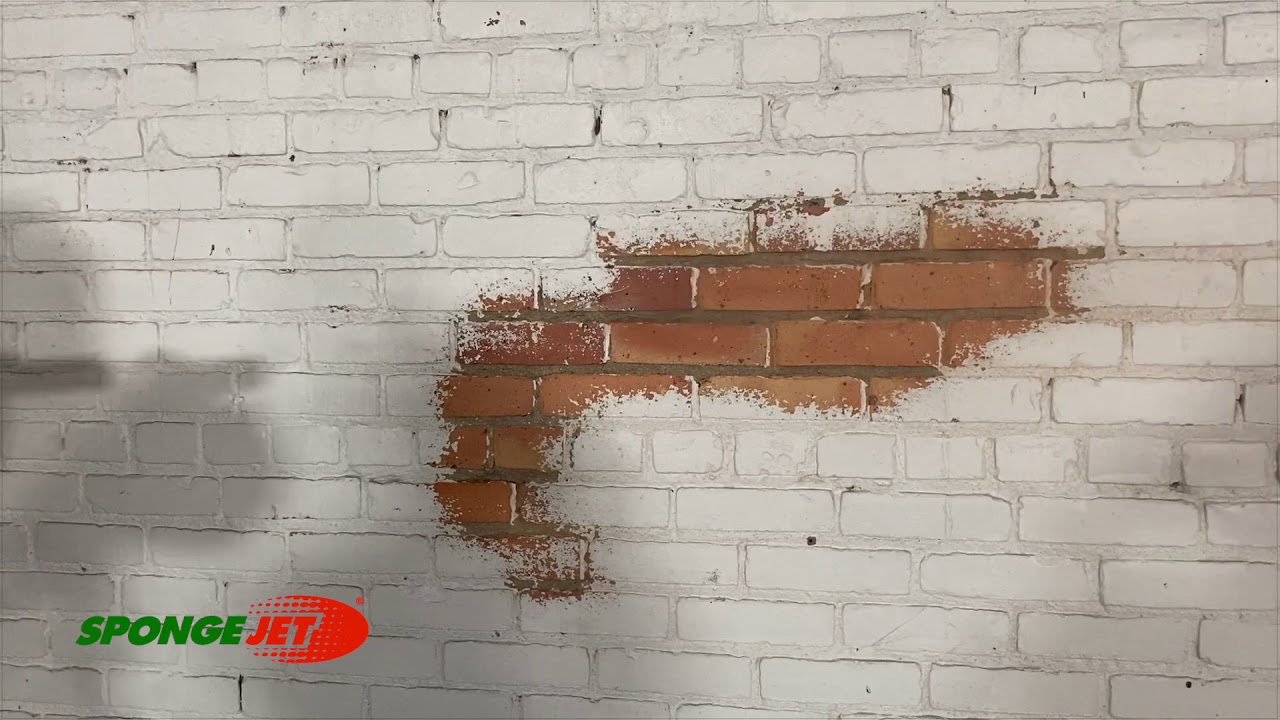
How to Strip Paint from Brick Fireplace – My Alternate Life

Options for Removing Paint from Brick Fireplaces – Brick-Anew
Restore or not? Removing paint from fireplace brick
How to Remove Paint From Brick Blainu0027s Farm u0026 Fleet Blog

Removing Paint From Brick Fireplace DIY Home Improvement Forum

Removing Paint from Soft Brick
Related Posts: