When I first envisioned adding an outdoor fireplace to my backyard, I knew I wanted something that felt authentic and timeless, not just another cookie-cutter addition. After months of planning and building, my rustic outdoor fireplace has become the heart of our outdoor living space. The crackling flames, the natural stone facade, and the cozy gathering spot it creates have transformed how my family and friends experience our backyard. Let me share what I learned along the way about creating this magical focal point.
Choosing the Perfect Location for Your Rustic Fireplace
Finding the right spot for my outdoor fireplace was crucial to the entire project’s success. I spent weeks walking around my yard at different times of day, considering wind patterns, views from the house, and how the space would flow with our existing patio. The location needed to be far enough from overhanging branches and structures to meet safety codes, but close enough to the house for convenience.
I discovered that positioning matters more than I initially thought. My fireplace faces away from the prevailing winds, which keeps smoke from blowing toward our seating area. I also made sure there was enough clearance around all sides for people to move comfortably. The spot I chose creates a natural gathering area that doesn’t interfere with other yard activities.
One mistake I almost made was placing it too close to my neighbor’s fence. Local building codes required specific setbacks, and I’m glad I checked before breaking ground. The final location creates privacy while still feeling connected to the main outdoor living areas. It’s become the perfect backdrop for evening conversations and weekend gatherings.
Selecting Natural Materials for Authentic Rustic Character
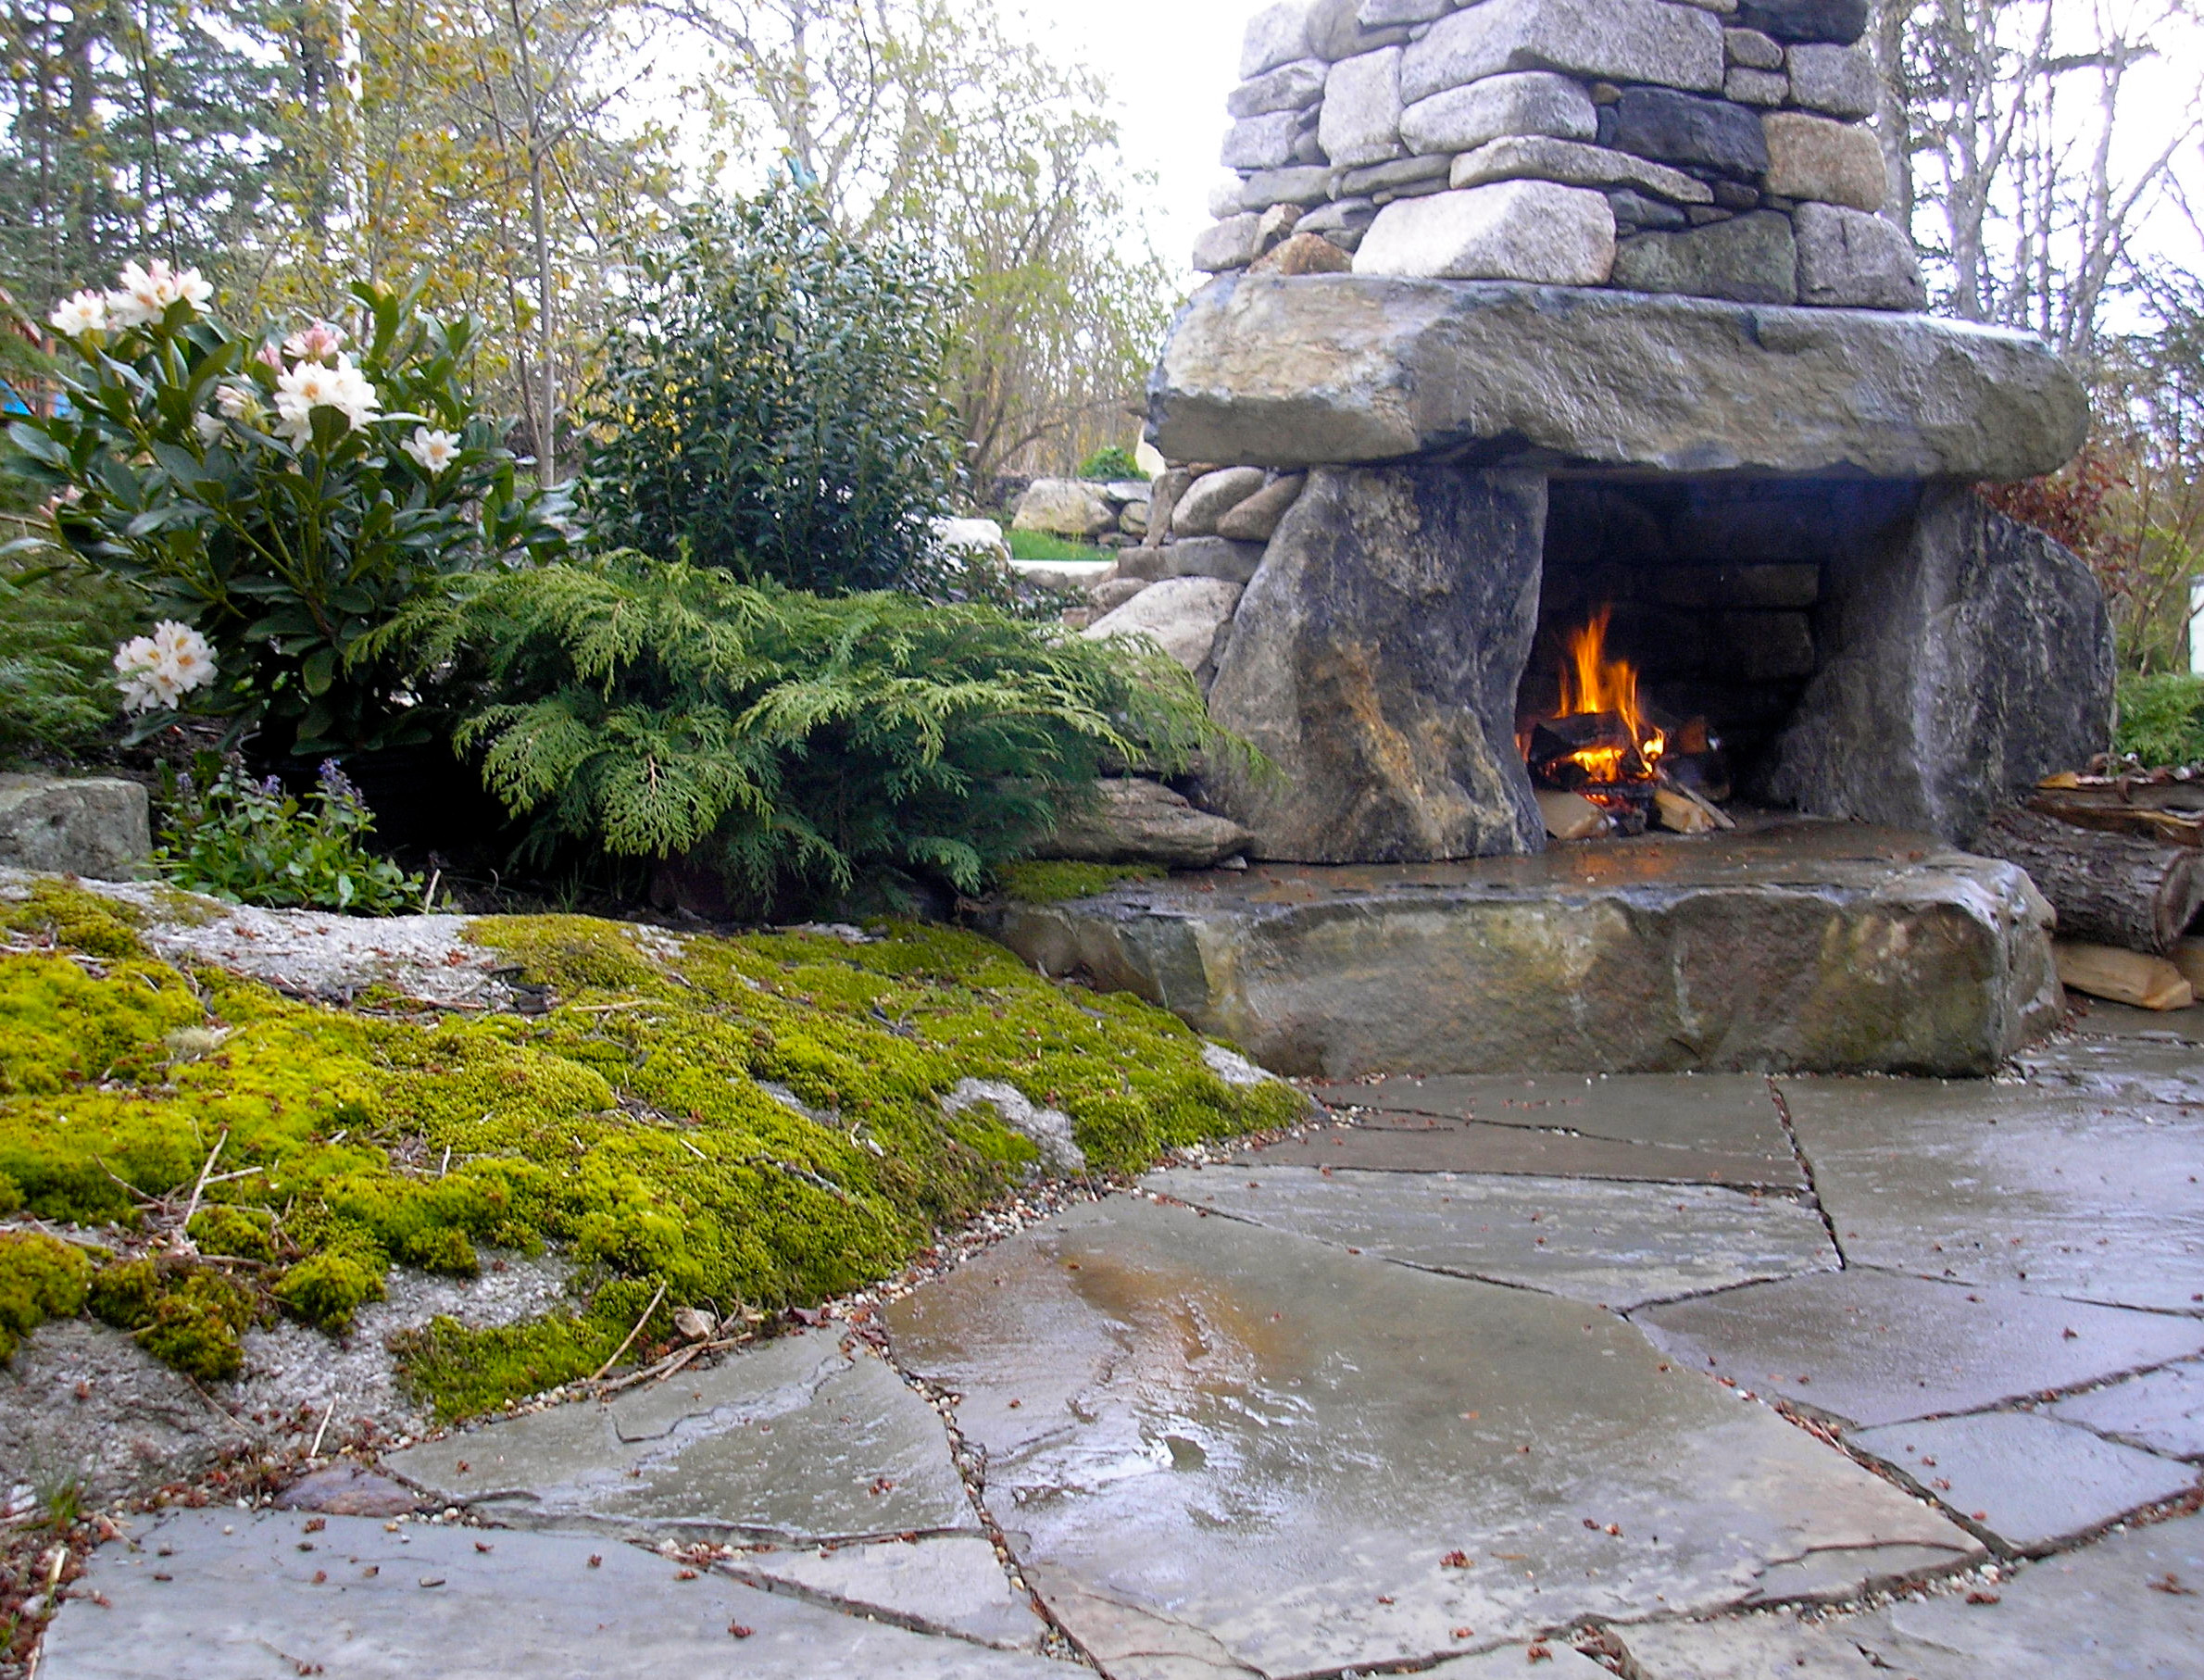
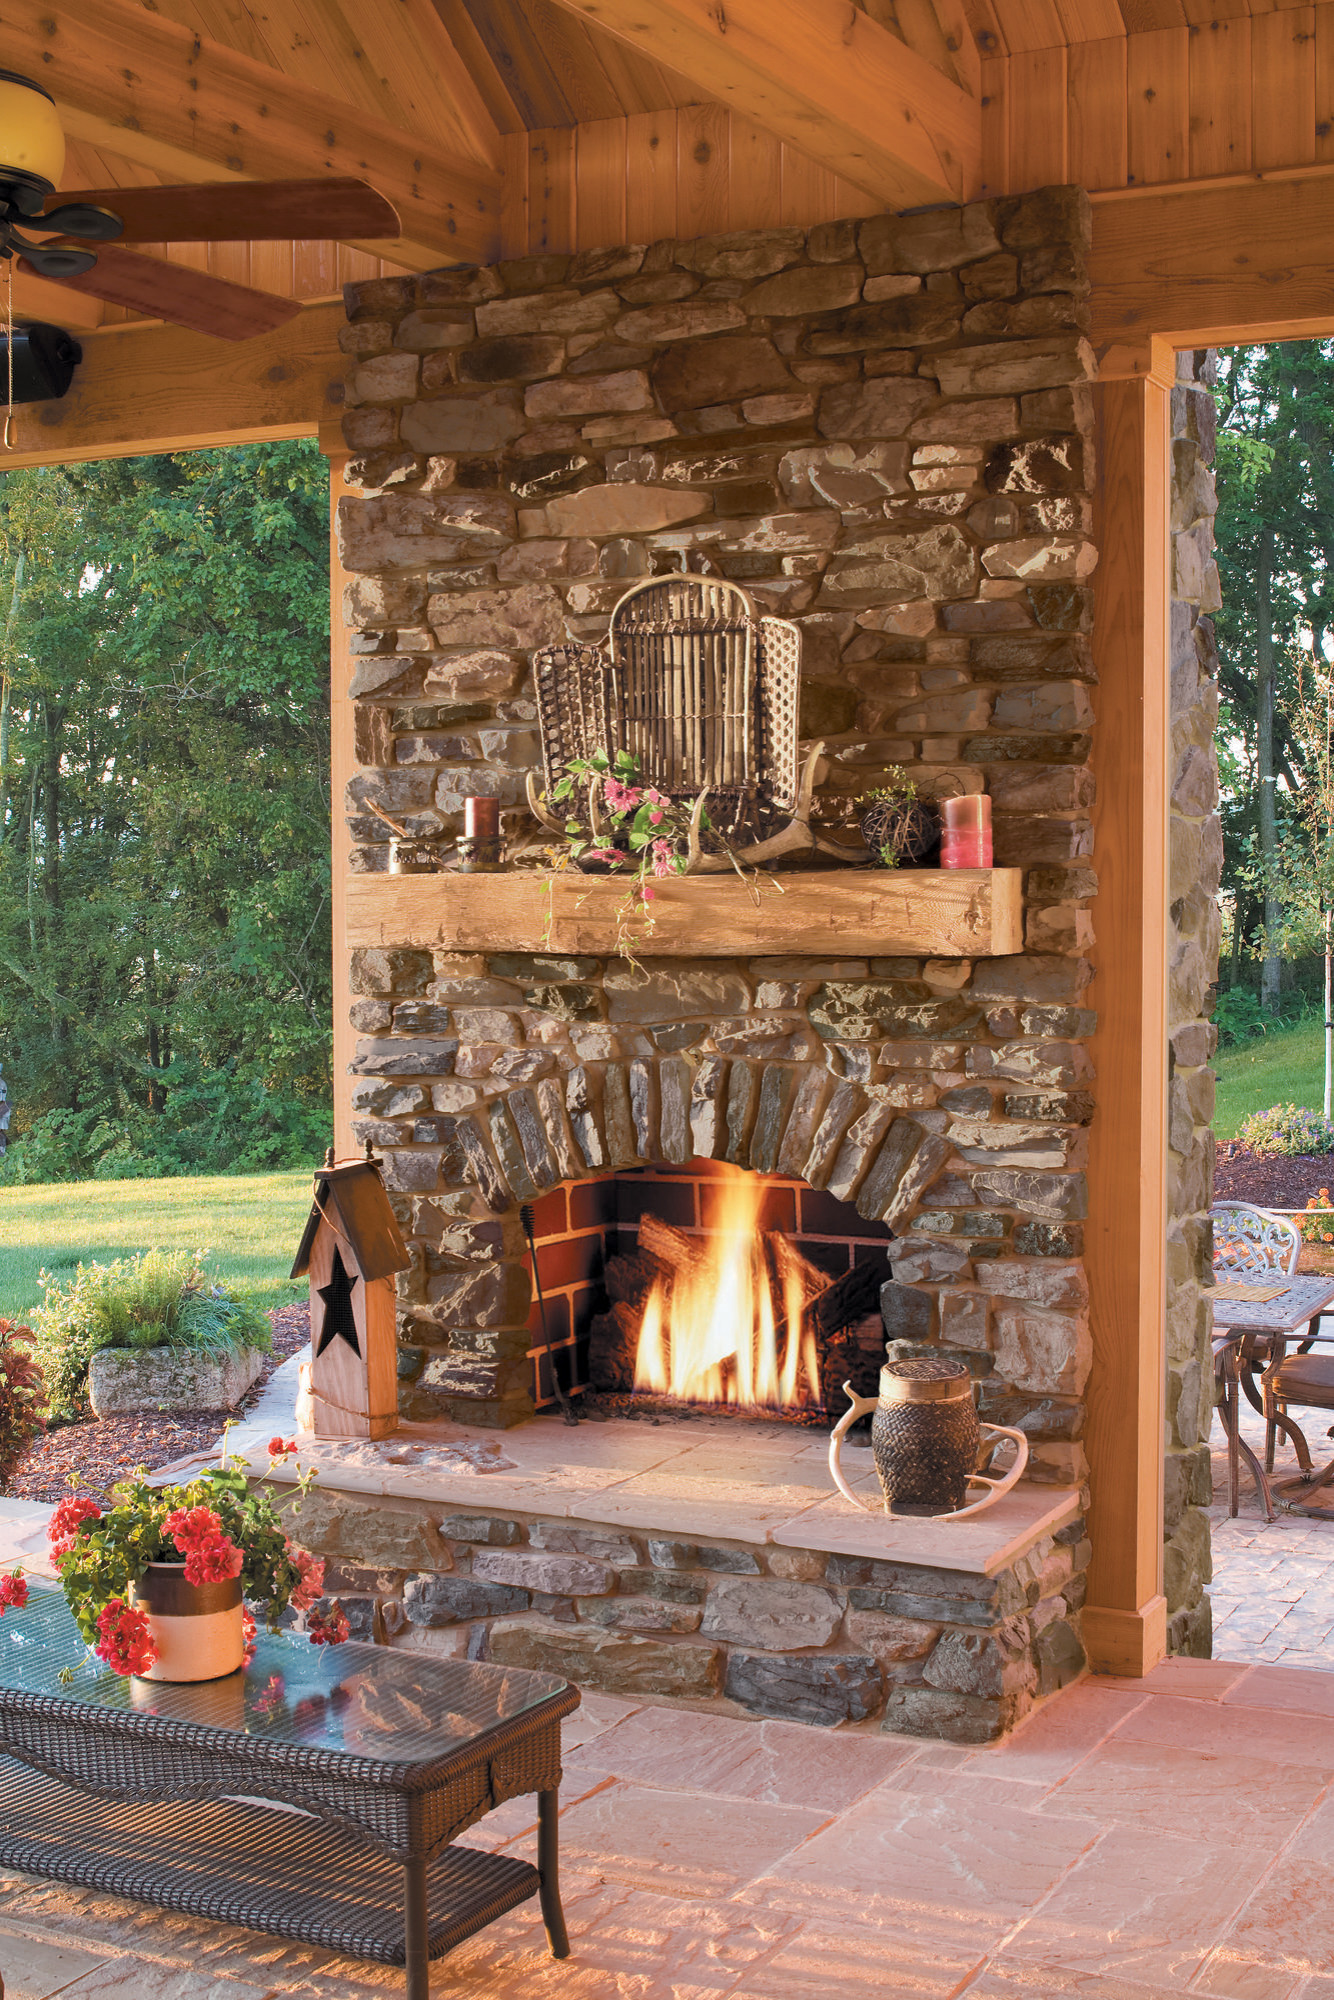
The materials I chose really make or break the rustic aesthetic I was after. I went with locally sourced fieldstone for the main structure because it has that weathered, timeless look that fits perfectly with our landscape. The irregular shapes and natural color variations give the fireplace a character that manufactured materials just can’t match.
For the hearth and cap, I selected a warm-toned limestone that complements the fieldstone beautifully. The contrast between the rough stone walls and the smoother limestone creates visual interest without being too busy. I also incorporated reclaimed barn wood for the mantel, which adds that perfect rustic touch and tells its own story.
The mortar joints were another important consideration. I used a slightly recessed joint style that emphasizes each stone’s individual character. The mortar color matches the lighter tones in the stone, so it doesn’t compete visually. These material choices work together to create something that looks like it’s been there for decades rather than recently built.
Designing for Both Function and Rustic Beauty
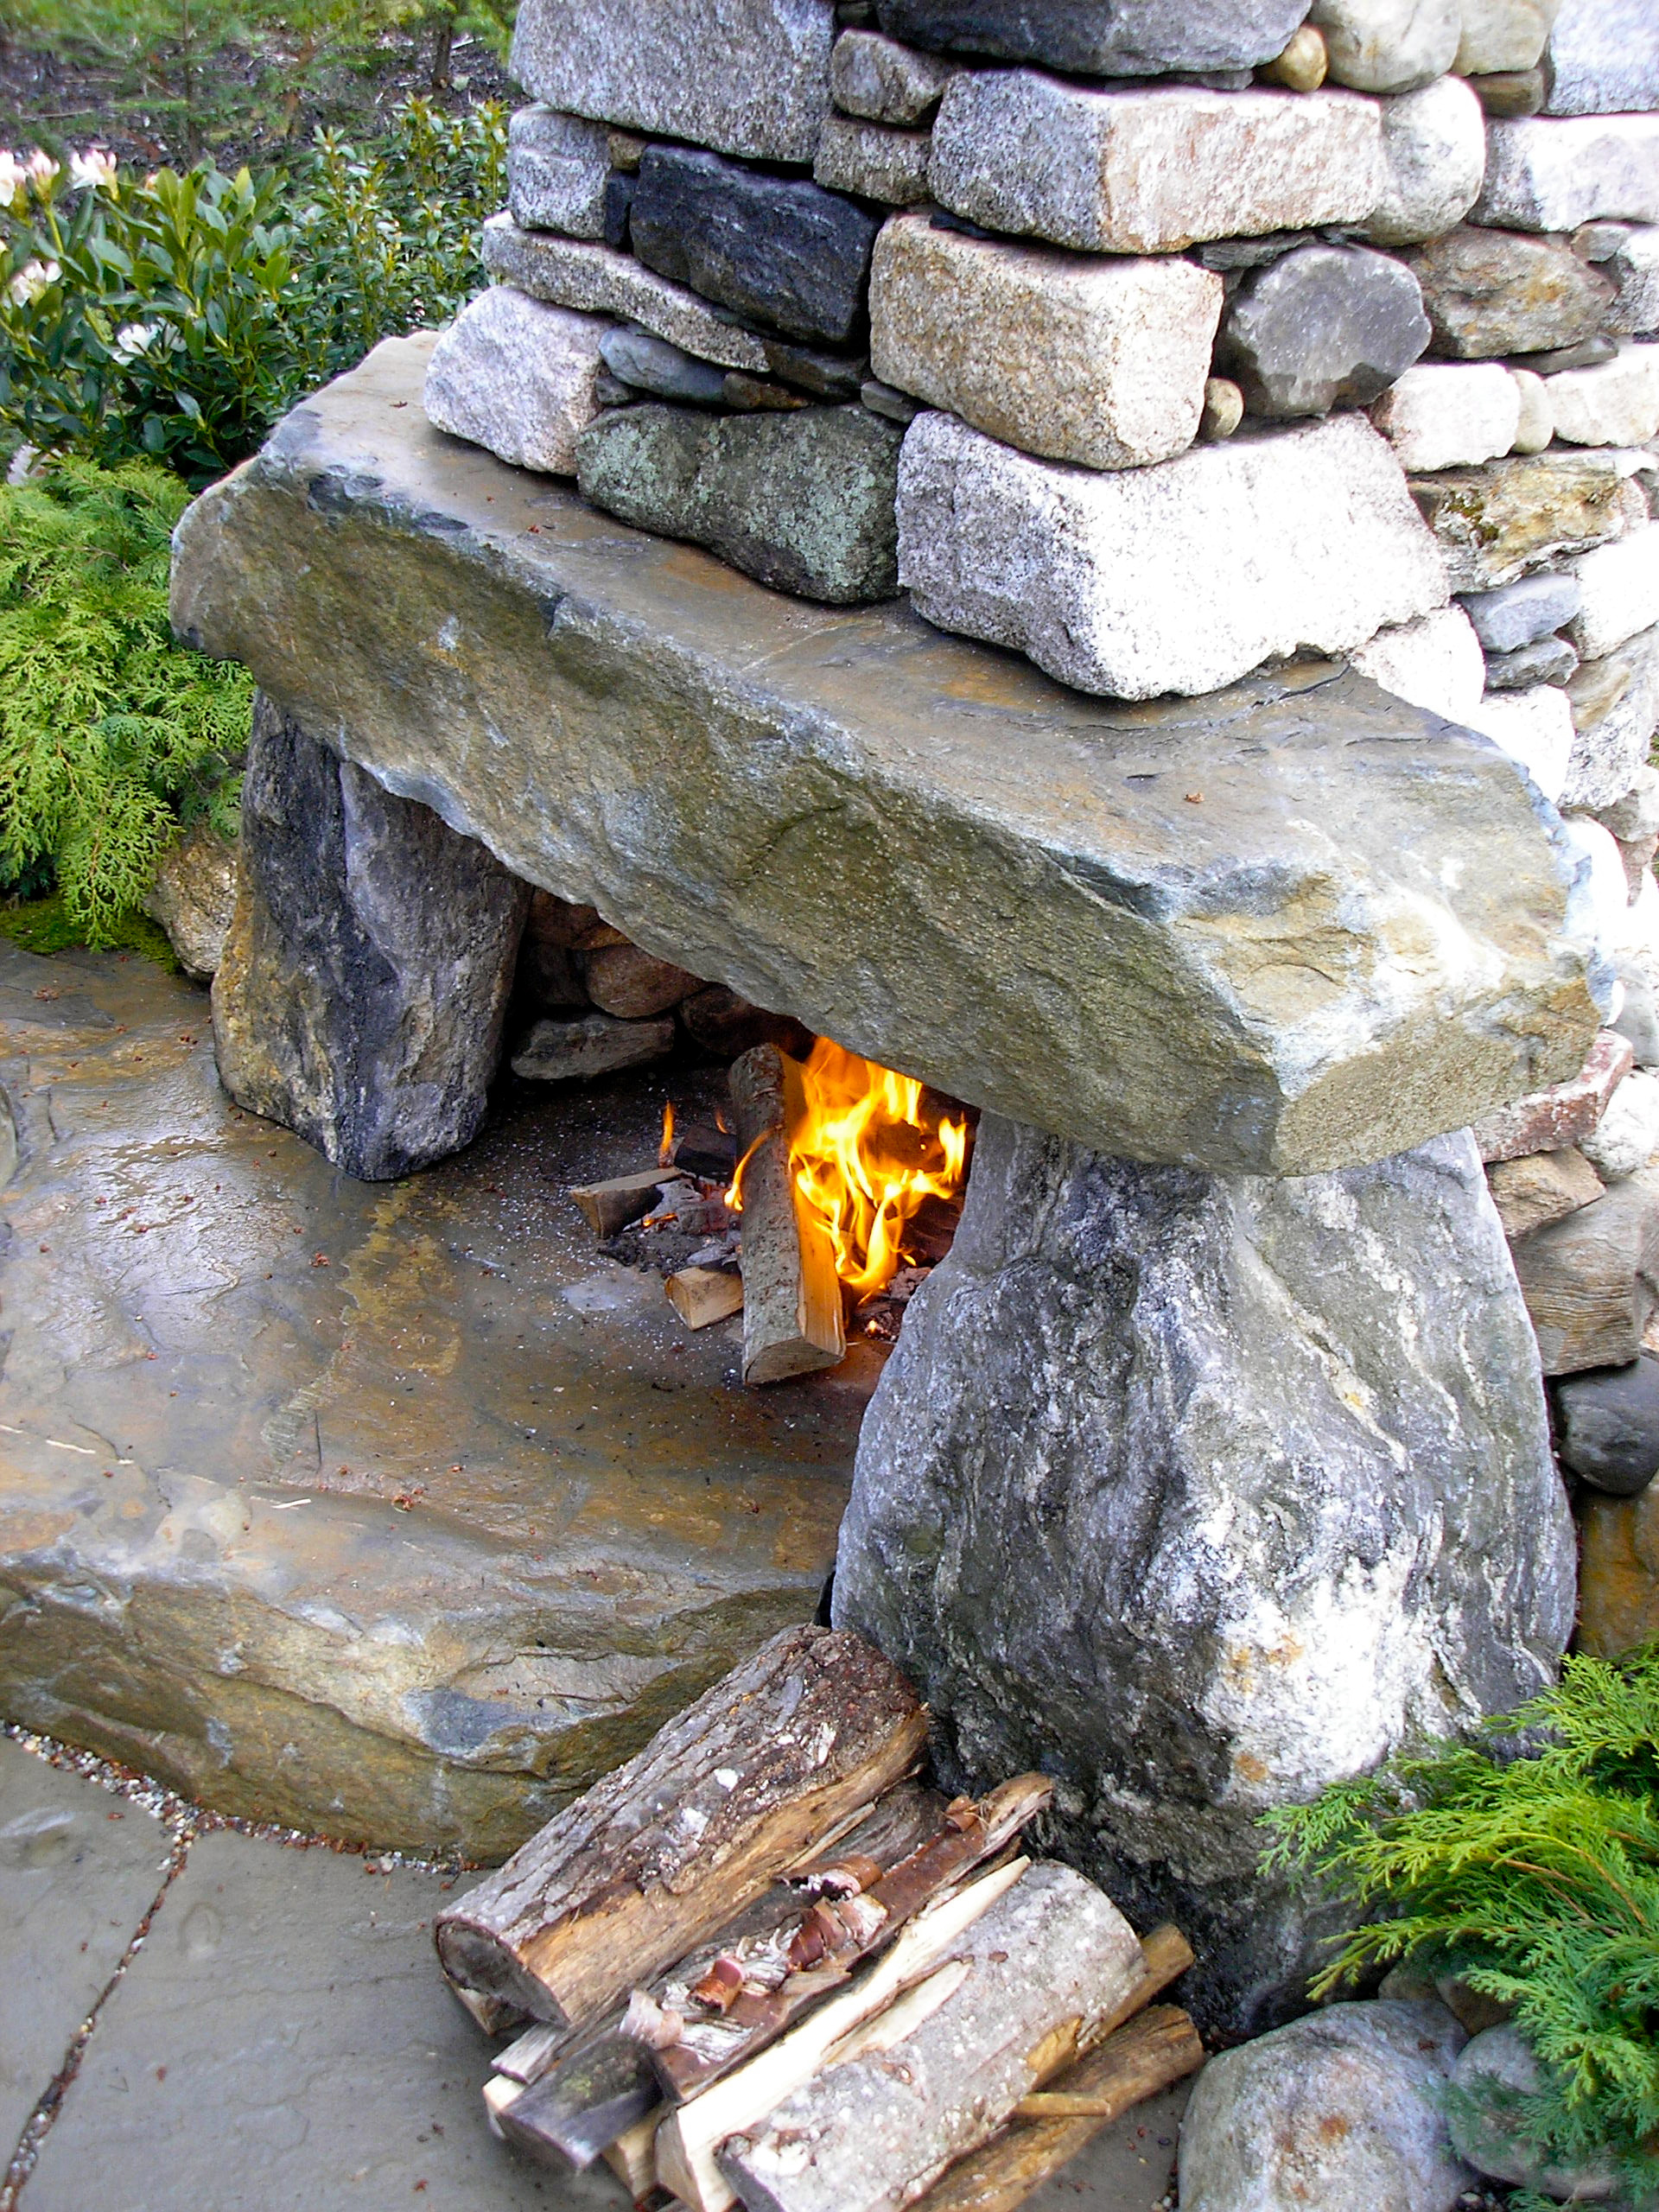
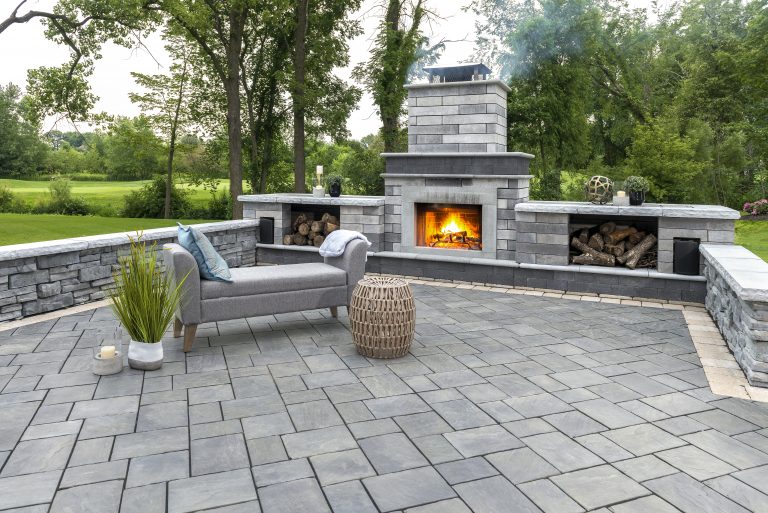
My fireplace needed to be more than just beautiful; it had to work well for our family’s needs. I designed it with a generous firebox that can handle good-sized logs, creating substantial flames that are visible from across the patio. The opening is proportioned to draw properly while providing an impressive view of the fire.
I included built-in storage niches on either side for firewood, keeping fuel handy while maintaining the clean lines of the design. The hearth extends far enough to provide extra seating when we have larger groups. I also planned for a spark screen that can be easily removed when we’re not using the fireplace, but slides into hidden brackets when needed.
The chimney design was critical for proper function. I made it tall enough to create a good draft while keeping it proportional to the overall structure. The cap includes a spark arrestor and weather protection, both essential for safety and longevity. These functional elements are integrated seamlessly into the rustic design, so they enhance rather than detract from the aesthetic.
Construction Challenges and Solutions I Discovered
Building this fireplace taught me plenty about outdoor construction challenges. The foundation was my first major hurdle, requiring excavation below the frost line and proper drainage considerations. I learned that adequate footings are essential, even though they’re hidden underground. Skipping this step would have led to settling and cracking later.
The weather became my biggest construction enemy. Rain delayed mortar work several times, and I had to protect partially completed sections with tarps. I discovered that rushing masonry work in poor conditions always leads to problems later. Patience became my most valuable tool, even when I was eager to see progress.
The fireplace’s interior construction required careful attention to fire-resistant materials and proper clearances. I used fire bricks for the firebox and made sure all combustible materials stayed well away from high-heat areas. Learning about thermal expansion joints prevented cracking as the structure heats and cools with use. These technical details aren’t glamorous, but they’re what make the fireplace safe and long-lasting.
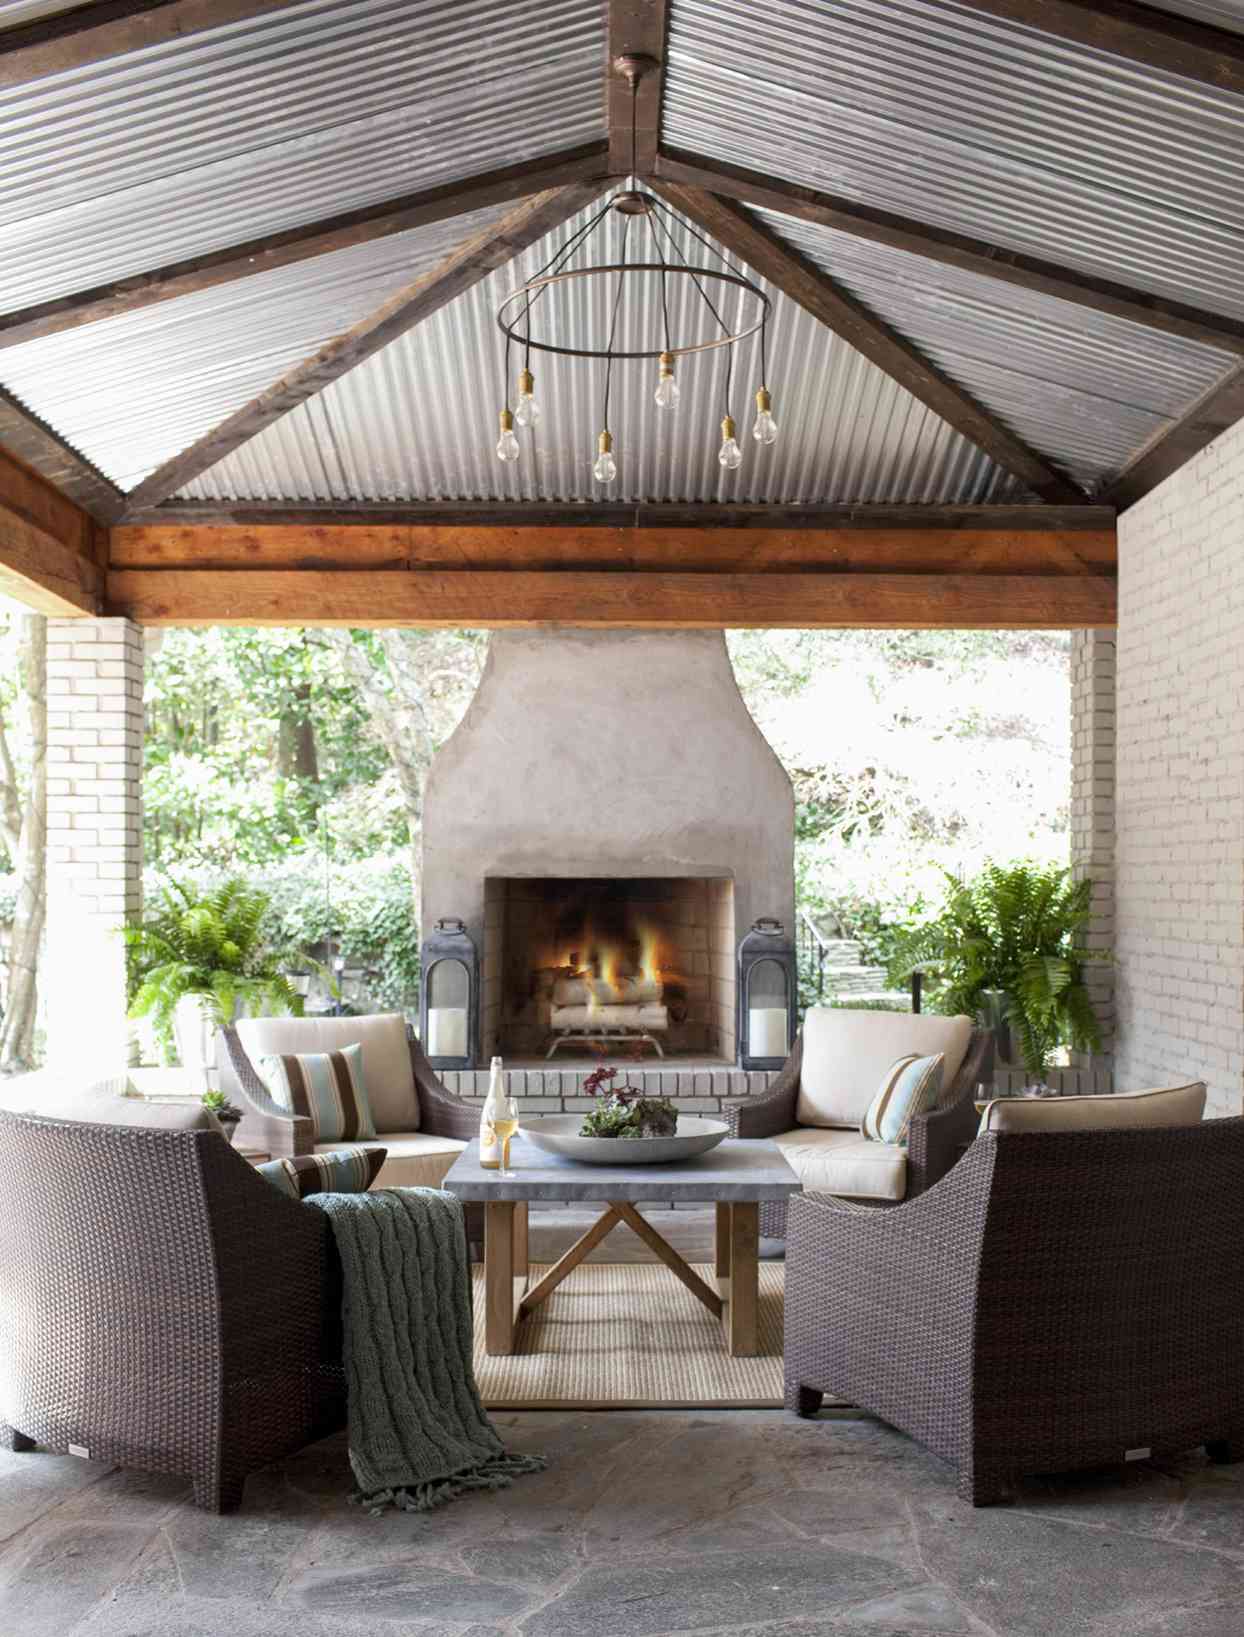
Creating the Perfect Gathering Space Around Your Fireplace
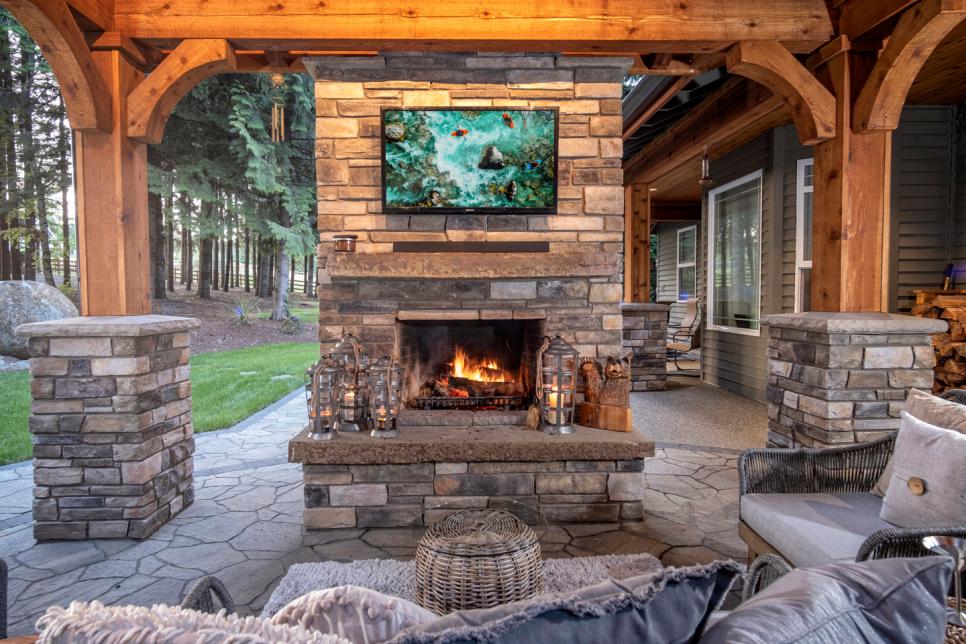
The fireplace is just the centerpiece; the surrounding space is what makes it truly functional for entertaining. I created different seating zones at various distances from the fire, accommodating both those who love the heat and others who prefer to stay cooler. Built-in stone benches provide permanent seating that matches the fireplace perfectly.
I added gravel pathways leading to the fireplace area, using the same earth tones as the stone work. These paths feel natural and rustic while providing good drainage during wet weather. String lights overhead create ambiance for evening gatherings, and I installed them with weather-resistant fixtures that complement the rustic theme.
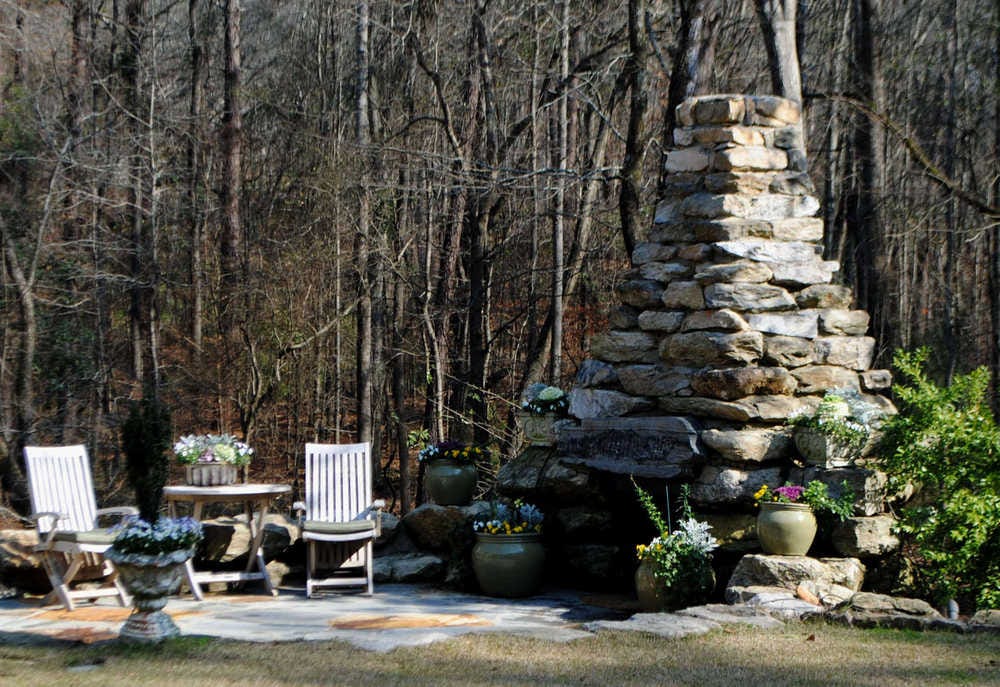
The landscaping around the fireplace was carefully planned to enhance the rustic feel. I planted native grasses and perennials that look natural and require minimal maintenance. Large boulders placed strategically create additional casual seating and help the fireplace look like it belongs in the landscape. The entire space now feels like a natural outdoor room.

Maintenance and Seasonal Care for Longevity
Keeping my rustic fireplace in great condition requires regular attention, but nothing too demanding. I clean out the firebox after every few uses, removing ash and debris that could retain moisture and cause problems. A stiff brush works well for cleaning the fire bricks, and I inspect for any cracks or damage while I’m at it.
Seasonal maintenance includes checking the mortar joints for any signs of deterioration and repointing as needed. I’ve learned to catch small problems early before they become major repairs. The chimney gets inspected and cleaned annually, just like an indoor fireplace. I also check that the spark arrestor and cap are secure and functioning properly.
Winter protection involves covering the fireplace opening when it’s not in use, preventing snow and ice from accumulating inside. I use a custom-fit cover that protects while still allowing air circulation. Spring brings a thorough inspection of all components and any touch-up work needed. This regular maintenance keeps my fireplace looking great and functioning safely year after year.

How much does it typically cost to build a rustic outdoor fireplace?
From my experience, costs can range from $3,000 for a basic DIY version to $8,000 or more for professional installation with premium materials. I spent about $4,500 doing most of the work myself, but hiring help for the foundation and chimney. Material costs were about 60% of my total budget.
Do I need permits for an outdoor fireplace?
Yes, most areas require building permits for permanent outdoor fireplaces. I had to submit plans showing setbacks from property lines and structures, plus get inspections during construction. Check with your local building department early in the planning process to understand requirements in your area.
How do I ensure proper ventilation and safety?
Proper chimney height and design are crucial for good draft and safety. I followed standard ratios for firebox opening to chimney size, and included a spark arrestor. The fireplace should be at least 10 feet from combustible structures, and I keep a fire extinguisher and garden hose nearby during use.
What’s the best wood to burn in an outdoor fireplace?
I use only seasoned hardwoods like oak, maple, or hickory. These burn cleaner and produce less smoke than softwoods or green wood. I avoid treated lumber, which releases toxic fumes, and never burn trash or leaves. Well-seasoned wood has been dried for at least six months and makes a hollow sound when knocked together.

Can I use my outdoor fireplace year-round?
Absolutely! I actually enjoy mine most during cool fall and winter evenings. The key is having adequate protection from wind and weather for both the fireplace and seating areas. I added a partial windscreen using natural stone that matches the fireplace, creating a cozy microclimate even on breezy nights.
How do I integrate lighting around my rustic fireplace?
I installed low-voltage LED lights in the stone work itself, highlighting the texture beautifully after dark. String lights overhead provide ambient lighting for the seating area. I also use solar-powered lanterns that can be moved around as needed. The goal is to create warm, inviting light that complements the firelight rather than competing with it.

Rustic Outdoor Fireplace
Unique Outdoor Fireplace Design Ideas

EXCITING RUSTIC OUTDOOR FIREPLACE DECOR IDEAS Rustic outdoor

Cozy Outdoor Fireplace Ideas for the Most Inviting Backyard
Rustic Outdoor Fireplace Designs
outdoor fireplace rustic giant boulders – Surrounds Landscape

Garden Guru: Outdoor fireplaces extend season outside
Related Posts: