When I first walked into our 1990s colonial three years ago, the dark red brick fireplace made me cringe every single time I entered the living room. The heavy, dated appearance dominated the space and clashed with every design vision I had for creating a warm, inviting farmhouse-style home. I knew that painting over the brick wasn’t going to give me the clean, fresh look I craved, so I started researching tile options that could transform our fireplace into the stunning focal point I dreamed of. After months of planning, tile shopping, and a few DIY mishaps, I successfully created a beautiful farmhouse fireplace that has become the heart of our home.
Selecting the Perfect Farmhouse Tile Style for Your Space
My tile selection journey began with countless hours scrolling through Pinterest and visiting local tile showrooms, trying to narrow down the overwhelming number of options available. I quickly learned that farmhouse style encompasses several distinct looks, from rustic reclaimed wood-look tiles to crisp white subway tiles, and each creates a completely different feeling in the space. The key was figuring out which direction matched both my personal style and the existing character of our home.
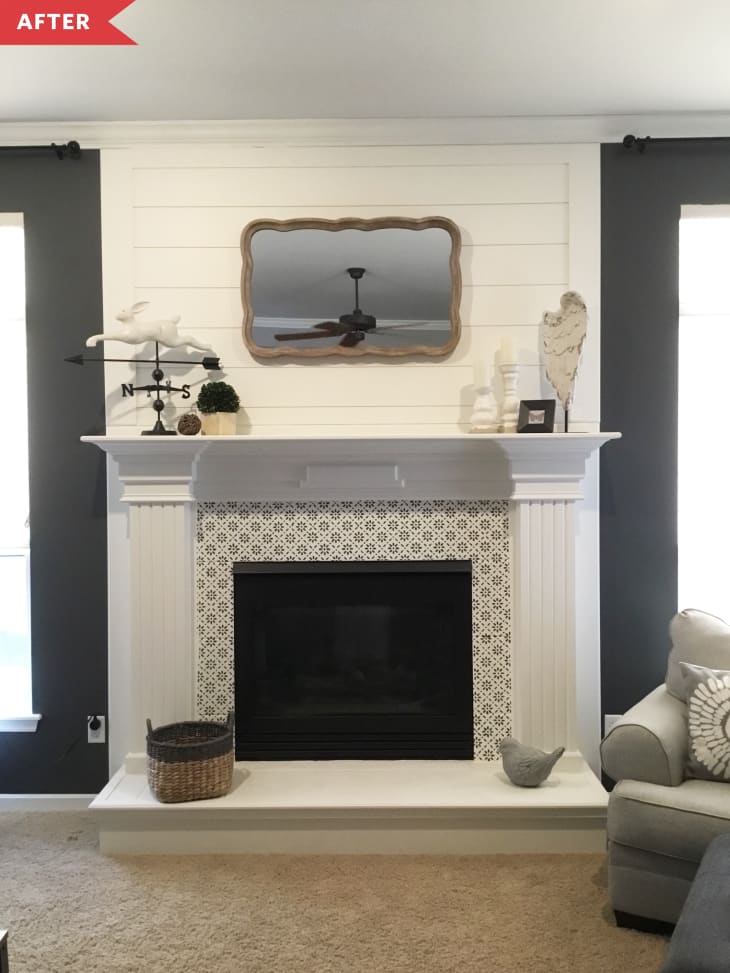
After living with sample tiles propped against the fireplace for two weeks, I narrowed my choices to three favorites: classic white subway tiles, natural stone-look porcelain, and a weathered wood-grain ceramic. The white subway tiles felt too clean and modern for the cozy farmhouse vibe I wanted, while the stone looked beautiful but seemed too heavy for our modest-sized living room. The wood-grain ceramic struck the perfect balance, offering warmth and texture while maintaining the clean lines that define farmhouse style.
The deciding factor came when I realized that wood-look tiles would complement the exposed ceiling beams we had added the previous year while creating visual interest without competing for attention. I chose a light oak finish with subtle grain variations that looked authentic from a distance but offered the durability and heat resistance that natural wood couldn’t provide in a fireplace application. This choice gave me the farmhouse character I wanted while solving practical concerns about maintenance and fire safety.
Preparing the Existing Brick Surface for Tile Installation
The prep work turned out to be the most labor-intensive part of the entire project, and I seriously underestimated how much effort would be required to create a suitable surface for tile adhesion. My research had suggested that I could tile directly over clean brick, but after consulting with a professional tile installer, I learned that proper preparation would make the difference between a project that lasts decades and one that fails within a few years.
I started by thoroughly cleaning the brick with a wire brush and TSP solution to remove decades of soot, dust, and any residual mortar residue. The cleaning process revealed that some of the mortar joints were loose and crumbling, requiring repair with fresh mortar before I could proceed. This step took an entire weekend and left me covered in brick dust, but it was essential for creating a stable foundation for the tile installation.
The final preparation step involved applying a bonding primer specifically designed for challenging surfaces like brick. I chose a high-quality epoxy-based primer that would ensure proper adhesion between the old brick and new tile adhesive. This primer required careful application with a brush to get into all the mortar joints and surface irregularities, followed by a 24-hour curing period before I could begin tiling. The preparation took three times longer than expected, but it gave me confidence that my tile installation would be built to last.

Choosing the Right Adhesive and Installation Techniques
Selecting the proper adhesive became another crucial decision that required more research than I had anticipated. Standard tile adhesive wasn’t suitable for the heat exposure and surface variations I was dealing with, so I needed a specialized product that could handle both the high temperatures and the irregular brick substrate. After consulting with several professionals, I chose a polymer-modified adhesive designed specifically for fireplace applications.
The installation process required adapting traditional tiling techniques to work with the irregular brick surface and varying tile thicknesses. I invested in a high-quality notched trowel and learned the importance of back-buttering each tile to ensure complete coverage and eliminate air pockets that could lead to future failures. Working on a vertical surface also meant I had to work in small sections, allowing the adhesive to set up enough to support the weight of additional tiles above.
My biggest challenge came when tiling around the curved firebox opening, where I had to make intricate cuts and adjustments to achieve clean lines and proper fit. I rented a wet tile saw for the weekend and spent considerable time practicing cuts on sample pieces before working on the actual installation. The curved areas required hand-cutting with a grinder and diamond blade, followed by careful filing to achieve smooth edges. This detailed work took much longer than the straight runs, but getting these transition areas right was essential for a professional appearance.

Creating Clean Lines and Professional-Looking Grout Joints
The grouting process proved to be where my project would either look DIY or professionally installed, and I quickly learned that technique and patience matter more than expensive tools. I chose a light gray grout that would complement the wood-grain tiles while providing subtle definition between individual pieces. The key was working in small sections and removing excess grout completely before it had a chance to haze the tile surface.
Achieving a consistent grout joint width required more attention than I expected, especially when working around the irregular brick substrate that caused some tiles to sit slightly proud of others. I used tile spacers religiously and checked my work frequently with a level and straight edge to catch any alignment issues before the adhesive set. The vertical installation meant that gravity was constantly working against me, requiring periodic adjustments to prevent tiles from sagging or shifting.
The final grout cleanup and polishing took an entire day, but made the difference between a good project and a great one. I used a clean, damp sponge to remove grout haze, changing the water frequently to avoid redistributing residue across the tile surface. After the initial cleanup, I allowed the grout to cure for 24 hours before performing a final polish with a clean microfiber cloth. The attention to detail during this phase transformed my DIY installation into something that looked professionally done.
Heat Resistance and Safety Considerations I Learned
Working around a functional fireplace taught me important lessons about heat resistance and safety that I hadn’t fully appreciated during the planning phase. Even though my wood-grain ceramic tiles were rated for high heat applications, I needed to consider the entire system, including adhesive, grout, and underlying substrate, when evaluating the installation’s ability to handle thermal cycling and direct heat exposure.
I learned that maintaining proper clearances from the firebox opening was crucial, not just for safety but also for the longevity of the tile installation. The intense heat directly in front of the fireplace opening can cause materials to expand and contract repeatedly, potentially leading to cracking or adhesive failure over time. I followed manufacturer recommendations for minimum distances and used high-temperature caulk for any joints that would be exposed to direct heat.
The most important safety consideration was ensuring that my installation didn’t block or interfere with the fireplace’s designed ventilation and heat dissipation. I consulted with a chimney professional before beginning the project to understand how my tile installation might affect airflow and heat management. This consultation cost $150 but gave me peace of mind that my beautiful new fireplace wouldn’t create safety hazards or reduce the efficiency of our heating system.

Maintenance and Long-term Care of Fireplace Tile
Living with my tiled fireplace for two years now has taught me valuable lessons about maintenance and what to expect from the installation over time. The wood-grain ceramic tiles have proven remarkably easy to care for, requiring only regular dusting and occasional cleaning with a damp microfiber cloth to maintain their appearance. Unlike natural wood, the ceramic surface doesn’t absorb stains or odors from fireplace use.
The grout lines have required more attention than the tiles themselves, particularly in areas closest to the firebox, where heat and soot exposure is greatest. I’ve developed a routine of cleaning the grout every few months with a mild alkaline cleaner and a soft brush, followed by thorough rinsing to prevent residue buildup. I also resealed the grout annually with a penetrating sealer designed for high-heat applications.
One unexpected maintenance issue arose during our second winter when I noticeda slight darkening of the grout near the firebox opening. This turned out to be normal discoloration from heat exposure rather than a failure of the installation. A professional cleaning restored the original color, and I learned that this type of maintenance should be expected in high-heat areas. Overall, the tile installation has proven much easier to maintain than the original brick while providing the beautiful farmhouse aesthetic I wanted.

How much did your farmhouse fireplace tile project cost, and what were the biggest expenses?
My total project cost was around $1,200, with the wood-grain ceramic tiles being the largest expense at $600 for 50 square feet. High-temperature adhesive and grout added $200, tools and prep materials cost $250, and professional consultation was $150. While I could have saved money with basic ceramic tiles, the quality wood-grain finish was worth the investment for the authentic farmhouse look and long-term durability in this high-heat application.
Can I tile over my existing brick fireplace without removing it first?
Yes, but proper preparation is absolutely crucial for success! I cleaned thoroughly, repaired loose mortar, and used high-quality bonding primer before tiling. The existing brick must be structurally sound and well-attached to the wall. Some installations may require additional mechanical fastening or surface preparation, depending on the brick’s condition. I strongly recommend consulting a professional to evaluate your specific situation before proceeding with this approach.

What’s the difference between regular ceramic tile and fireplace-rated tiles?
Fireplace-rated tiles are specifically tested to handle rapid temperature changes and high heat without cracking or losing adhesion. Regular bathroom or kitchen tiles may crack or fail when exposed to fireplace temperatures. I learned that the rating system indicates maximum safe temperatures and thermal shock resistance. While fireplace-rated tiles cost more, they’re essential for areas within 6 inches of the firebox opening and highly recommended for the entire surround.
How do I maintain the grout lines, and what products work best?
I clean grout monthly with pH-neutral tile cleaner and a soft brush, avoiding acidic or abrasive products that can damage the surface. For deeper cleaning, I use oxygen bleach rather than chlorine bleach, which can discolor grout over time. Annual resealing with penetrating grout sealer designed for high-heat applications helps prevent staining and makes routine cleaning easier. The key is staying ahead of buildup rather than trying to restore heavily soiled grout.

Did you need any special permits or inspections for this project?
Most decorative tile installations don’t require permits since they don’t alter the fireplace’s structure or function, but I checked with my local building department to be sure. My homeowner’s insurance agent confirmed that cosmetic improvements wouldn’t affect coverage as long as I maintained proper clearances and used appropriate materials. I did have the chimney professionally inspected after completion to ensure my work didn’t impact safety or efficiency, which was money well spent for peace of mind.
What would you do differently if you started this project over?
I’d invest in better kneepads and back support, as the vertical work was harder on my body than expected! I’d also buy 15% extra tile from the beginning rather than trying to match later, and I’d rent professional-grade tools like the wet saw for the entire project duration instead of trying to rush weekend rentals. Most importantly, I’d budget more time for the prep work; it took three times longer than expected but was essential for the professional results I achieved.

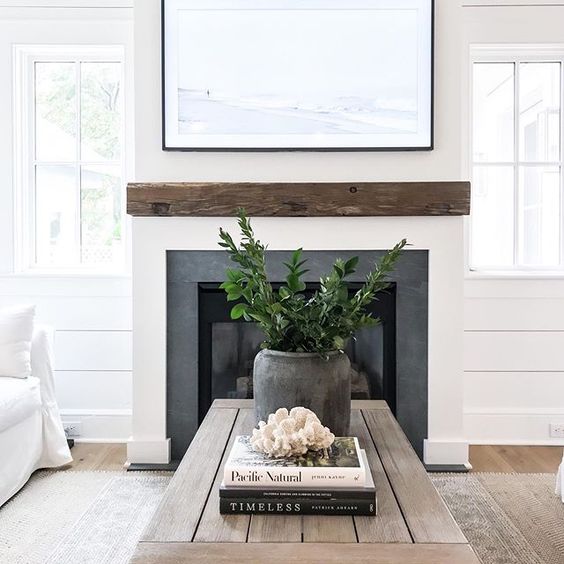
This view is too cozy not to share. I love this modern farmhouse

Hot Fireplace Tile Trends Bedrosians Tile & Stone
Modern Farmhouse Fireplace Design Inspiration ANDERSON+GRANT
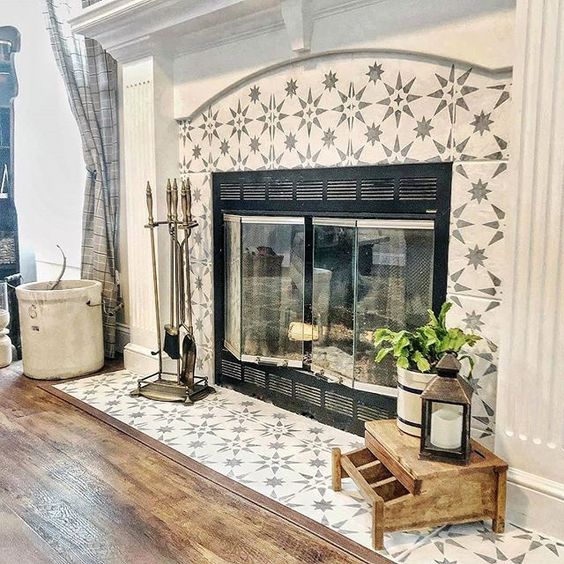
Beautiful Fireplace Tile Ideas

Real People. Real Projects: Fireplaces
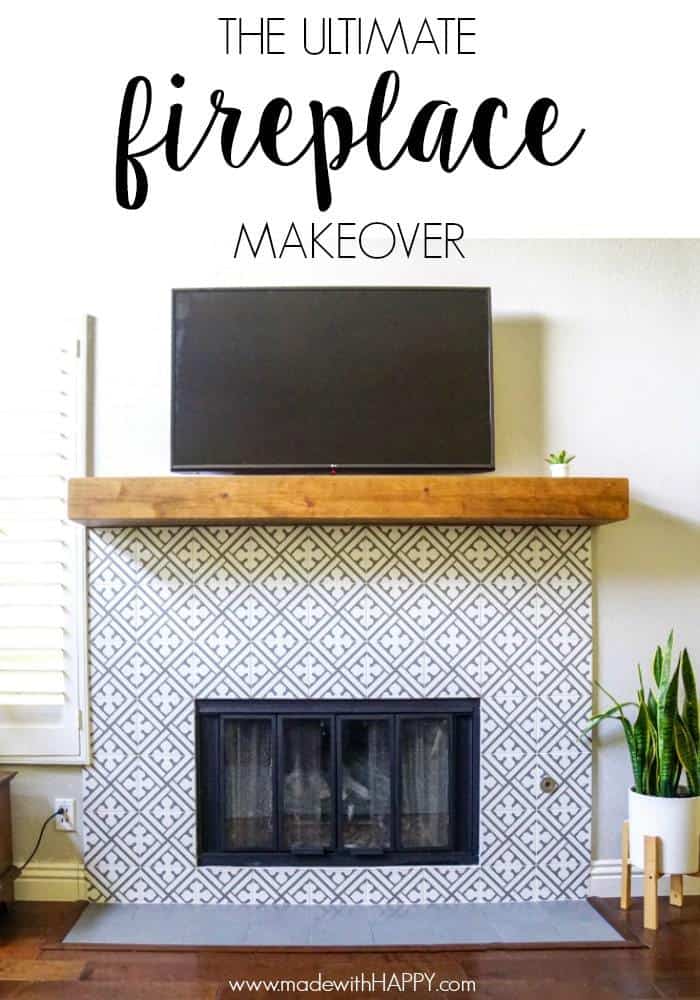
Modern Fireplace Makeover – Made with HAPPY
Grey Tile Living room tiles, Home fireplace, Living room mantle

Modern Farmhouse Fireplace Design Inspiration ANDERSON+GRANT
Tiled Fireplaces To Accent Your Living Room
Related Posts: