When I decided to add a fireplace to my living room, I faced a common challenge among homeowners: limited wall space. My room had an awkward corner that felt wasted, and that’s when I discovered the beauty of corner fireplaces. Installing a rustic corner fireplace mantel transformed that dead space into the coziest focal point of my home. The process taught me a great deal about working with unique architectural features and embracing the charm of reclaimed wood and natural materials. I learned that corner fireplaces aren’t just space-savers; they create an intimate gathering spot that draws people in and makes a room feel complete.
Selecting the Right Wood for Your Rustic Mantel
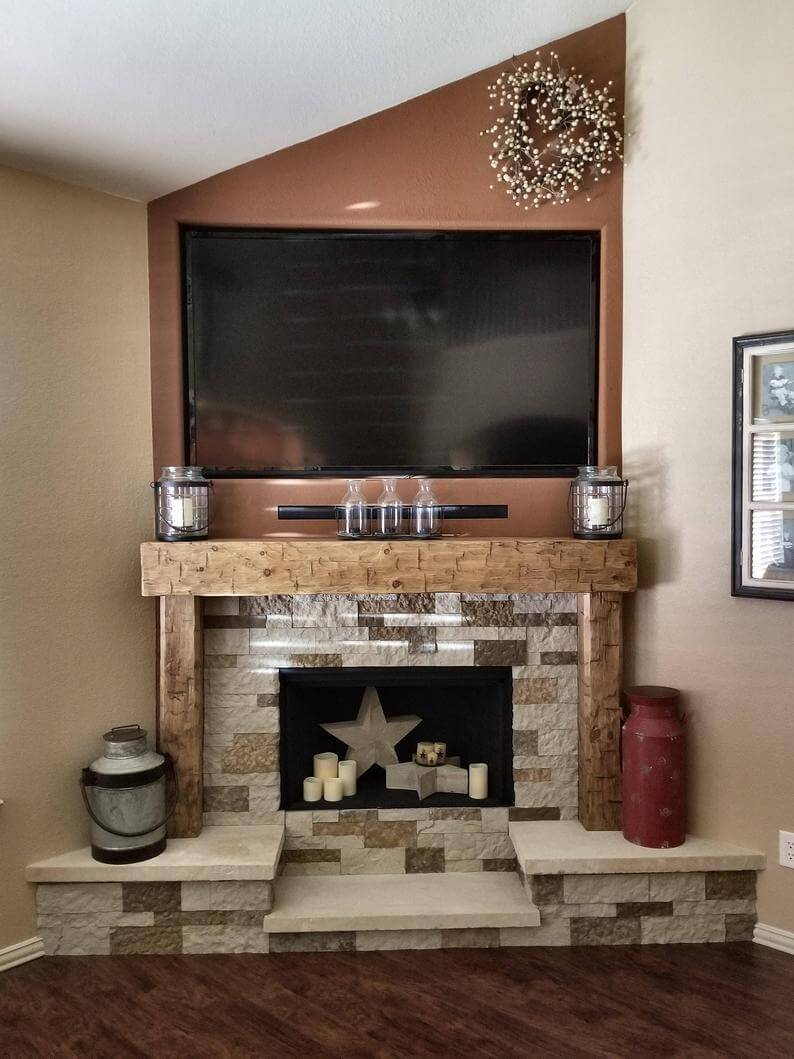
Choosing the wood for my corner mantel was one of the most exciting parts of the project. I wanted something with real character, not the perfectly milled lumber from big box stores. I started visiting salvage yards and talking to local sawmills about reclaimed barn wood and rough-cut lumber. I eventually found a beautiful piece of reclaimed oak beam from an old barn that was being demolished. The wood had nail holes, saw marks, and a gorgeous weathered patina that told a story spanning over a century.
The type of wood matters beyond just aesthetics. I considered the practical aspects too, like how the wood would hold up to heat exposure and whether it would warp over time. Hardwoods like oak, maple, and walnut are excellent choices because they’re dense and stable. Pine and cedar are softer but offer beautiful grain patterns and are easier to work with if you’re doing the installation yourself. I made sure my beam was completely dry and had been properly aged, which prevents cracking and splitting once it’s installed above the fireplace, where temperatures fluctuate.
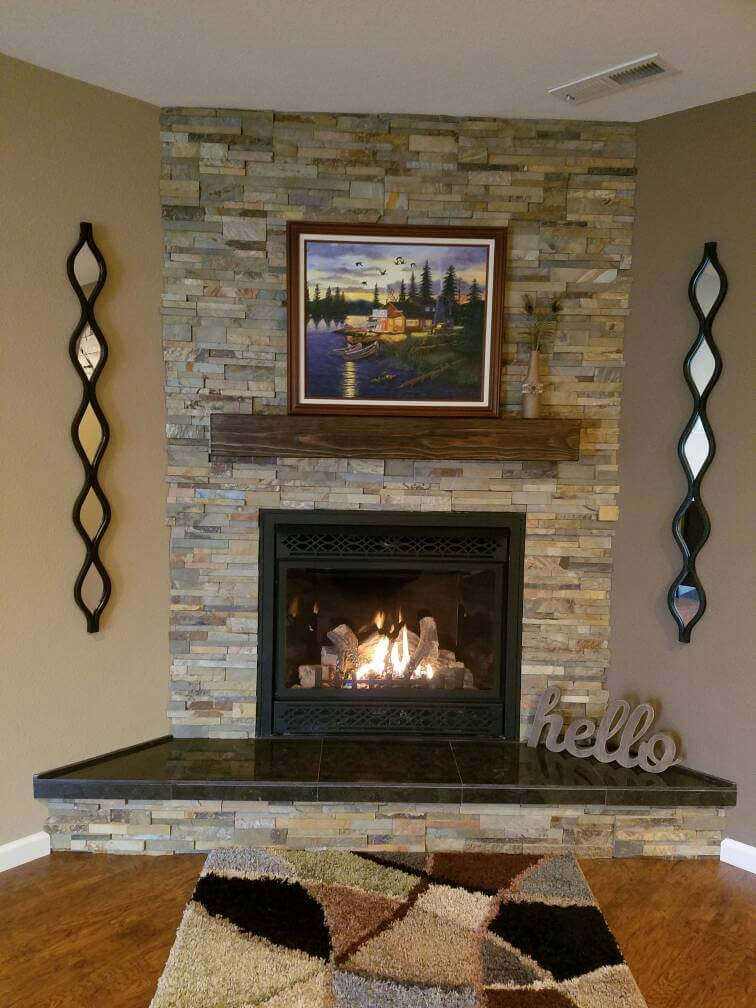
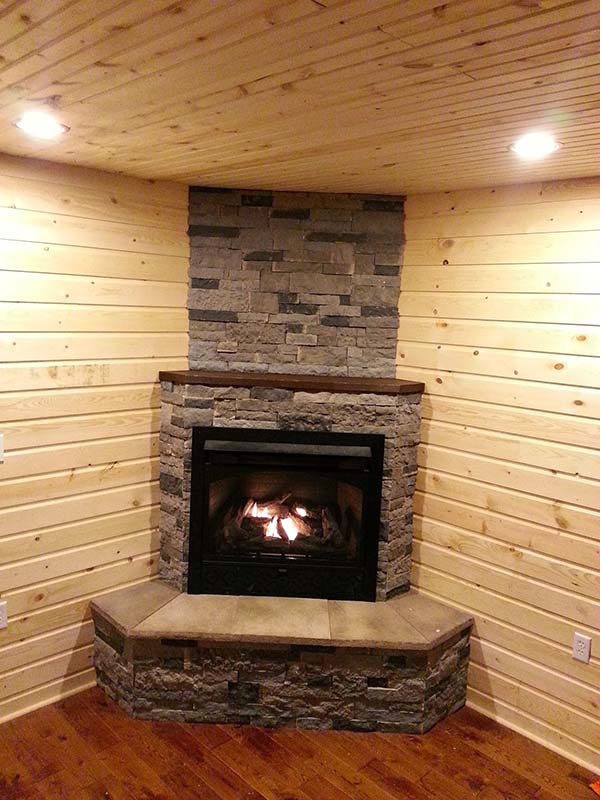
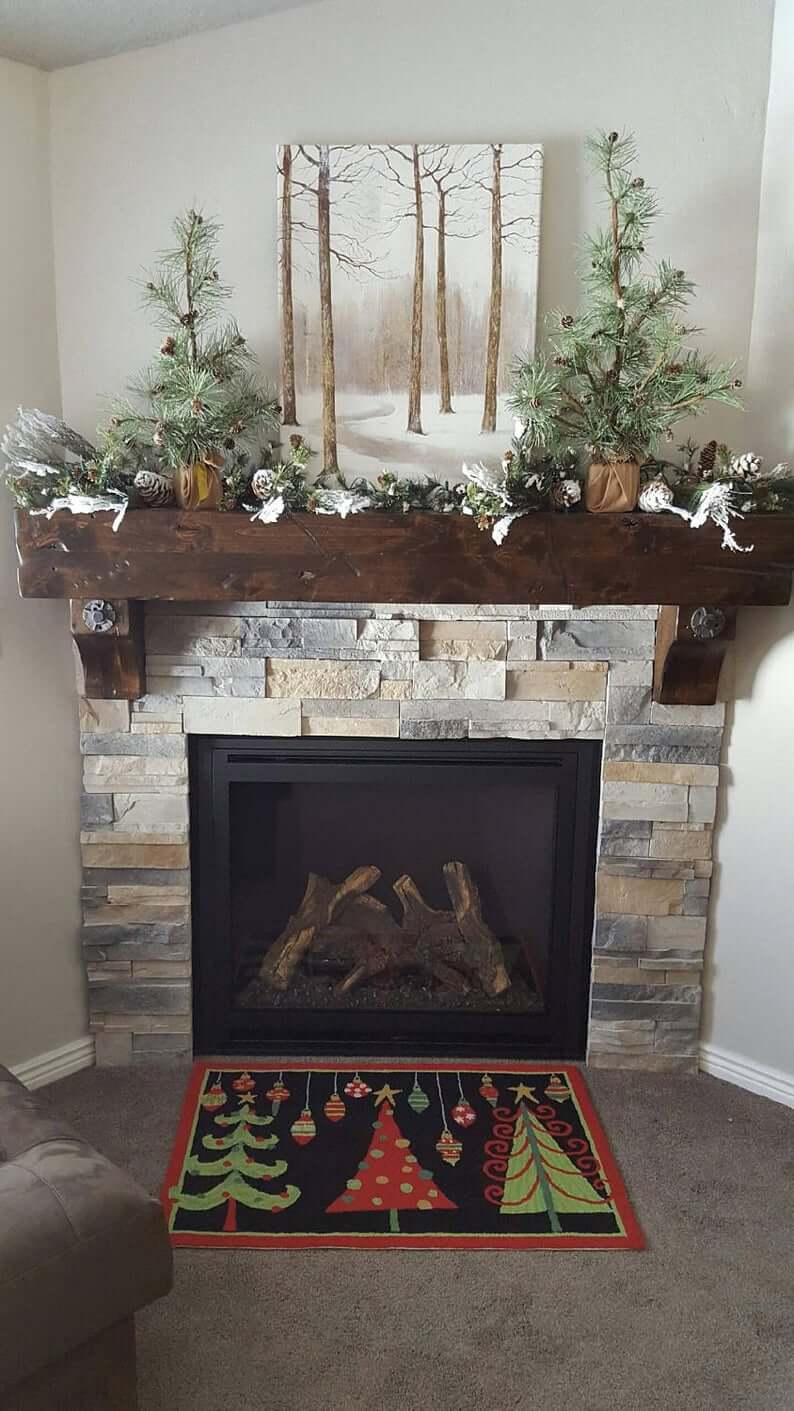
What I love most about rustic wood is that imperfections become features rather than flaws. The checks, knots, and irregular edges that would disqualify wood for formal applications are exactly what make a rustic mantel special. I kept the natural edge on one side of my beam, which creates an organic look that perfectly suits the corner placement. The wood’s thickness mattered too; I went with an eight-inch-deep beam that provides substantial presence without overwhelming the corner space. That heft makes the mantel feel like it’s always been part of the house.
Installation Techniques for Corner Configurations
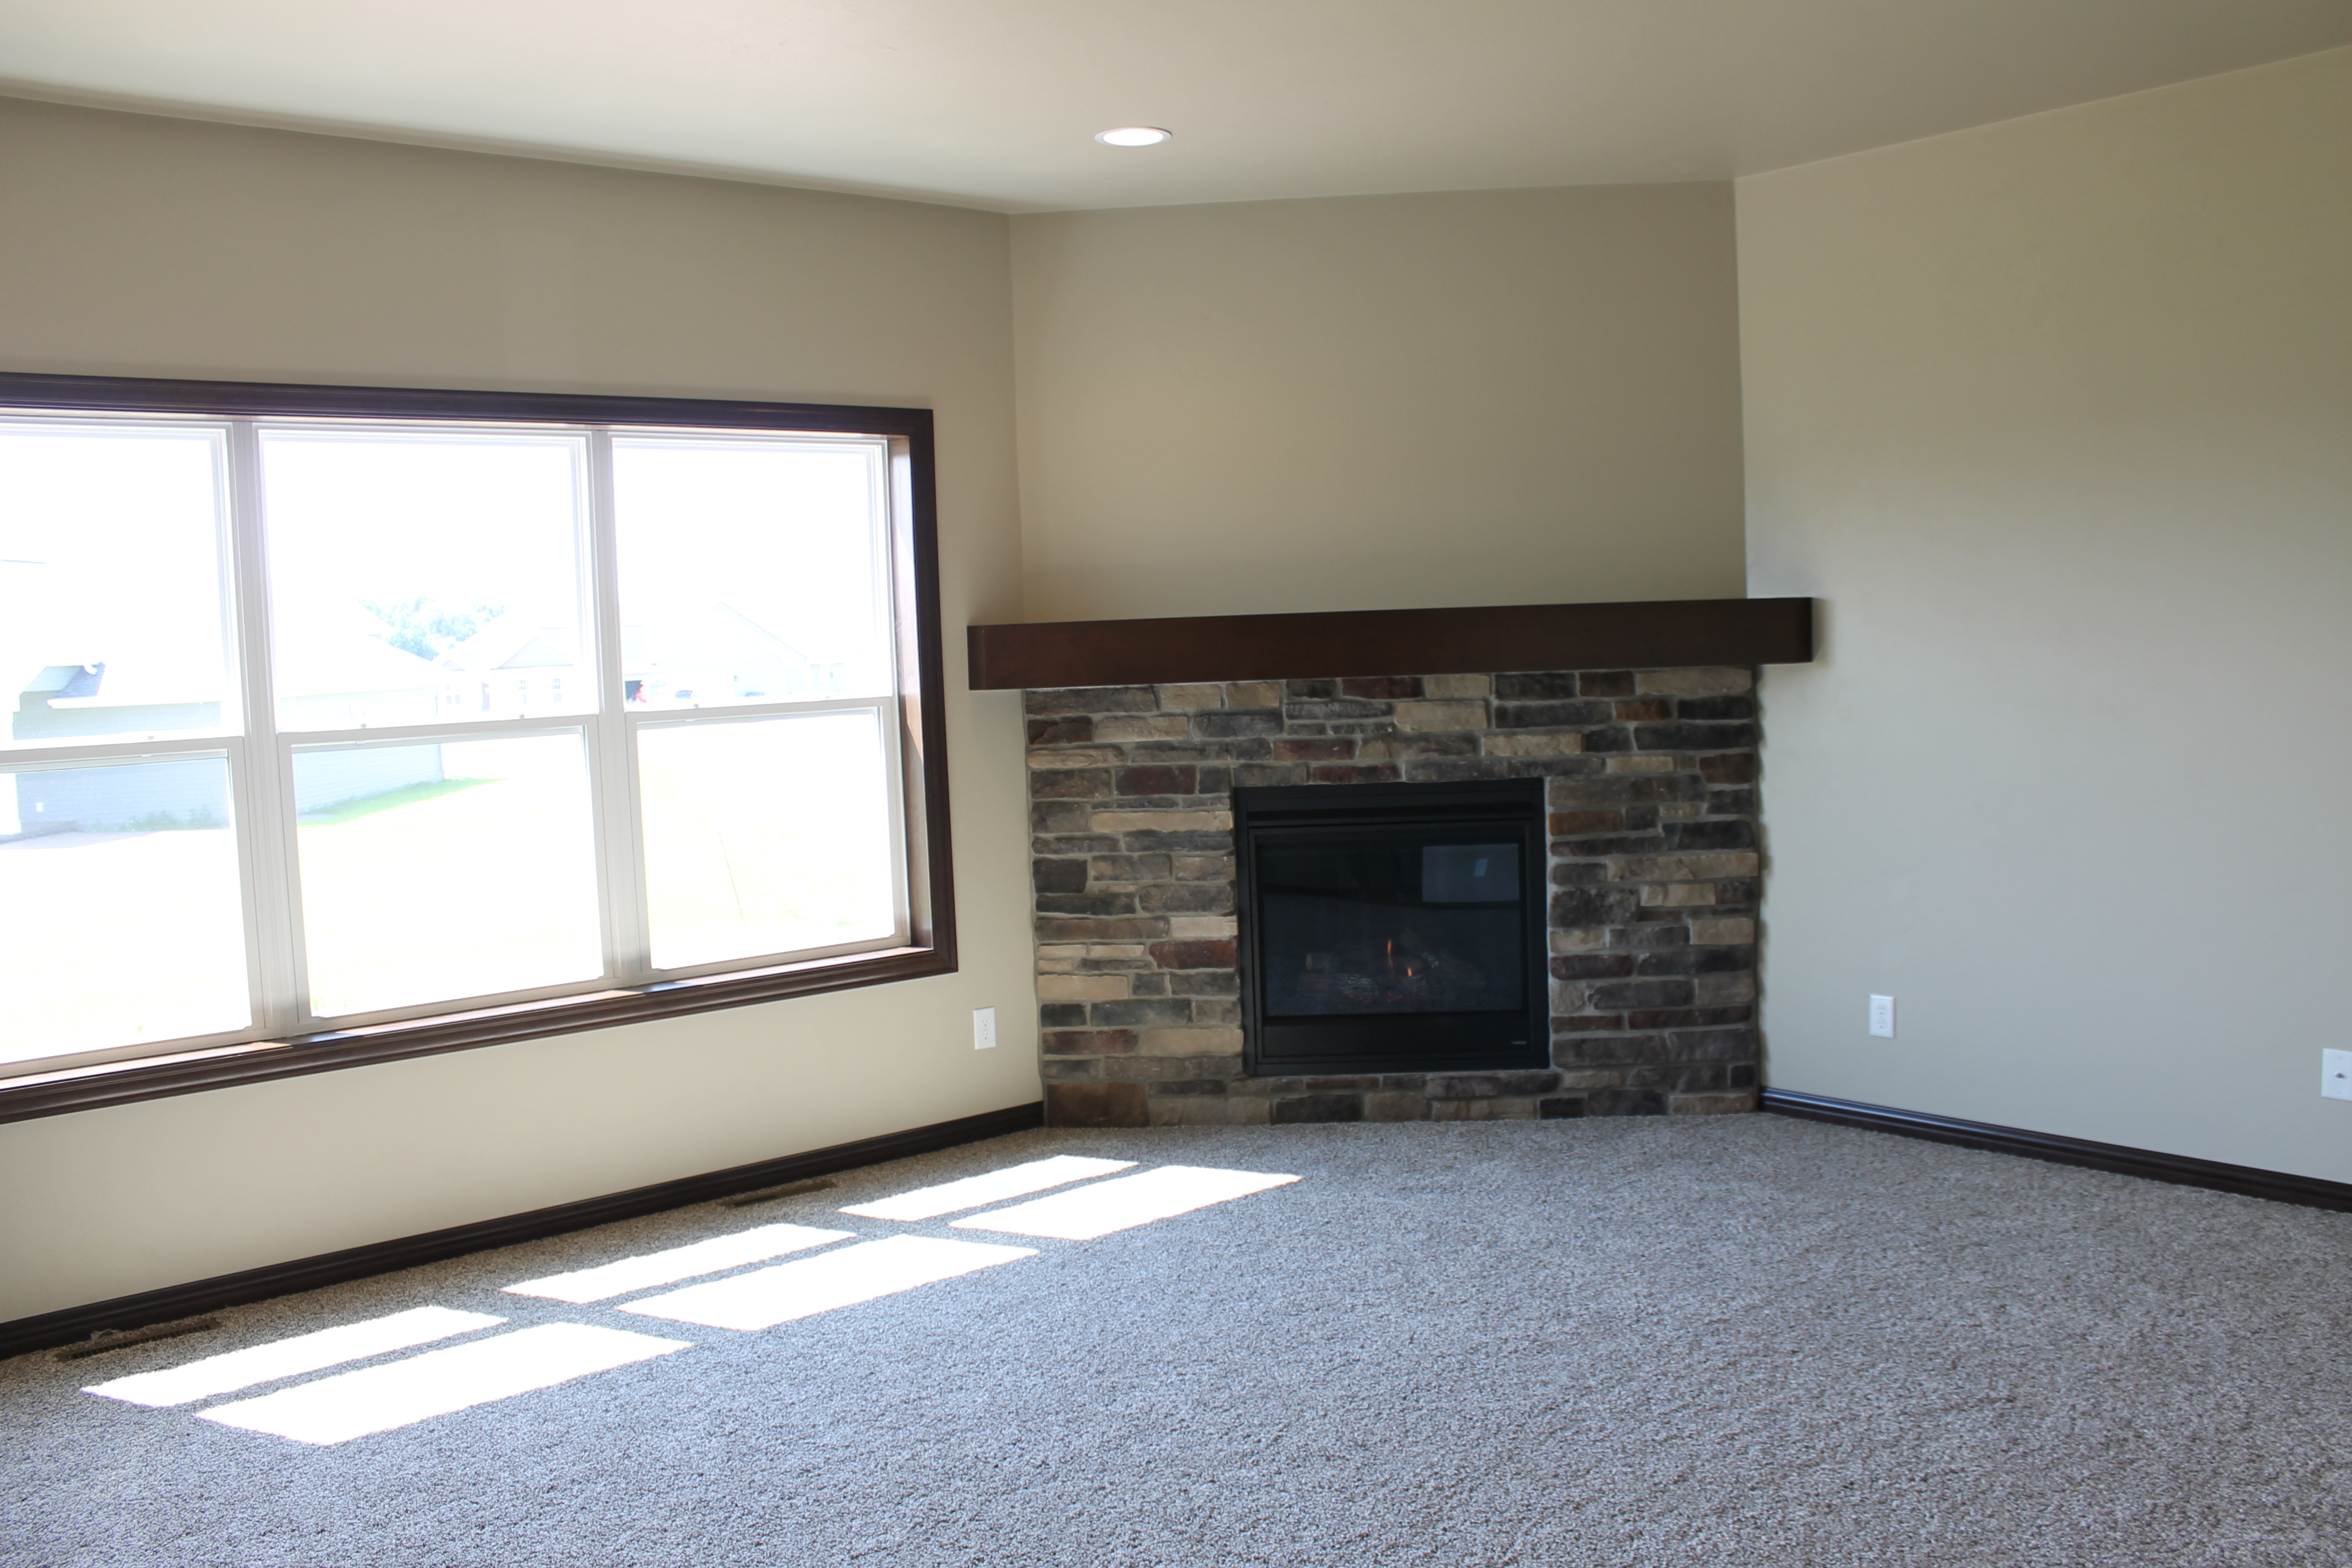
Installing a corner mantel is definitely trickier than mounting a standard straight mantel, but it’s absolutely doable with the right approach. I spent a lot of time planning the angle and measuring multiple times before making any cuts. The key challenge is getting the two pieces that form the corner to meet at a perfect angle, typically forty-five degrees for a ninety-degree corner. I used a miter saw for precise cuts, though I ended up doing some hand-sanding to get the fit absolutely right.
I chose to use hidden brackets for support because I wanted the rustic wood to be the star without visible hardware distracting from it. I installed heavy-duty steel brackets into the wall studs, making absolutely certain they were level and could support the weight of the solid beam. For corner installations, you need at least one bracket on each wall section, positioned to distribute the weight evenly. I used a level constantly during installation, checking and rechecking, because even a slight tilt is really noticeable on a corner mantel.
The actual mounting process required an extra set of hands. My neighbor helped me lift the beam into place while I secured it to the brackets from underneath. We used long screws driven up through the brackets into pre-drilled holes in the beam. I was careful not to over-tighten, which could crack the wood, especially with older reclaimed lumber. After securing everything, I filled the screw holes with wood filler tinted to match, making the mounting system virtually invisible. The whole installation took an afternoon, but the preparation and planning beforehand made it go smoothly.
Finishing and Sealing Rustic Wood
Deciding how to finish my rustic mantel took considerable thought because I wanted to preserve its natural character while protecting it from heat and daily wear. I started by thoroughly cleaning the wood, removing decades of accumulated dirt and dust with a stiff brush and compressed air. I avoided sanding too aggressively because I didn’t want to lose the aged patina that made the wood special. I only smoothed the areas where people would naturally touch or rest their hands.
For the finish, I tested several options on scrap pieces of similar wood. I tried traditional polyurethane, but it looked too glossy and modern for the rustic aesthetic I wanted. Natural oil finishes like tung oil or Danish oil penetrated the wood beautifully and enhanced the grain without creating a plastic-looking surface. I applied three coats of tung oil, rubbing each one in with a cloth and letting it cure completely between applications. The oil darkened the wood slightly and brought out rich golden and amber tones I hadn’t fully appreciated before.
I also considered the heat factor since the mantel sits above an active fireplace. I made sure to maintain proper clearance from the firebox, following local building codes, which required at least twelve inches. The oil finish I chose is heat-resistant once fully cured, though I still watch for any signs of drying or cracking. I plan to reapply oil annually to keep the wood nourished and protected. Some people prefer leaving rustic wood completely raw, but I’ve found that even a natural oil finish makes cleaning easier and prevents the wood from drying out over time.
Styling a Corner Mantel for Maximum Impact
Styling a corner mantel requires a different approach than decorating a traditional straight mantel. I had to think about how the display would look from multiple angles since people view a corner from different positions in the room. I started by anchoring each side with a taller element, a vintage lantern on one side and a piece of weathered driftwood on the other. This creates balance while acknowledging that the corner is actually two display surfaces meeting at an angle.
I learned to keep the actual corner junction relatively clear or use it for one statement piece. I placed a small collection of pinecones and a candle right at the corner point where the two sections meet, which draws the eye to that intersection and emphasizes the unique geometry. Everything else I arranged gets positioned along each arm of the mantel, creating two complementary vignettes rather than one long display. I vary heights and textures, mixing metal with wood, smooth with rough, and organic with man-made elements.
Seasonal decorating became one of my favorite aspects of having this corner mantel. In fall, I drape a garland of preserved leaves along both sections, letting it swag naturally at the corner. Winter brings evergreen branches and pinecones. Spring and summer call for lighter touches like wildflowers in vintage bottles or a simple mirror leaning against the wall above the corner. The key is not overcrowding the space. I remind myself that negative space is important, especially with rustic elements where the wood itself deserves attention. Less is almost always more with corner mantels.
Integrating Corner Fireplaces into Room Layout
The corner fireplace changed how I arranged my entire living room, and it took some trial and error to get the furniture placement right. Initially, I made the mistake of pushing all my furniture against the walls, which created too much distance from the fireplace and made it feel isolated. I learned that corner fireplaces actually work best when furniture is arranged to embrace them, creating an intimate conversation area that makes the corner feel like a cozy nook rather than an afterthought.
I angled my sofa to face the corner at about forty-five degrees, which allows people sitting there to enjoy the fire without craning their necks. I placed two comfortable armchairs flanking the fireplace, each positioned to create good sightlines to both the fire and anyone sitting on the sofa. This arrangement naturally creates a triangular conversation area that feels welcoming and encourages interaction. The corner placement actually works in my favor here because it doesn’t eat up valuable wall space that I need for other furniture and storage.
Rugs became an important tool for defining the fireplace zone. I chose a large area rug that anchors all the seating around the corner fireplace, which visually unifies the space and makes it clear that this is a destination within the room. I made sure to leave enough clearance between the rug and the fireplace surround for safety and practical reasons. The corner configuration also allowed me to tuck a small side table right beside the fireplace where I keep firewood in a rustic basket, keeping everything I need within easy reach while maintaining the aesthetic.

Building Custom Corner Mantel Shelving
After living with my basic corner mantel for a year, I decided to add built-in shelving on either side to maximize the functionality of that corner space. I designed simple rustic shelves using the same reclaimed wood aesthetic as the mantel, which created a cohesive look that feels like it was always meant to be there. The shelving extends from floor to ceiling on both walls that form the corner, with the mantel serving as a natural horizontal break in the vertical lines.
I kept the shelf design intentionally simple with rough-cut boards supported by black iron brackets that complement the rustic wood. The spacing between shelves varies, with larger gaps near the bottom for bigger items like baskets and books, and tighter spacing higher up for displaying smaller decorative pieces. This varied spacing creates visual interest and makes the built-ins more functional. I made sure to maintain proper clearance from the fireplace opening, keeping combustible shelving at safe distances according to code requirements.
The built-in shelving transformed my corner fireplace from a standalone feature into a complete focal wall that serves both decorative and practical purposes. I store extra firewood on the lower shelves in woven baskets, display my collection of vintage books and pottery on the middle shelves, and use the upper shelves for seasonal decorating. The rustic wood continues the organic, collected-over-time aesthetic that I love. Building the shelves myself saved thousands compared to hiring a carpenter, and customizing them to my exact needs and style made the project even more rewarding.
What’s the ideal size for a rustic corner fireplace mantel?
I found that proportion matters more than specific measurements. My corner has ninety-degree walls, and I used a mantel that extends about four feet along each wall from the corner point. The depth should be substantial enough to display items, usually six to eight inches minimum. Thickness adds visual weight. I went with an eight-inch-tall beam. Measure your corner space carefully and consider the fireplace size to keep everything balanced and proportionate.
How do I find authentic reclaimed wood for a mantel?
I had success at architectural salvage yards, demolition sites, and local sawmills. Facebook Marketplace and Craigslist often have people selling barn beams and old lumber. I also contacted local barn restoration companies, which sometimes sell beams they’ve removed. Always inspect for insect damage, excessive rot, or structural issues. Some lumber yards now sell new wood that’s been artificially distressed if authentic reclaimed wood isn’t available in your area.

Can I install a corner mantel myself, or do I need a professional?
I installed mine with a helper and basic carpentry skills. You’ll need proper tools, including a miter saw for angle cuts, a level, a stud finder, and a drill. The trickiest part is getting accurate angle cuts where the two sections meet. If you’re comfortable with basic carpentry and can identify load-bearing points in your walls, it’s definitely doable. However, if your fireplace needs gas line work or significant structural modifications, hire licensed professionals for those aspects.
What clearance is required between a mantel and fireplace opening?
Building codes typically require at least twelve inches of clearance between the mantel and the top of the fireplace opening, though this varies by location and fireplace type. I maintained fourteen inches to be safe. The mantel depth also matters; deeper mantels may require more clearance. Check your local building codes and your fireplace manufacturer’s specifications. These requirements exist for fire safety, so don’t cut corners. Insurance companies may also have requirements if you’re making claims.
How do I maintain and care for a rustic wood mantel?
I dust mine weekly with a soft cloth and reapply natural oil finish annually to keep the wood nourished. I avoid harsh chemical cleaners that can damage or discolor the wood. If ash or soot gets on it, I wipe it off immediately with a barely damp cloth. I check regularly for any signs of heat damage, especially the section closest to the fireplace. Keep the wood away from direct flame contact and maintain proper clearances. Rustic wood is forgiving and develops character over time.
What’s the cost difference between reclaimed and new wood for mantels?
Authentic reclaimed beams can range from fifty to several hundred dollars, depending on size, species, and condition. I paid about one hundred fifty dollars for mine at a salvage yard. New rough-cut lumber costs less, maybe thirty to eighty dollars, but lacks the patina and character. Custom milling adds cost if needed. New wood artificially distressed falls somewhere in between. Installation labor, if hiring out, typically costs three hundred to eight hundred depending on complexity. DIY saves significantly but requires time and tools.

Best Corner Fireplace Ideas
DIY Corner Fireplace Ideas
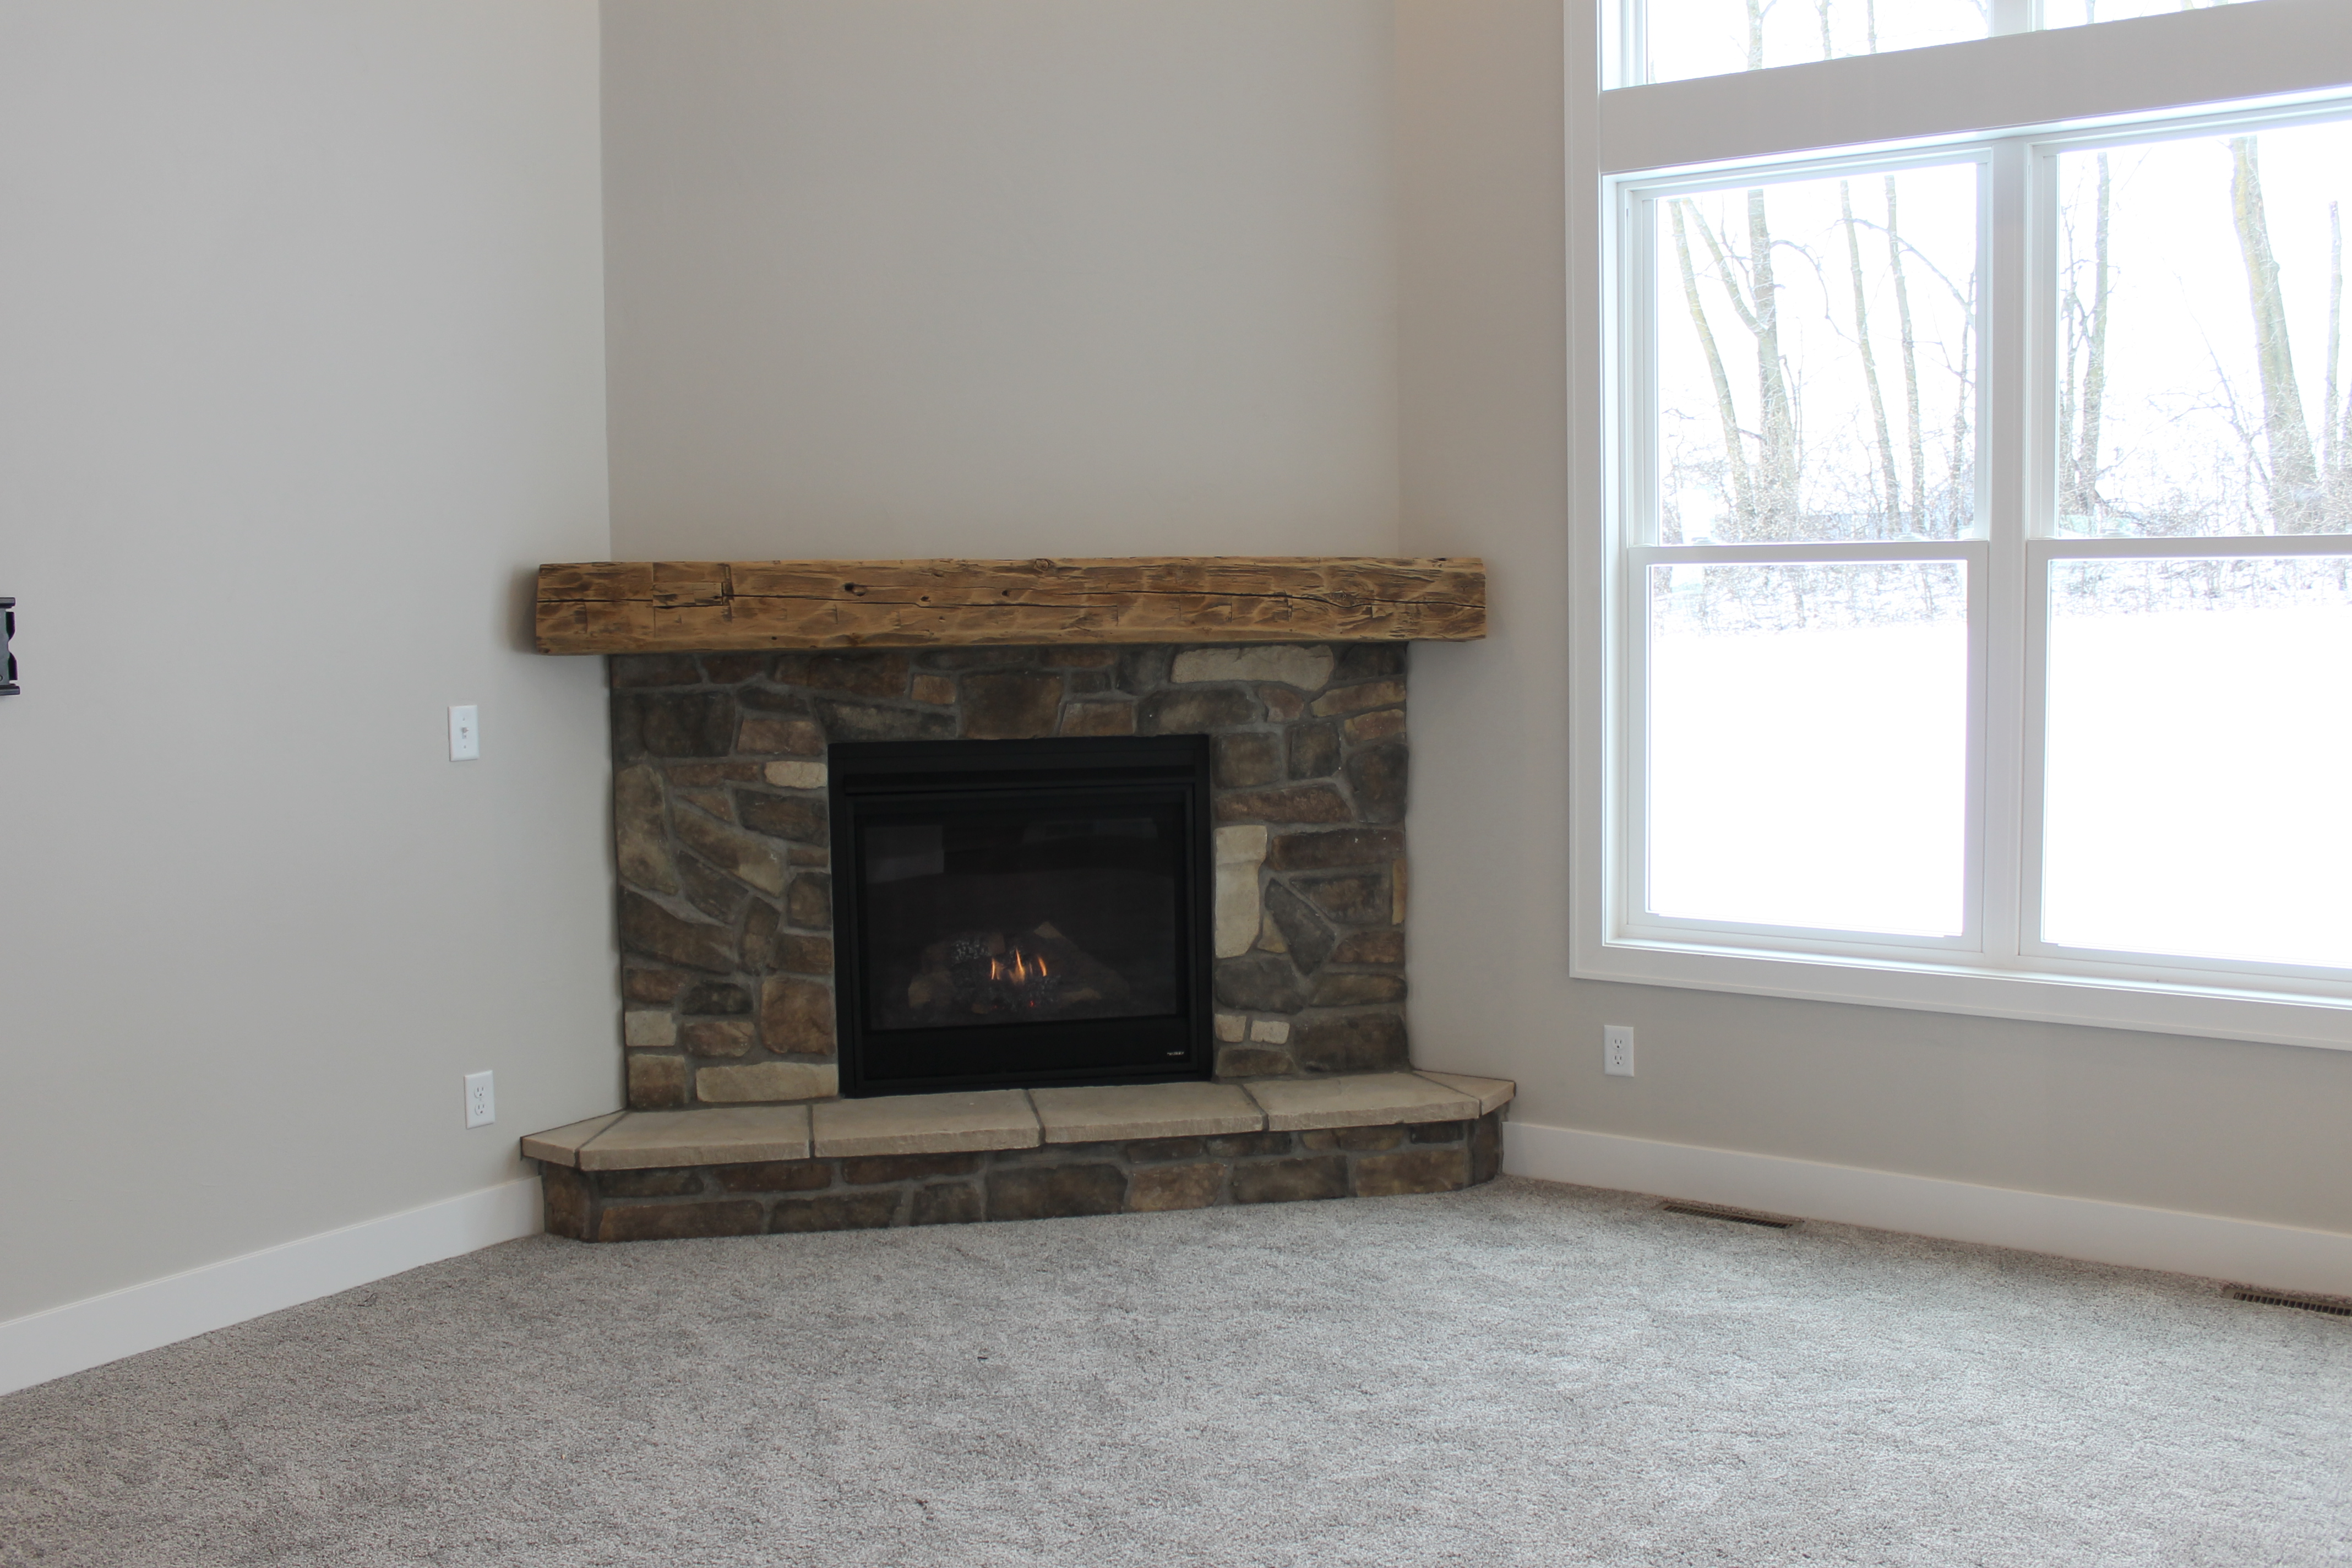
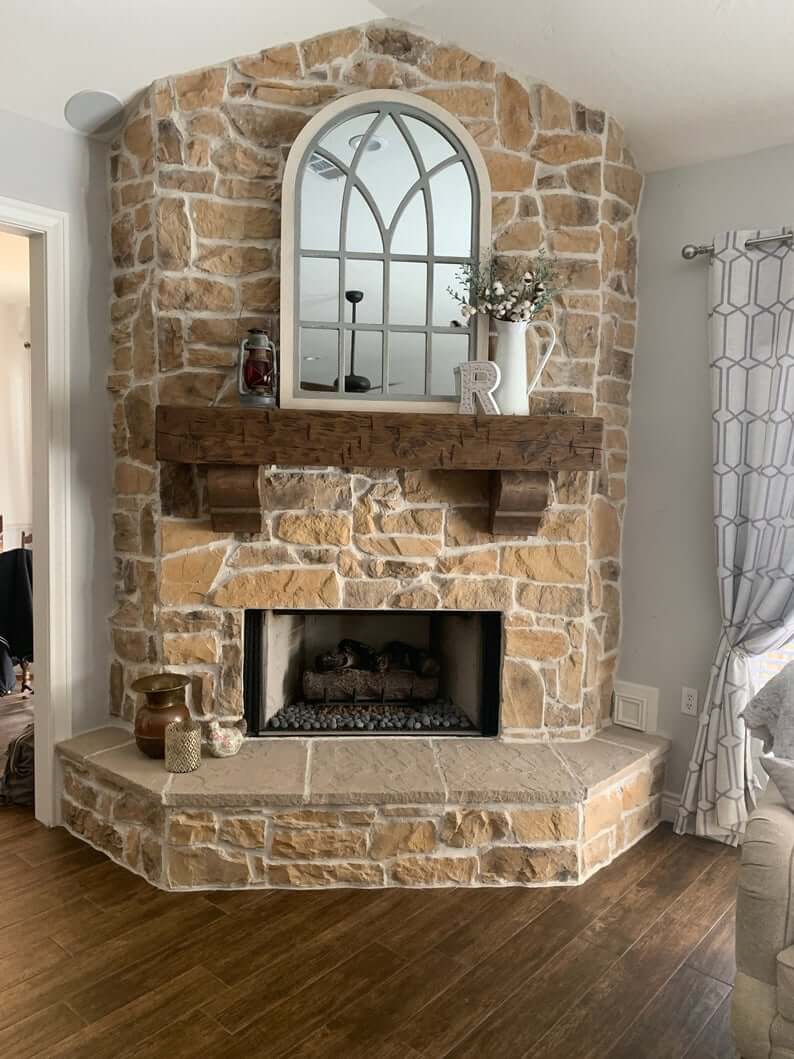
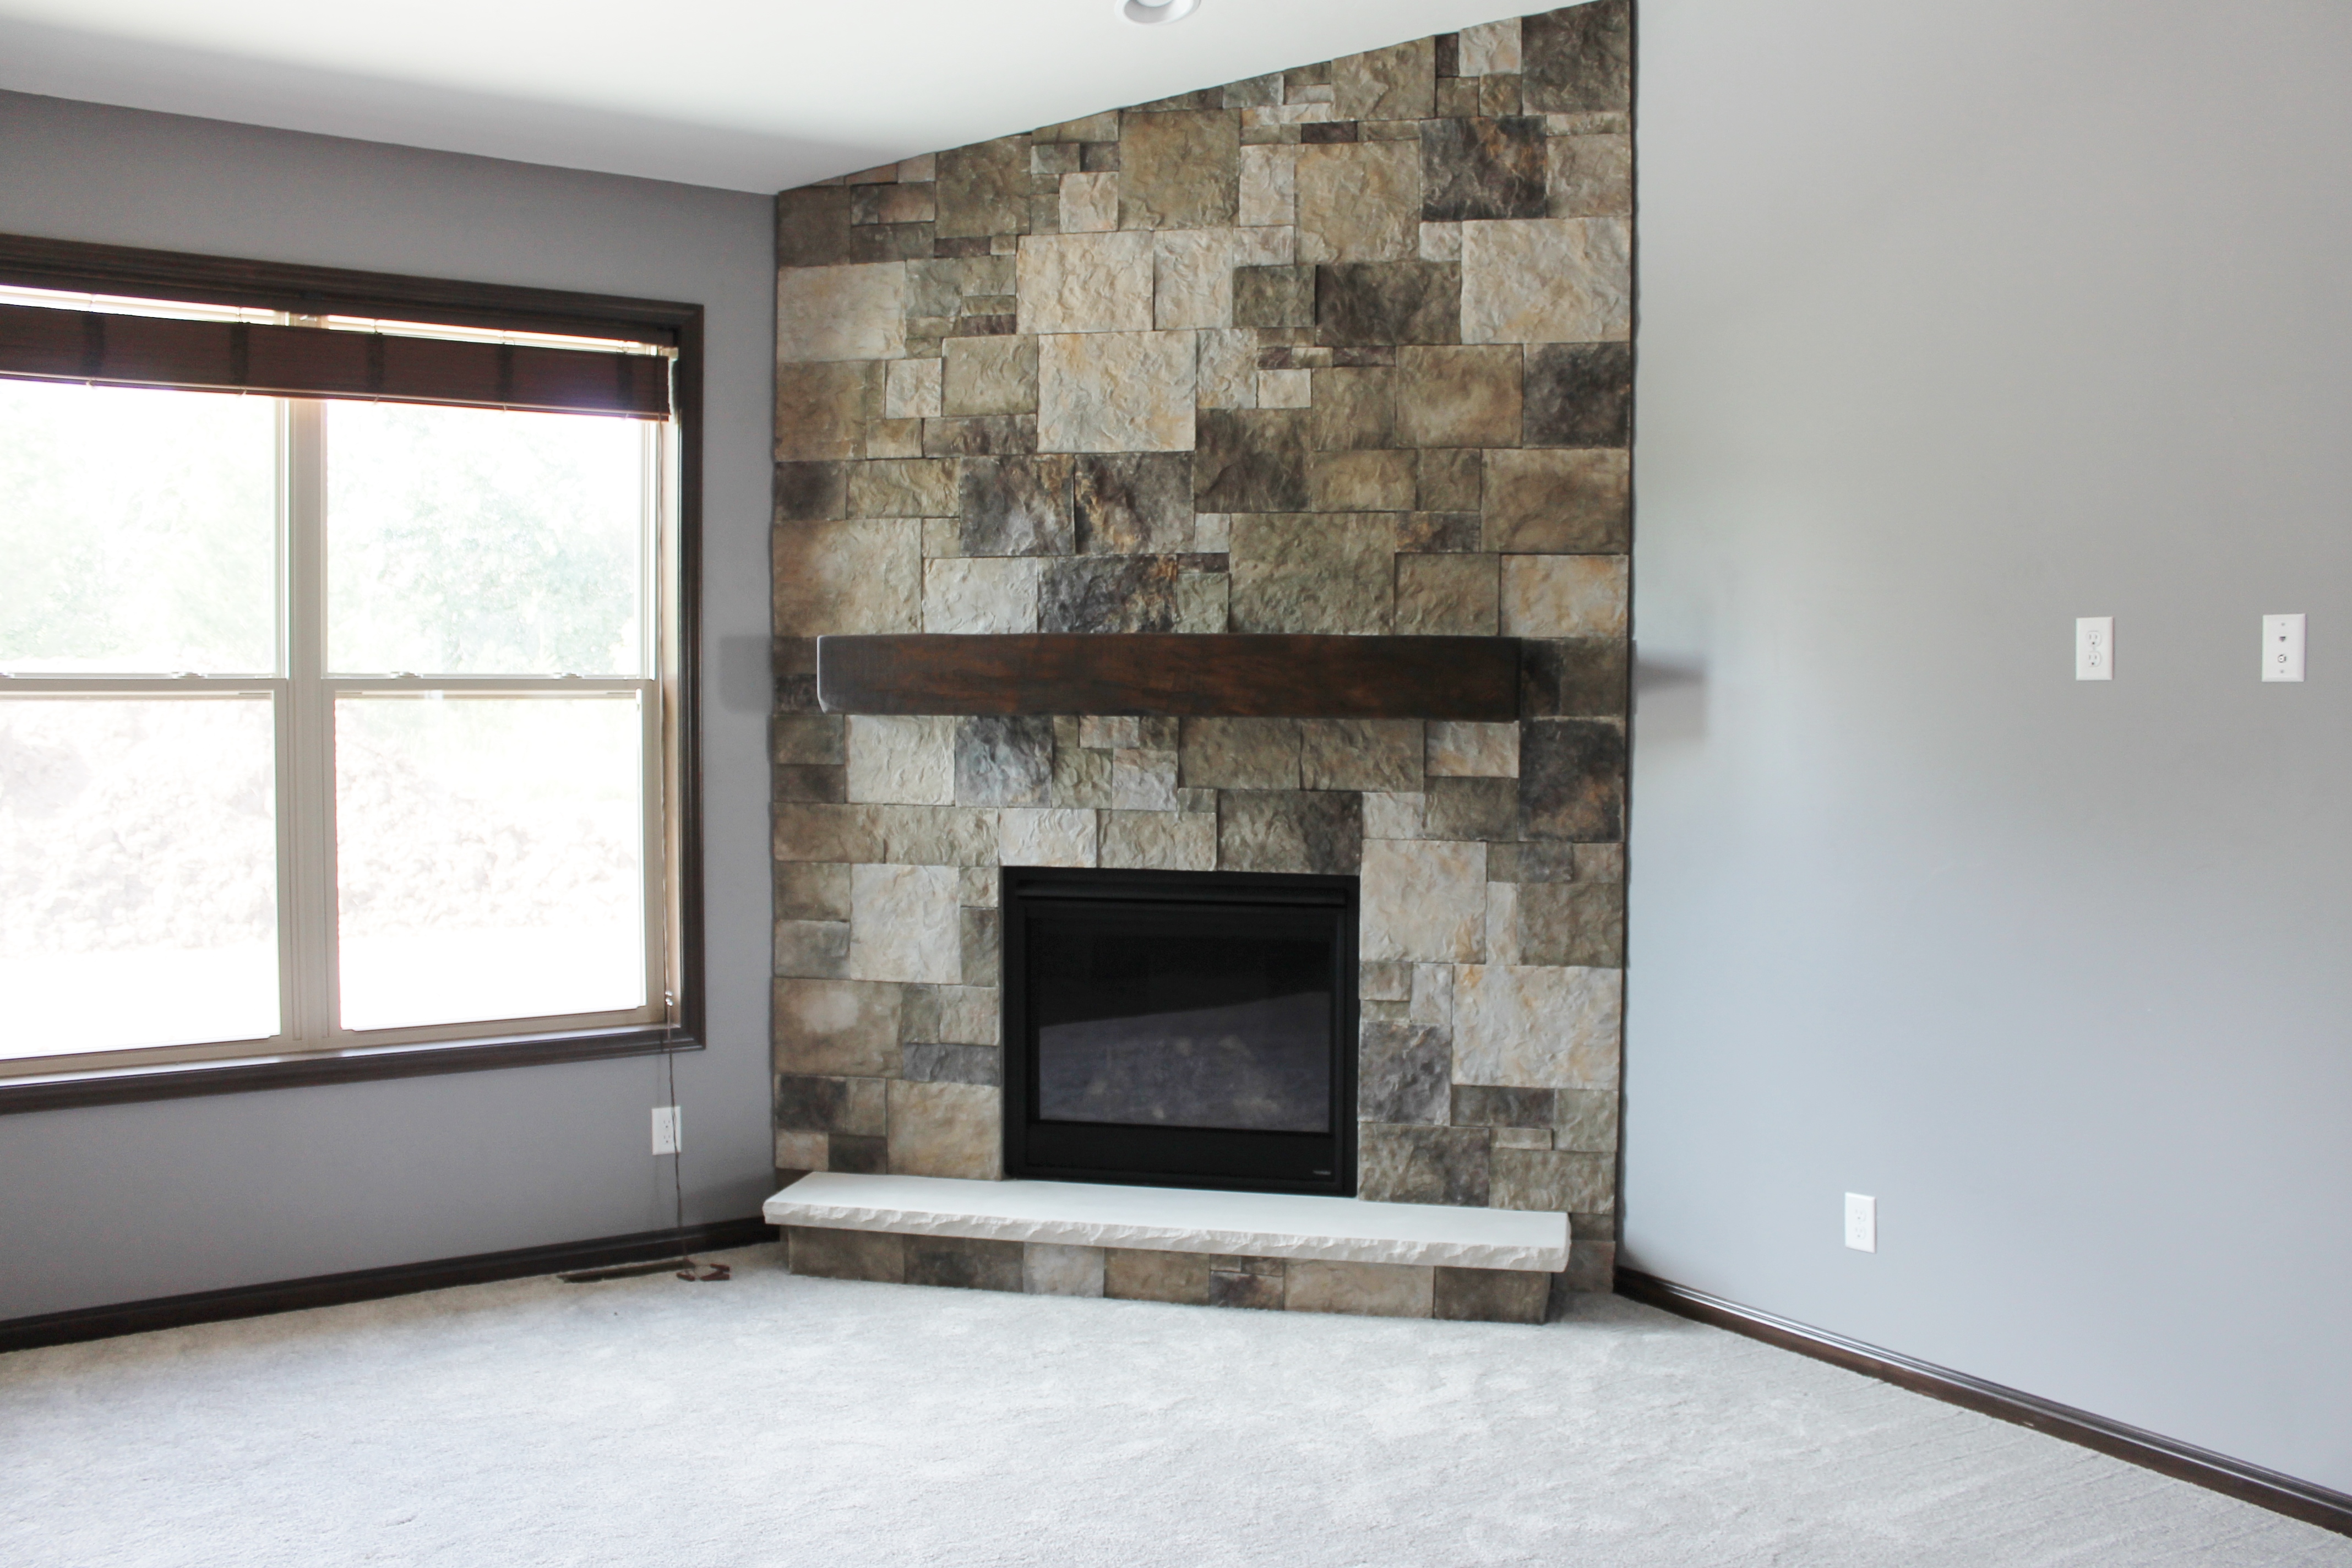
Rustic corner fireplace with stacked stone and barn beam mantel

Fireplace Designs and the Rustic Mantel Trend!
Best DIY Corner Fireplace Ideas
Related Posts: