Lots of individuals are using these kinds with a backyard upgrade, making the patio a form of outdoor kitchen with an excellent grill and patio dinning dining room table next to the fireplace. In case you are previously convinced that you must have an outdoor fireplace then the next thing is to decide on what kind of fireplace you need.
Images about Build Outdoor Fireplace Chimney
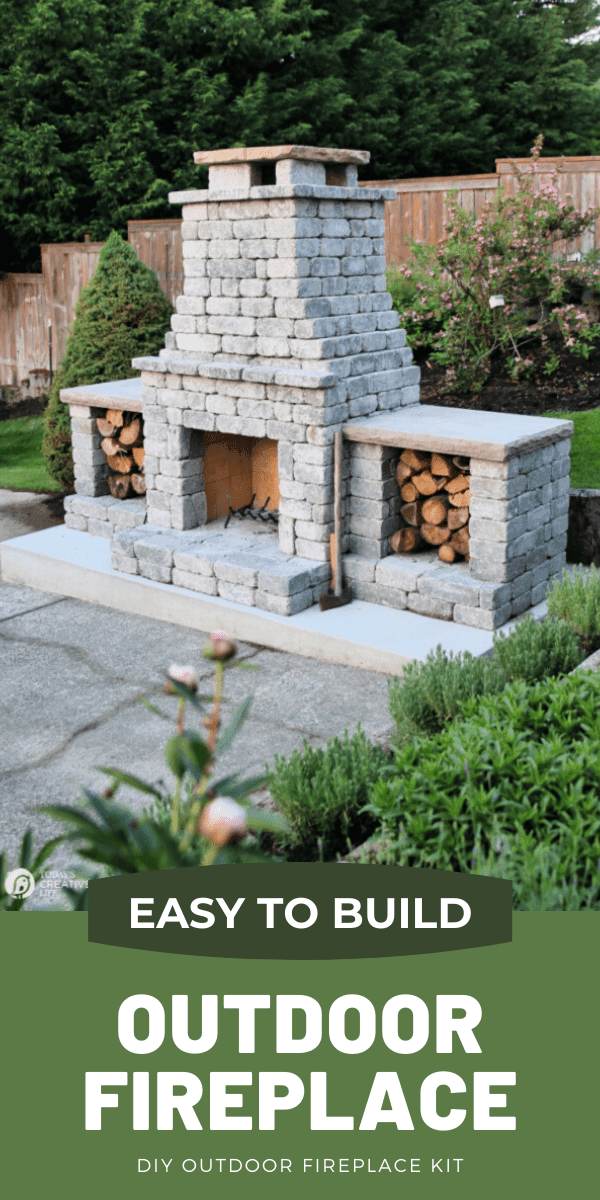
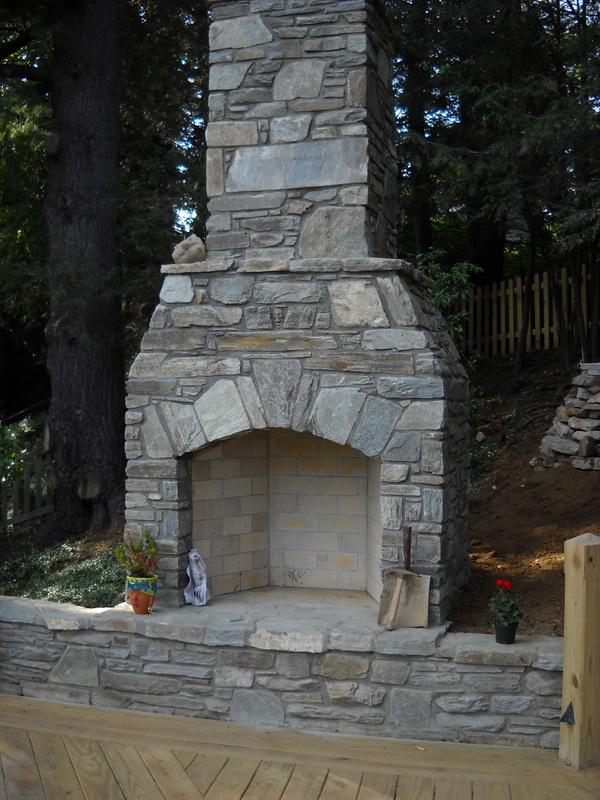
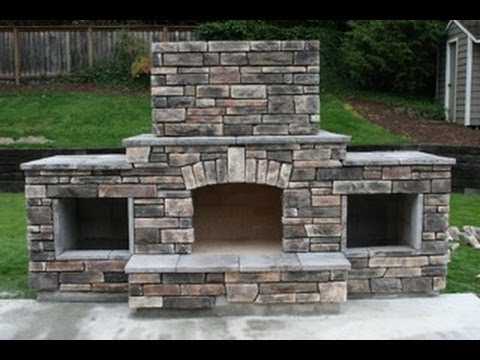
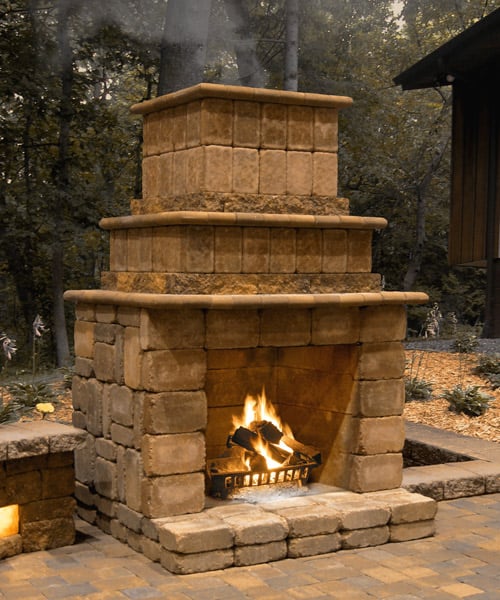
Build Outdoor Fireplace Chimney
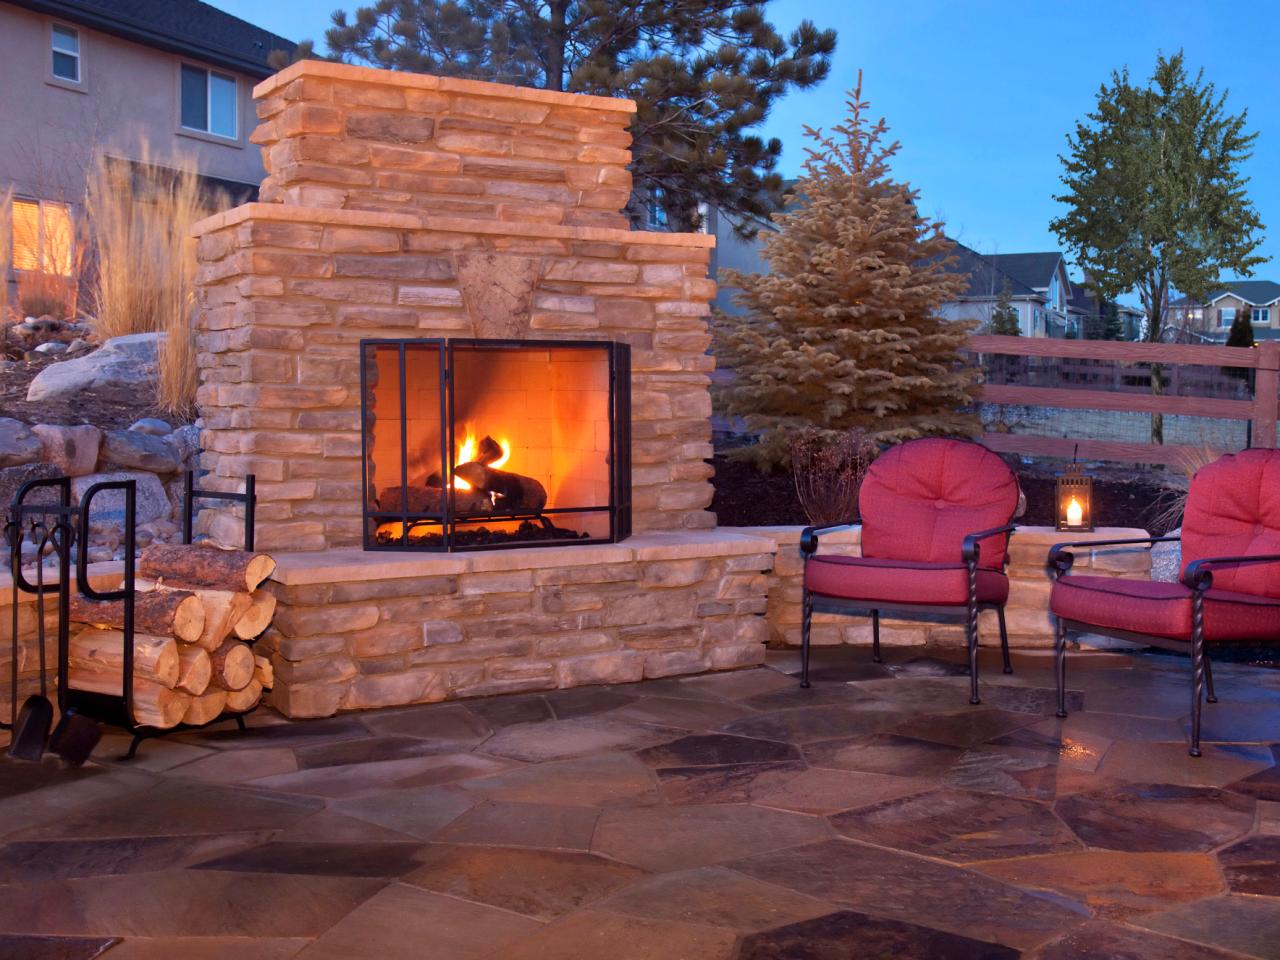
An outdoor area with an outdoor fireplace as a center point extends the living room and is usually employed to block a undesirable point of view or perhaps create privacy. After all, the air outdoors is a very good means to cool down. Make sure you pick the right hearth for your house.
stonetutorials – Living Stone Masonry
to be able to provide convenience, fireplaces made for cooking are usually placed next to a place or a patio for socializing. Proper burning following the building of the masonry fireplace of yours is essential to the longevity of the outdoor fireplace of yours. You’ll have a choice to own a fireplace outdoors created from clay.
How to Build An Outdoor Fireplace Step-by-Step Guide – #BuildWithRoman
Family and friends are going to enjoy spending nights and weekends at your home all year round gathering around one of these wood burning fire pits. But, it is probably worth emphasizing the basic fact that outside fireplaces are only allowed to be used for the back yard rather than it house.
10 Free Outdoor Fireplace Construction Plans
/free-outdoor-fireplace-plans-5113163-hero-0fa114a8e82e45aba4bba7186f6034c0.jpg)
Building An Outdoor Fireplace (with tips from a professional mason!)

stonetutorials – Living Stone Masonry
How to Build An Outdoor Fireplace Step-by-Step Guide – #BuildWithRoman

How to Plan for Building an Outdoor Fireplace HGTV
How to Build an Outdoor Fireplace
/OutdoorFireplace-2c3216480f034a7f95c2389dbb5a553d.jpg)
DIY – Building an outdoor fireplace
How to Build a DIY Outdoor Fireplace Your DIY Outdoor Fireplace
How We Built Our Outdoor Fireplace – Chris Loves Julia
How to Build Outdoor Fireplaces (with Pictures) – wikiHow

What is the Cost to Build an Outdoor Fireplace?
Related Posts:
- Retro Outdoor Fireplace
- Vintage Outdoor Fireplace
- Rustic Outdoor Fireplace
- Outdoor Stone Fireplaces
- Stacked Stone Outdoor Fireplace
- DIY Small Outdoor Fireplace
- Outdoor Fireplaces Firepits
- Simple Brick Outdoor Fireplace
- Ideas For Outdoor Fireplaces On Patios
- Outdoor Fireplace Ideas Stone
Building an outdoor fireplace chimney is a great way to enhance your outdoor living space and create a cozy ambiance for gatherings with friends and family. Not only does it provide warmth on chilly nights, but it also adds a touch of elegance and sophistication to your backyard. In this article, we will guide you through the process of building an outdoor fireplace chimney, from choosing the right location to adding the finishing touches.
Choosing the Right Location
The first step in building an outdoor fireplace chimney is selecting the right location. Consider the size of your backyard and the proximity to your house or any other structures. An ideal location should be away from trees and other flammable materials, ensuring safety while enjoying your fireplace. Additionally, choose a spot that offers good ventilation and won’t cause smoke to blow into seating areas.
FAQ: What are some safety measures to consider when choosing a location for my outdoor fireplace chimney?
Answer: When choosing a location for your outdoor fireplace chimney, ensure that it is at least 10 feet away from any combustible structures or materials, such as fences or overhanging branches. Also, make sure there are no underground utility lines in the area. It’s recommended to consult with local authorities or professionals to ensure compliance with safety regulations.
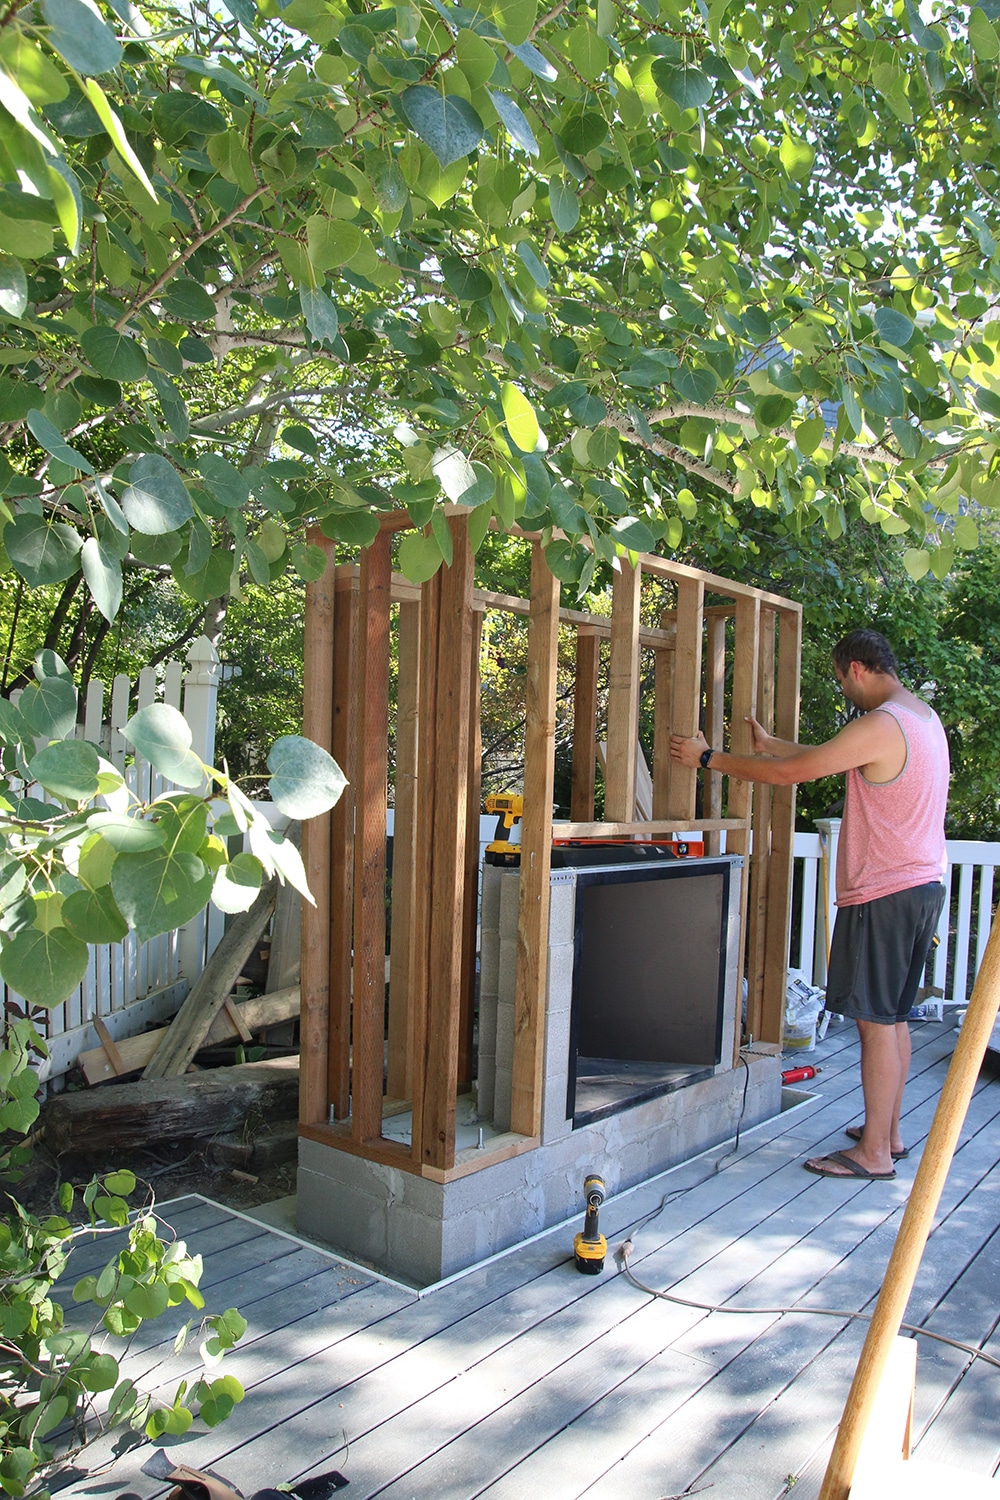
Gathering Materials and Tools
Once you have chosen the perfect spot for your outdoor fireplace chimney, it’s time to gather all the necessary materials and tools. Here’s a list of items you’ll need:
1. Bricks or stones: Choose bricks or stones that are suitable for outdoor use and can withstand high temperatures.
2. Mortar: Use high-quality mortar specifically designed for fireplaces.
3. Concrete blocks: These will form the foundation of the chimney.
4. Fireplace kit (optional): If you prefer a more straightforward installation process, consider purchasing a pre-fabricated fireplace kit.
5. Shovel: For digging the foundation and mixing mortar.
6. Trowel: Used for applying mortar.
7. Level: To ensure the bricks or stones are laid evenly.
8. Safety gear: Gloves, safety glasses, and a dust mask to protect yourself during construction.
FAQ: Can I use regular bricks for my outdoor fireplace chimney?
Answer: Regular bricks are not suitable for outdoor fireplaces as they may crack or crumble due to the high temperatures. It’s essential to choose firebricks or refractory bricks that are specifically designed to withstand heat.
Preparing the Foundation
Before you start laying the bricks or stones, it’s crucial to prepare a solid foundation for your outdoor fireplace chimney. Follow these steps:
1. Dig a trench: Dig a trench that is at least 4 inches deep and wider than the base of your chimney.
2. Fill with gravel: Fill the trench with gravel to provide drainage and prevent moisture buildup.
3. Lay concrete blocks: Lay concrete blocks on top of the gravel, ensuring they are level and properly aligned.
FAQ: Why is a solid foundation important for an outdoor fireplace chimney?
Answer: A solid foundation ensures stability and prevents shifting or settling of the chimney over time. It also helps in providing proper air circulation, which is essential for efficient combustion and preventing smoke from entering your living space.
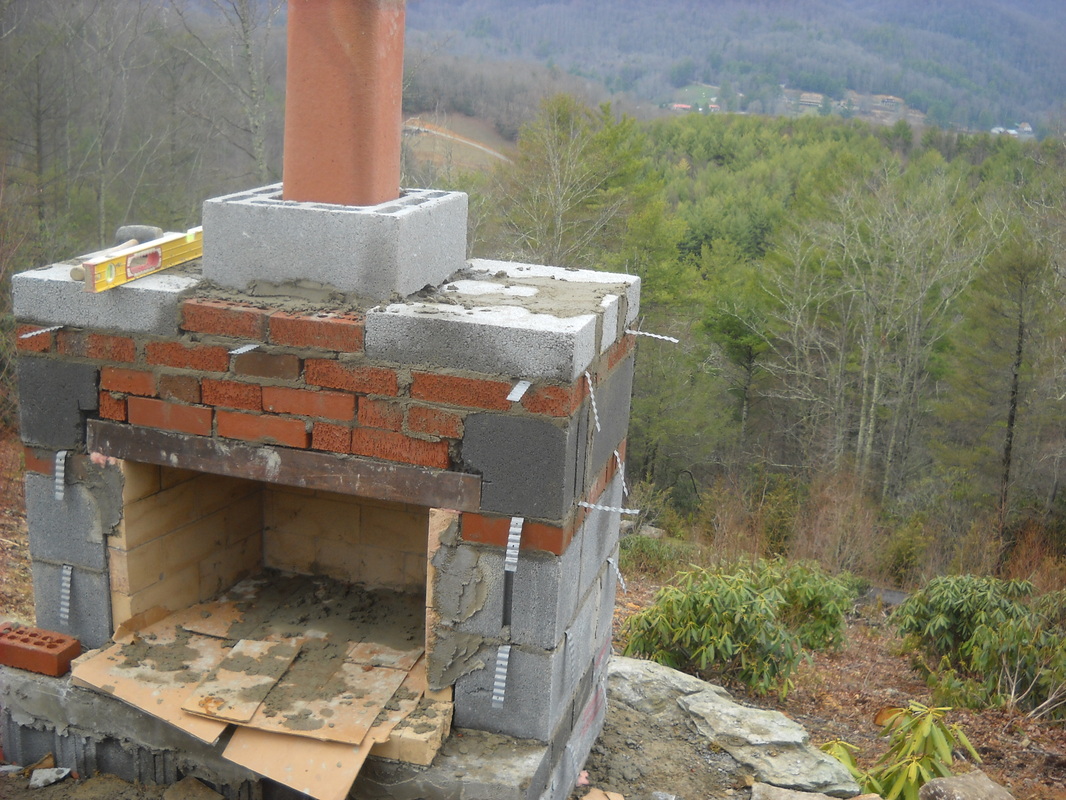
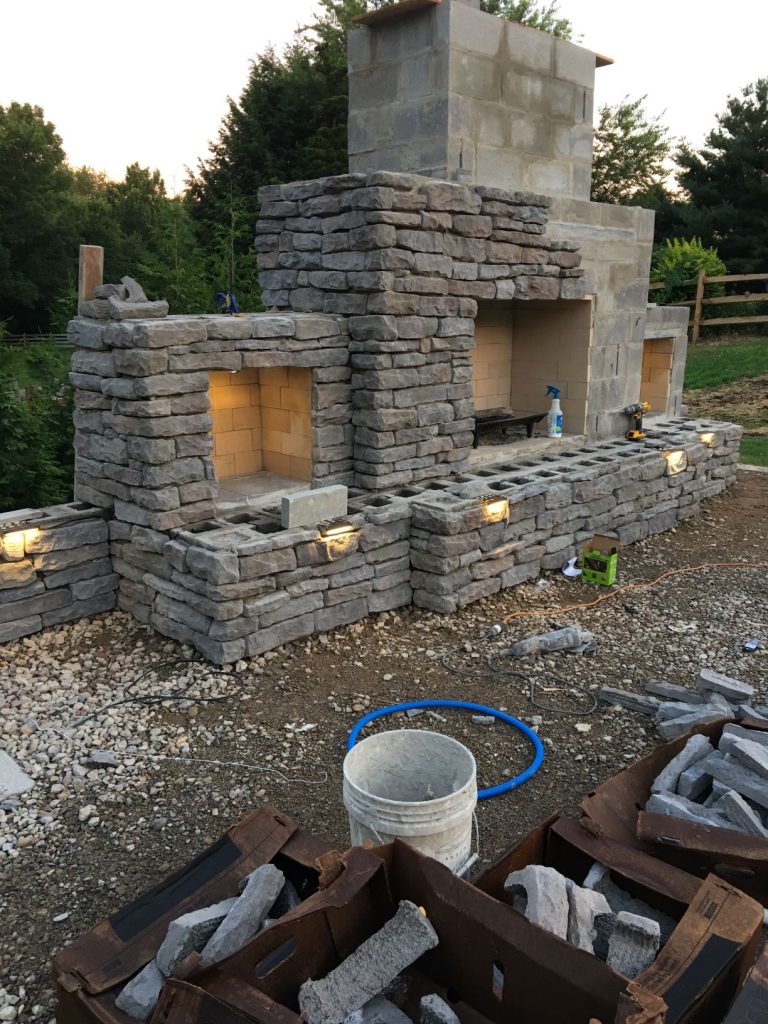
Constructing the Chimney
Now that you have prepared the foundation, it’s time to start building the chimney itself. Follow these steps:
1. Start with corners: Lay bricks or stones at the corners of your chimney, using mortar to secure them in place.
2. Build up the walls: Continue Laying bricks or stones, layer by layer, using mortar to bond them together. Ensure that each layer is level and properly aligned.
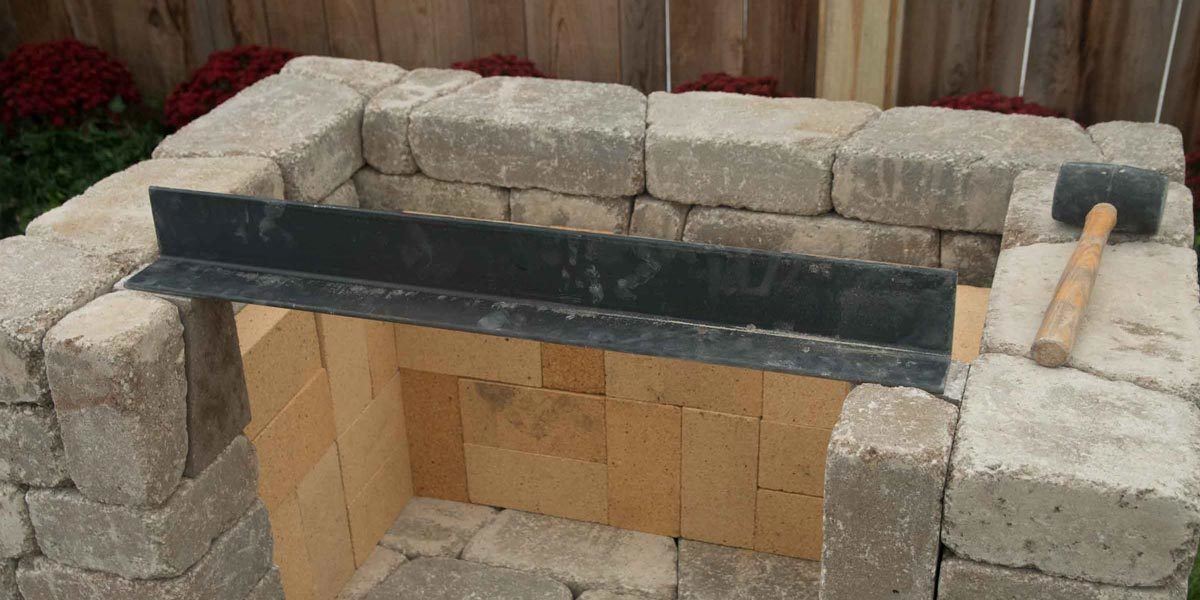
Laying bricks or stones is a common technique used in construction to create walls, buildings, and other structures. The process involves placing individual bricks or stones on top of each other, layer by layer, and using mortar to bond them together.
Here are the steps to lay bricks or stones:
1. Prepare the surface: Start by preparing the surface where you will be laying the bricks or stones. The surface should be clean, level, and free from any debris or loose material.
2. Gather the materials: Gather all the necessary materials for the job, including bricks or stones, mortar mix, water, a trowel, a spirit level, a masonry jointer tool, and safety equipment like gloves and goggles.
3. Mix the mortar: Follow the instructions on the mortar mix packaging to prepare the mortar. Typically, you will need to mix the dry mortar with water until it reaches a thick but workable consistency.
4. Apply mortar to the surface: Use a trowel to apply a layer of mortar onto the surface where you will be laying the bricks or stones. Start from one end and work your way across the area.
5. Lay the first layer: Place the first brick or stone onto the mortar bed. Use a slight twisting motion while applying pressure to ensure proper adhesion with the mortar. Tap it gently with a rubber mallet to align it properly.
6. Level and align: Use a spirit level to ensure that the first brick or stone is perfectly level and aligned with adjacent ones. Adjust as necessary by tapping gently with a mallet.
7. Continue laying subsequent layers: Apply mortar on top of the first brick or stone and lay down subsequent layers in a similar manner. Use string lines or guide boards as reference points for maintaining straight lines.
8. Check for level and alignment regularly: Continuously check for level and alignment after laying each layer of bricks or stones. Adjust as needed to maintain a straight and even pattern.
9. Fill the mortar joints: Once a layer is complete, use a masonry jointer tool to fill the mortar joints between the bricks or stones. This not only enhances the appearance but also strengthens the structure.
10. Clean up: Remove any excess mortar from the surface using a trowel or brush before it dries. This will give the finished wall a neat and professional look.
11. Allow curing time: Allow sufficient time for the mortar to cure and set before applying any additional loads or pressure on the structure. Follow the recommendations provided by the mortar manufacturer.
By following these steps, you can lay bricks or stones layer by layer, ensuring that each layer is level and properly aligned. This will result in a structurally sound and visually appealing construction project.