Replacing the thermocouple in a Superior gas fireplace is a crucial maintenance task that ensures the safety and efficiency of the appliance. The thermocouple is a vital component that detects whether the pilot light is lit and communicates this to the gas valve. If the pilot light goes out, the thermocouple signals the gas valve to shut off, preventing gas from leaking into the room, which could lead to hazardous conditions. Over time, thermocouples can wear out or fail, requiring replacement to maintain the fireplace’s proper functioning. Understanding the steps and precautions involved in this process can help homeowners perform this task safely and effectively.
Images about Superior Gas Fireplace Thermocouple Replacement
Superior Gas Fireplace Thermocouple Replacement
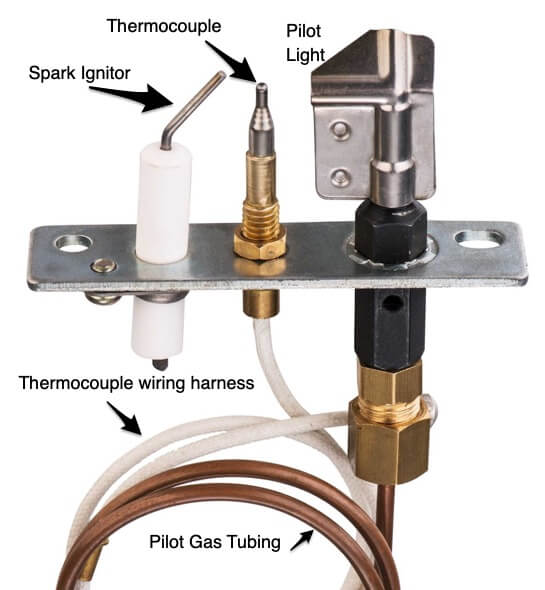
The first step in replacing a Superior gas fireplace thermocouple is to ensure safety by turning off the gas supply and allowing the fireplace to cool completely. This prevents accidental gas leaks and protects against burns. Once the gas is turned off, the next step involves locating the thermocouple, which is typically situated near the pilot light. The thermocouple is connected to the gas valve and the pilot assembly, usually secured with screws or clips. Carefully remove these fasteners to detach the thermocouple from its position. It’s important to handle the components gently to avoid damaging any surrounding parts.

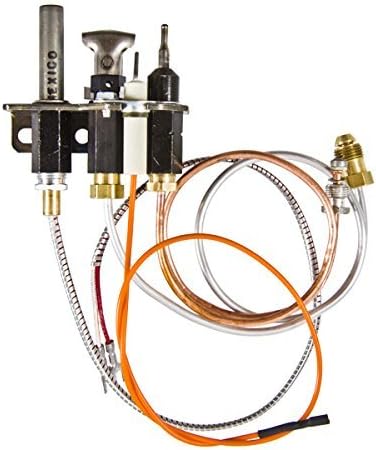
After removing the old thermocouple, the installation of the new one begins. The new thermocouple should be an exact match for the model and specifications of the Superior gas fireplace to ensure compatibility. Insert the new thermocouple into the pilot assembly, ensuring it is positioned correctly to detect the pilot flame. Secure it in place with the screws or clips that were removed earlier. Connect the other end of the thermocouple to the gas valve. It’s crucial to tighten the connections sufficiently to prevent gas leaks but avoid overtightening, which could damage the threads or the thermocouple itself.
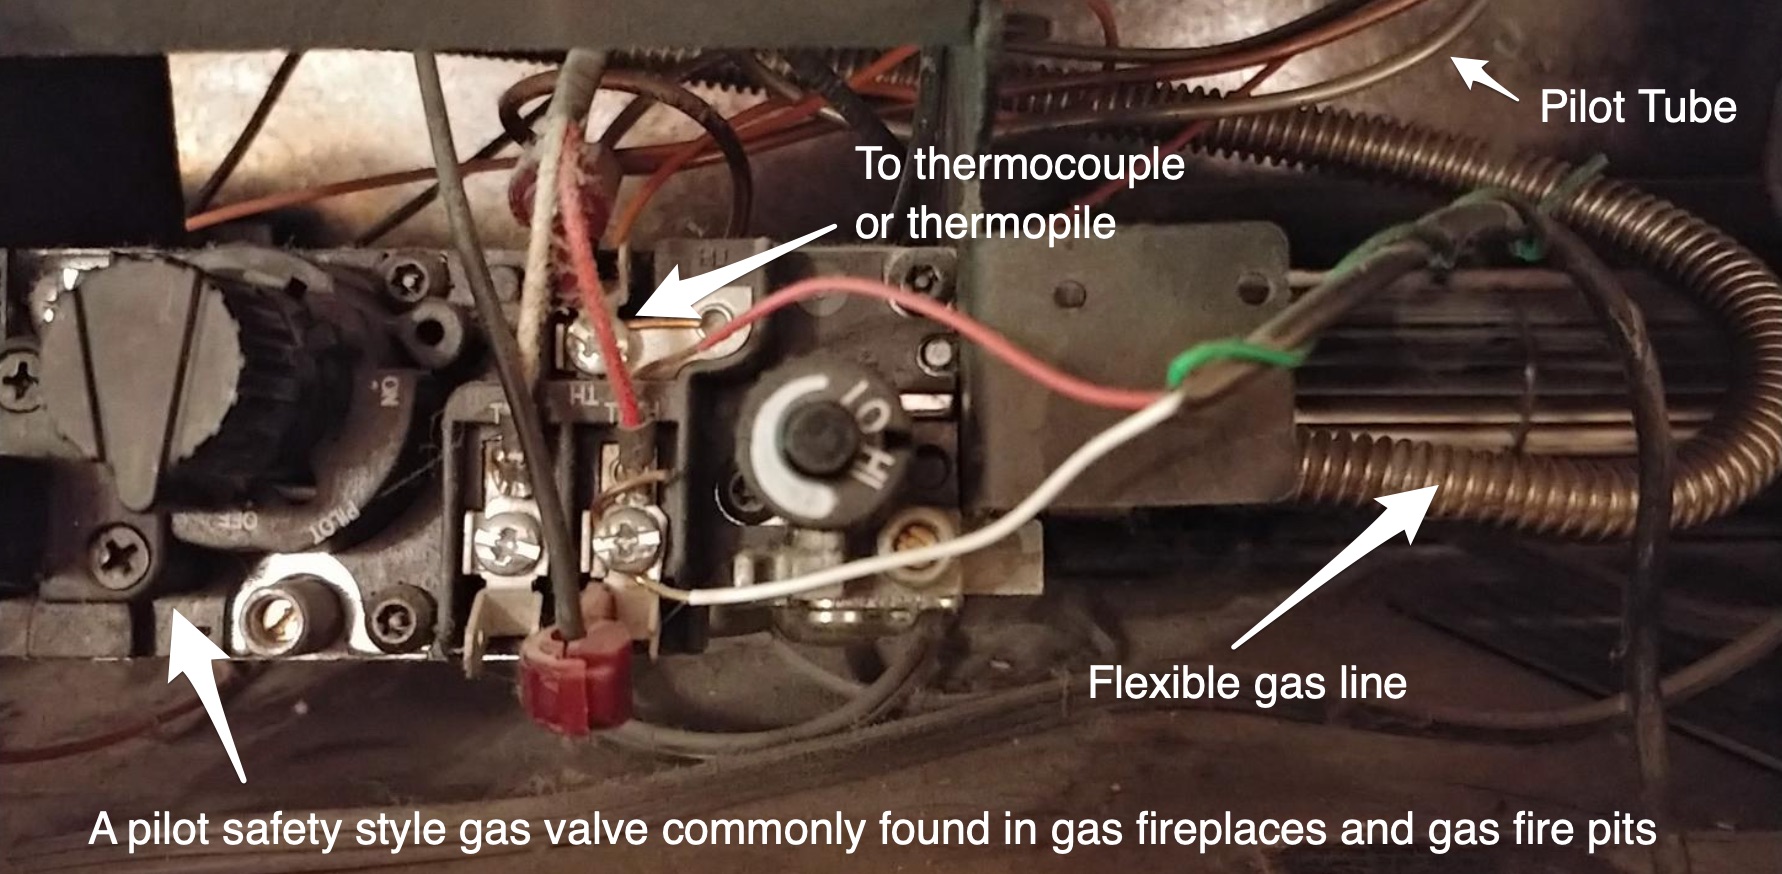
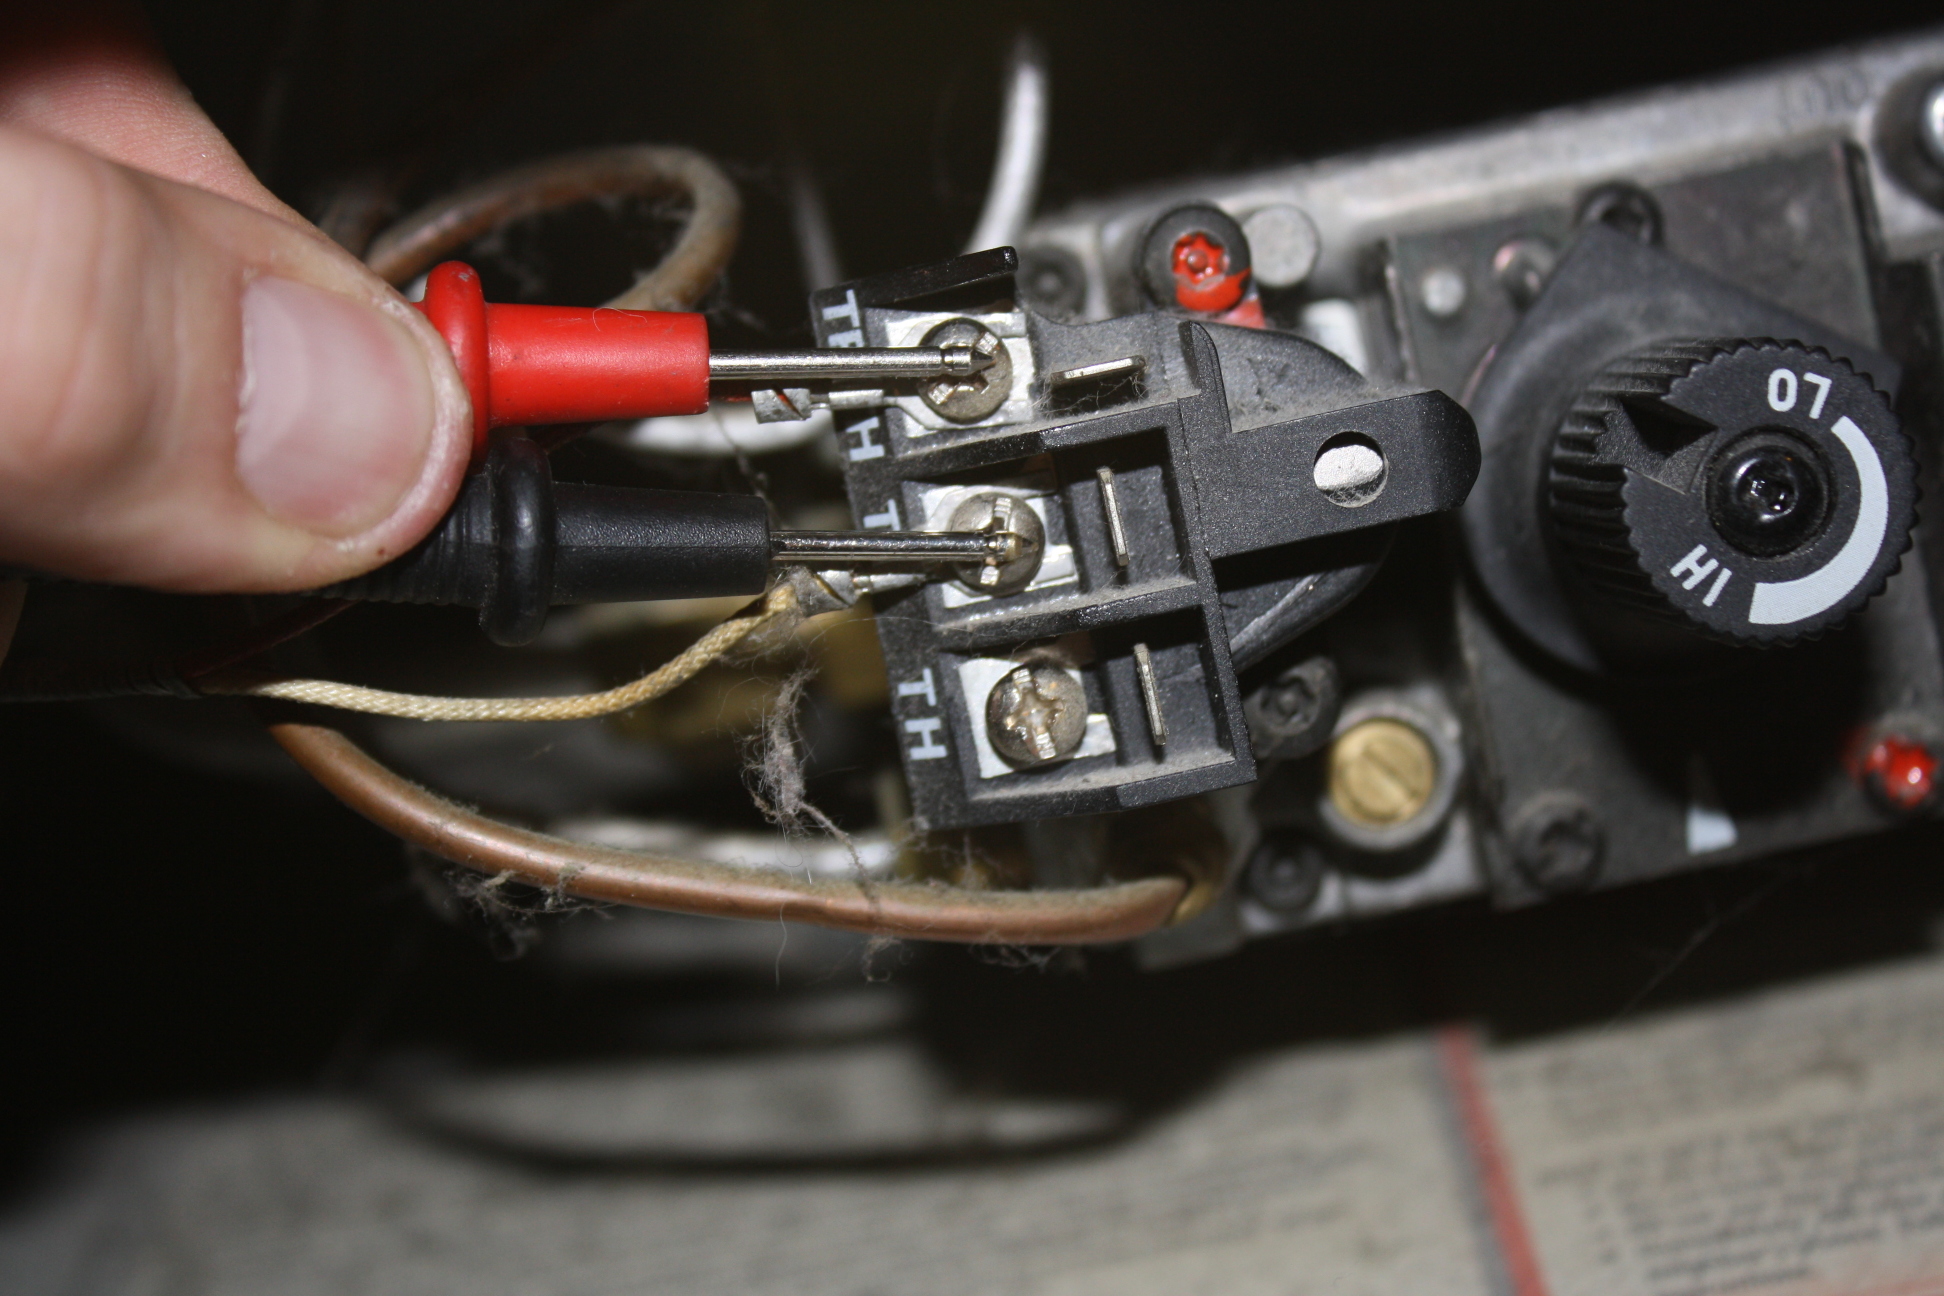
Once the new thermocouple is installed, the final steps involve testing the system to ensure everything is working correctly. Turn the gas supply back on and relight the pilot light according to the manufacturer’s instructions. Observe the pilot flame and ensure it stays lit, indicating that the thermocouple is functioning properly by keeping the gas valve open. Additionally, monitor the fireplace during its first few uses after replacement to ensure there are no issues. If the pilot light goes out or the fireplace doesn’t operate correctly, further inspection or professional assistance might be needed. Regular maintenance and timely replacement of components like the thermocouple can extend the lifespan of a Superior gas fireplace, ensuring it operates safely and efficiently for years to come.
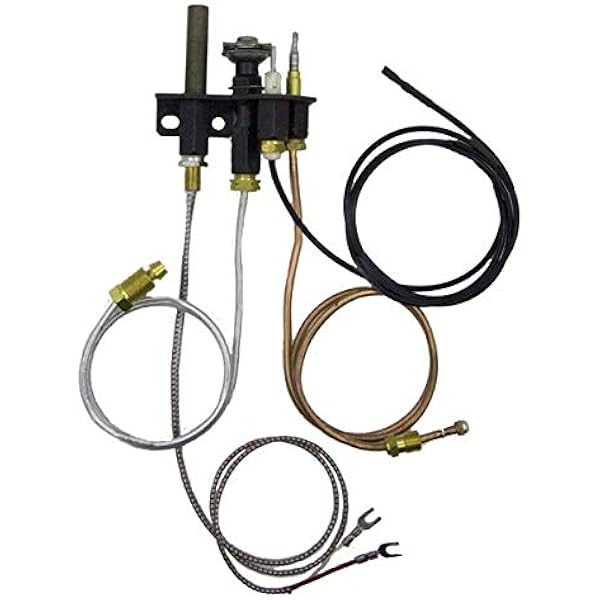
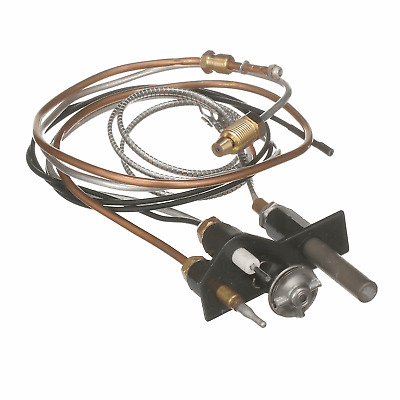
67L70 Lennox Superior Direct Vent Fireplace Gas Pilot Assembly
How to Test your Thermopile – www.mygasfireplacerepair.com
69L17 Lennox Superior Direct Vent Fireplace Natural Gas Pilot
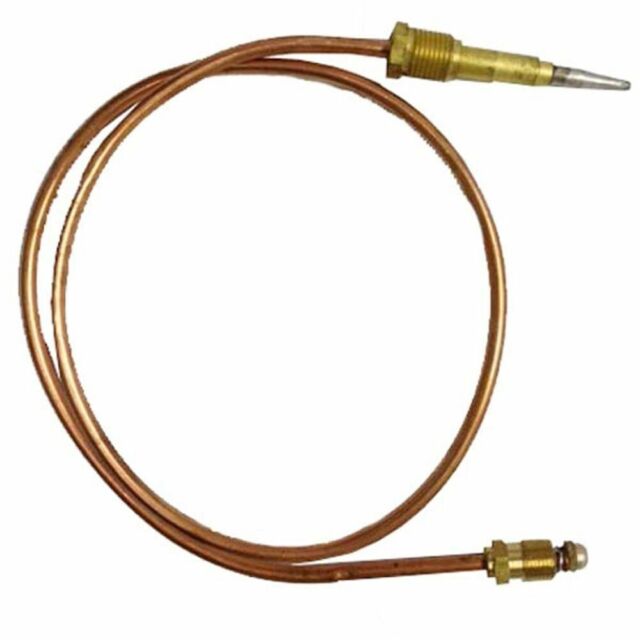
SiT 0290216 Gas Fireplace Thermocouple Same for sale online eBay
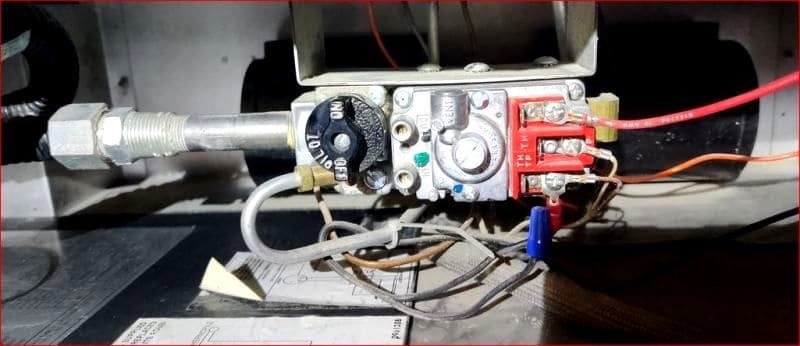
How the fireplace thermopile system is wired

Non working Superior fireplace – DoItYourself.com Community Forums
Superior Direct Vent Fireplace Natural Gas Pilot Assembly 904405 69L1701 eBay
Related Posts:
- Modern Ventless Gas Fireplace
- Natural Gas Fireplace
- Rustic Gas Fireplace Ideas
- Corner Gas Fireplace
- Vent Free Gas Fireplace Logs
- Portable Gas Fireplace Heater
- Gas Fireplace Design
- Indoor Gas Fireplace Ideas
- Natural Gas Fireplace Reviews
- Gas Fireplace Energy Efficiency
Are you in need of a gas fireplace thermocouple replacement? If so, you’ve come to the right place. A gas fireplace thermocouple is a crucial component that helps regulate the flow of gas to your fireplace. When it malfunctions or wears out, it can lead to issues such as the pilot light going out or the fireplace not turning on at all. In this article, we will discuss everything you need to know about replacing a gas fireplace thermocouple, including common mistakes to avoid and frequently asked questions.
Choosing the Right Replacement Thermocouple
When it comes to replacing a gas fireplace thermocouple, one of the most important steps is choosing the right replacement part. Thermocouples come in different sizes and configurations, so it’s essential to find one that is compatible with your specific fireplace model. You can usually find this information in your fireplace’s manual or by consulting with a professional.
Before purchasing a replacement thermocouple, make sure to turn off the gas supply to your fireplace and let it cool down completely. Once you have the new thermocouple, carefully follow the installation instructions provided by the manufacturer. It’s also a good idea to test the new thermocouple before reassembling your fireplace to ensure that it is working properly.
Installation Process
The installation process for a gas fireplace thermocouple replacement can vary depending on the make and model of your fireplace. In general, you will need to locate the old thermocouple and disconnect it from both the gas line and the pilot light assembly. Then, remove any screws or fasteners holding the old thermocouple in place and replace it with the new one.
Once you have installed the new thermocouple, reattach it to both the gas line and pilot light assembly using the provided fittings or adapters. Make sure everything is securely tightened before turning on the gas supply and testing your fireplace. If everything is working correctly, you can then reassemble any removed components and enjoy a warm fire once again.
Common Mistakes to Avoid
One common mistake when replacing a gas fireplace thermocouple is not properly shutting off the gas supply before starting the installation process. Failing to do so can result in a dangerous gas leak or other safety hazards. Another mistake is not following the manufacturer’s instructions for installation, which can lead to improper functioning of the new thermocouple.
It’s also essential to double-check that all connections are securely tightened during installation to prevent gas leaks or other issues down the line. Lastly, avoid forcing any components during disassembly or reassembly, as this can cause damage and potentially lead to more significant problems with your fireplace.
Frequently Asked Questions
1. Can I replace a gas fireplace thermocouple myself?
Yes, you can replace a gas fireplace thermocouple yourself if you feel comfortable doing so. However, if you’re unsure or have any doubts about your ability to complete the installation safely, it’s best to consult with a professional.
2. How often should I replace my gas fireplace thermocouple?
On average, a gas fireplace thermocouple should be replaced every 1-2 years to ensure optimal performance and safety.
3. What are signs that my gas fireplace thermocouple needs replacing?
Signs that your gas fireplace thermocouple may need replacing include difficulty lighting or keeping the pilot light lit, inconsistent flames, or strange odors coming from your fireplace.
4. Can I use any replacement thermocouple for my gas fireplace?
It’s essential to use a replacement thermocouple that is compatible with your specific make and model of fireplace to ensure proper function and safety.
5. How much does it cost to replace a gas fireplace thermocouple?
The cost of replacing a gas fireplace thermocouple can vary depending on factors such as labor costs and the price of the replacement part itself. On average, expect to pay anywhere from $50-$200 for this service.
In conclusion, replacing a gas fireplace thermocouple is a relatively straightforward task that can be done by most homeowners with some basic DIY skills. By following these guidelines and avoiding common mistakes, you can ensure that your fireplace continues to provide warmth and ambiance for years to come.
How do I know if the replacement thermocouple I purchased is the correct size and configuration for my gas fireplace?
To ensure that the replacement thermocouple you purchased is the correct size and configuration for your gas fireplace, follow these steps:
1. Consult your gas fireplace’s owner’s manual or contact the manufacturer to determine the specific model number and specifications of the thermocouple needed for your fireplace.
2. Measure the length of the existing thermocouple in your fireplace to ensure that the replacement is the same size.
3. Check the connector type of the existing thermocouple (e.g., threaded or push-in) and make sure that the replacement thermocouple has a compatible connector.
4. Verify that the replacement thermocouple is compatible with your gas fireplace’s make and model, as some thermocouples are designed for specific brands or types of fireplaces.
5. If you are unsure about whether the replacement thermocouple is compatible with your gas fireplace, consult with a professional technician or installer for guidance.
By following these steps, you can ensure that the replacement thermocouple you purchased is the correct size and configuration for your gas fireplace.
Can a faulty thermocouple cause other issues with my gas fireplace, such as carbon monoxide leaks?
A faulty thermocouple can potentially cause issues with the gas flow in your fireplace, leading to incomplete combustion and potentially higher levels of carbon monoxide being produced. It is important to ensure that your gas fireplace is properly maintained and any faulty components are promptly replaced to prevent safety hazards such as carbon monoxide leaks. If you suspect a problem with your gas fireplace, it is recommended to have it inspected by a qualified technician.