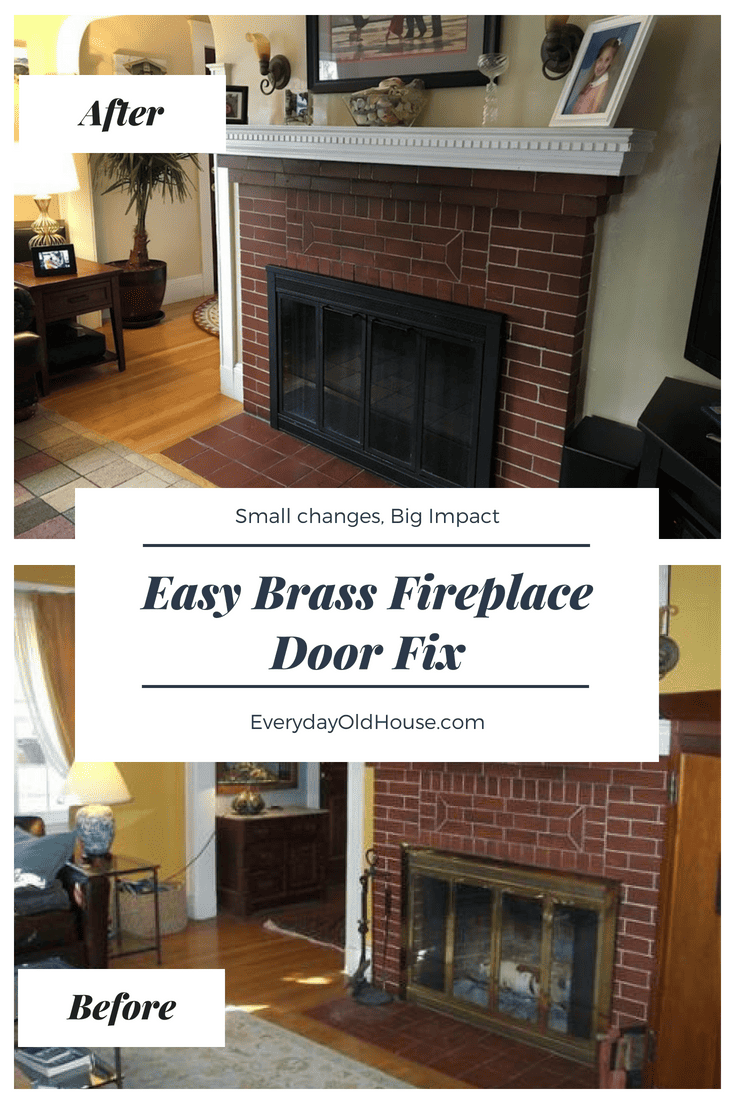
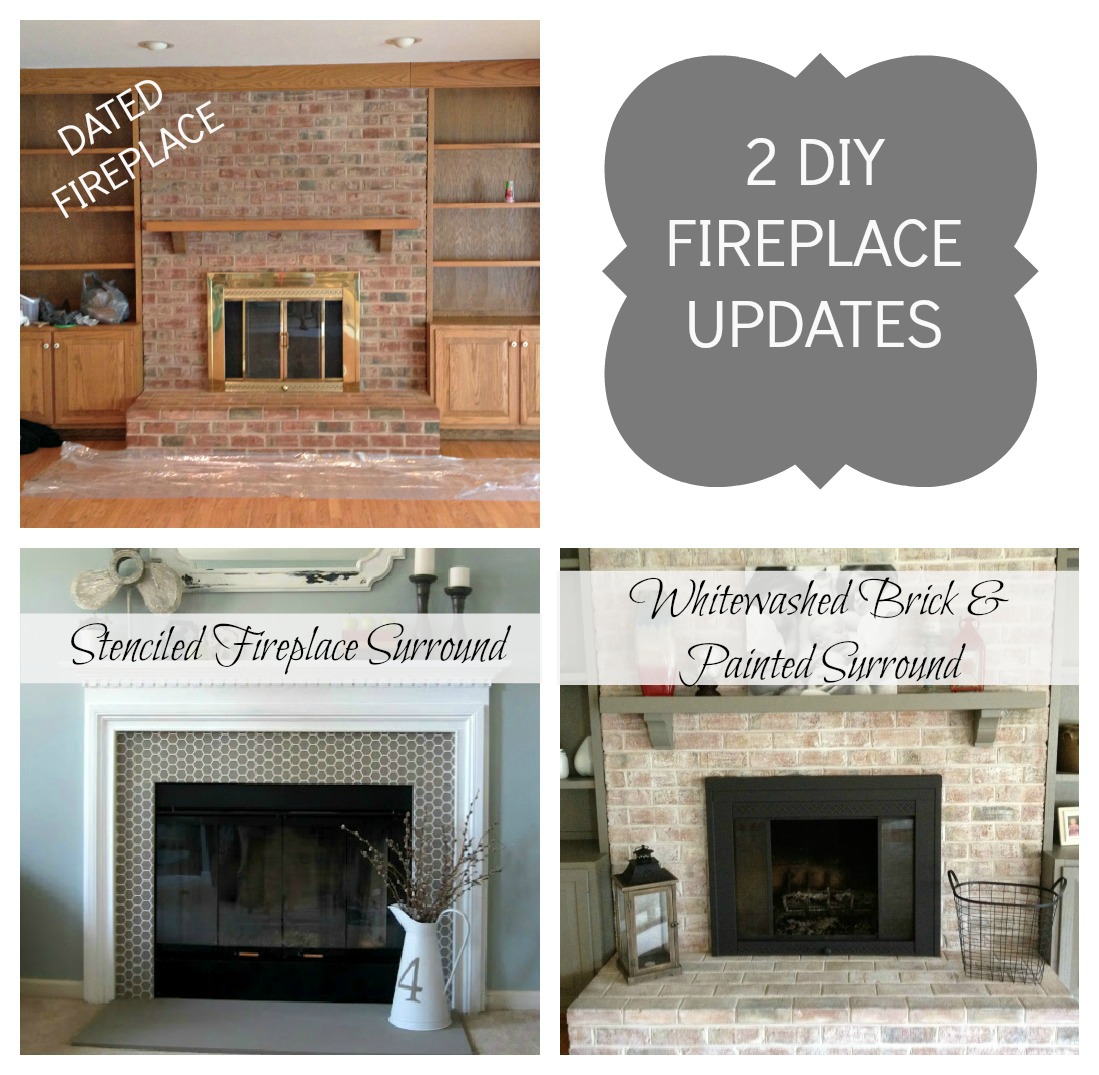
Painting Over Brass Fireplace Doors
Brass fireplace doors were once a staple in many homes, but they can make a fireplace look outdated today. Instead of replacing them entirely, a more affordable and stylish solution is to paint over them. This project can refresh the entire look of a fireplace, giving it a cleaner, more modern appearance. With the right preparation, tools, and approach, painting brass doors can be a simple and effective weekend DIY project.
Preparing the Surface: The Most Crucial Step
- Clean the brass thoroughly before anything else.
Before starting, I always make sure to clean the brass doors meticulously. Brass tends to attract soot, dust, and residue from years of use, and paint won’t adhere well to a dirty surface. I use a degreaser or a mix of vinegar and water to remove grime. Then, I dry the surface completely using a lint-free cloth to ensure no moisture is trapped underneath the primer. - Remove the doors if possible.
To avoid making a mess indoors and to paint more evenly, I prefer removing the fireplace doors entirely. This step not only provides better access to every nook and cranny but also prevents paint splatter on surrounding brick, tile, or carpet. A screwdriver or power drill is usually all I need. I make sure to keep all screws and hinges organized for reinstallation later. - Sanding is essential for proper adhesion.
Brass is a smooth, slick metal, and paint won’t stick well without some abrasion. I use fine-grit sandpaper (around 220 grit) to lightly scuff the surface. I don’t try to remove the brass entirely—just enough to roughen the surface so the primer has something to grip. A quick once-over is enough if the brass isn’t lacquered; otherwise, I spend more time sanding lacquered areas. - Remove all sanding dust afterward.
After sanding, it’s vital to get rid of the dust. I wipe everything down with a tack cloth, which picks up fine dust particles that a regular rag might leave behind. If dust remains, it can mix with the primer and cause bubbling or flaking later on. Cleanliness is crucial during every step of this project to ensure the best results. - Protect surrounding surfaces with painter’s tape.
Even if I remove the doors, parts like hinges or frame edges might stay attached. I cover any areas I don’t want painted with painter’s tape. This includes glass panes, brick borders, and other nearby surfaces. It helps me paint more confidently and quickly, knowing I won’t have to scrape off stray paint later. - Set up a safe workspace with ventilation.
Spray paints and primers can produce strong fumes. I always work in a well-ventilated area—preferably outdoors or in a garage with the door open. If I have to work inside, I use fans and open windows. I also lay down a drop cloth or cardboard to protect the floor and catch any paint overspray or drips.

Choosing the Right Paint and Primer
Use a heat-resistant primer and paint.
Since fireplace doors get exposed to high temperatures, it’s important to choose heat-resistant products. I look for primers and paints rated to withstand at least 200°F, preferably more. High-heat spray paints made for grills or stoves work well for this type of project. Never use regular wall or metal paint—they’ll peel or discolor under heat.
Pick a durable finish that hides imperfections.
Brass surfaces may have small scratches or uneven textures after sanding. I usually choose a matte or satin finish because it hides flaws better than glossy paint. Flat black is a popular choice because it gives a timeless, minimalist look and pairs well with nearly all fireplace surrounds, whether stone, tile, or brick.
Match paint color to your room’s decor.
When picking a color, I consider my room’s overall design. Black is classic, but other options like dark bronze, oil-rubbed bronze, or charcoal gray also look great. In modern or coastal homes, even brushed nickel or white might work. I use test swatches to compare colors before committing to a full coat.
Avoid cheap, multi-purpose spray paints.
There are lots of spray paints on the market, but not all are created equal. I avoid low-cost, all-purpose brands that don’t offer heat resistance or rust protection. Reputable brands like Rust-Oleum and Krylon have formulas specifically made for high temperatures and metal surfaces, and I find these give the best long-term results.
Choose a primer formulated for metal.
Before painting, a metal primer is essential for bonding and preventing rust. Even if the brass doors won’t rust, the primer still provides a uniform base. I use a gray or black primer to help with coverage, especially if I’m painting with darker tones. Spray primer is faster and more consistent than brush-on versions.
Don’t forget about dry time compatibility.
I always check that my primer and paint are compatible in terms of dry time and chemical composition. For example, if I use an oil-based primer, I make sure to use an oil-based paint over it. I also give each coat ample time to dry—usually 24 hours between primer and paint—to ensure a solid bond and avoid any tacky feel.

Applying the Paint Like a Pro
Use light, even coats instead of heavy passes.
When spraying, I avoid thick coats. I’ve learned it’s better to apply 2–3 thin layers than one thick one. This prevents drips, bubbles, and uneven finishes. I keep the spray can about 10–12 inches away from the surface and move in a steady, sweeping motion. I start spraying just off the edge and continue past it to avoid blotchy areas.
Allow proper drying between coats.
Between each coat, I let the paint dry for the recommended time—usually about an hour, depending on humidity. Rushing this step causes the paint to wrinkle or become soft later. I also make sure the surface is completely cool to the touch before adding another coat to prevent moisture trapping or paint distortion.
Touch up edges and corners carefully.
Corners and curves often miss the full spray coverage. After my main coats, I inspect these areas closely. If I find missed spots, I use a small brush with matching high-heat paint to fix them. This helps avoid uneven edges and ensures a fully coated look. Brush marks are less visible in these areas anyway.
Avoid painting over moving parts or hinges.
If the fireplace doors have functioning parts like hinges or spring latches, I avoid painting directly over them. Paint can clog the mechanisms or cause them to stick. I cover those parts with tape, or if paint accidentally gets on them, I wipe it off immediately with a damp cloth before it dries.
Apply a clear coat for extra protection.
After the paint dries completely, I sometimes add a heat-resistant clear coat for durability. This step helps protect against chips, smudges, and minor heat damage. A matte clear coat works best to avoid adding too much shine. It also gives the doors a professional-looking finish that lasts longer.
Let the final coat cure for 48–72 hours.
Before reinstalling the doors, I let the paint cure fully. Curing is different from drying—it means the paint has hardened completely and won’t peel or smudge. I keep the doors in a safe, dust-free place while they cure, usually for two to three days. Afterward, they’re ready to handle daily use and fireplace heat.
Reinstalling and Finishing Touches
Carefully reattach the doors to avoid scratches.
When reinstalling, I handle the painted doors gently to avoid scratching the new finish. I place a towel or foam pad underneath while positioning them. Screws and bolts can scrape paint if they’re overtightened or misaligned, so I take my time and align everything before securing it in place.
Check that doors still open and close properly.
Sometimes after painting and reinstallation, I find that hinges feel stiff or don’t close as smoothly. I test the doors a few times and apply a bit of lubricant to the hinges if needed. If the paint interferes with movement, I lightly sand or scrape it away from those areas and touch them up afterward.
Clean the glass for a polished look.
While the metal is the main focus, dirty or smudged glass can take away from the final result. I clean the glass panels with a streak-free window cleaner or a vinegar-water mix. Using a microfiber cloth prevents lint and gives the glass a clear, spotless finish that complements the new paint job.
Decorate the hearth area to match the update.
After the paint project, I like to update the hearth area with matching decor. A few candles, a basket with firewood, or a minimal metal tool set can make a big difference. These touches help the painted doors feel like part of a coordinated style instead of a quick fix.
Take photos for future reference.
I always take a few “after” photos to see the progress and keep a visual record. If I ever need to repaint in the future, these images remind me of the finish, tools, and techniques I used. Plus, it’s satisfying to see the dramatic improvement compared to the original brass look.
Maintain the finish with occasional cleaning.
To keep the doors looking good, I wipe them down occasionally with a soft cloth. I avoid using harsh chemicals or abrasive sponges, as they can scratch or dull the surface. With gentle care, the painted finish can last for years and keep the fireplace looking stylish and updated.

Common Mistakes to Avoid
Skipping the sanding step.
Without sanding, the paint will likely chip or peel off over time. It’s tempting to skip this step, especially if the doors seem clean, but sanding gives the surface grip and helps everything adhere properly.
Using regular paint instead of heat-resistant paint.
Standard paints can bubble, discolor, or even emit fumes when exposed to fireplace heat. Always check the label to make sure your products are heat-resistant.
Rushing the drying process.
Drying and curing times are critical. Moving too fast between coats or reinstalling too soon can ruin the finish. I always plan to give myself extra time for the paint to cure fully.
Painting indoors without ventilation.
Spray paints contain strong fumes. I make sure to work in a well-ventilated area or wear a respirator if painting indoors. Poor ventilation can be dangerous to your health.
Forgetting to tape off the glass.
Overspray on glass is annoying and hard to remove. I always tape off glass panels completely before spraying, using newspaper or plastic to cover large areas.
Applying too thick a coat of paint.
Thick coats might seem faster, but they lead to runs, drips, and uneven drying. Multiple thin layers always produce a smoother, longer-lasting finish.

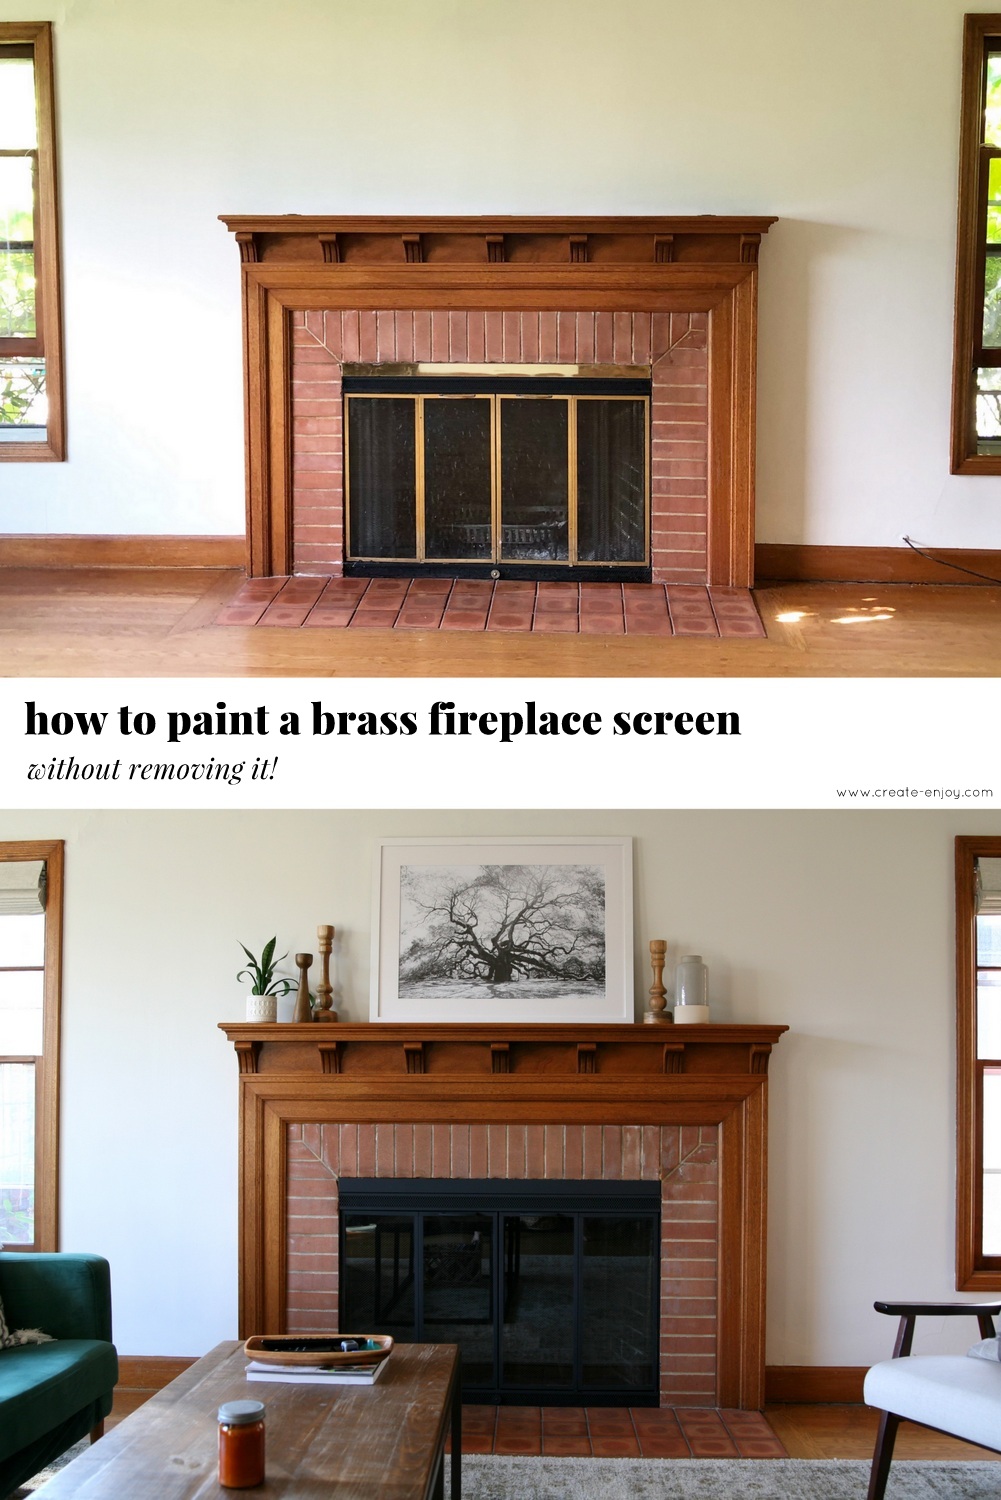
Can I paint fireplace doors without removing them?
Yes, but it’s harder to get full coverage and avoid mess. If I leave them attached, I use painter’s tape to mask the surrounding areas very carefully and lay down a protective sheet below.
Will the paint smell when I use the fireplace?
High-heat paints usually have minimal odor once cured. However, the first few uses may release a slight smell. I burn a small fire at first with windows open to help air it out.
How long does the painted finish last?
With proper prep and materials, the painted finish can last for years. I touch it up if I notice chips, especially in high-use areas. Regular cleaning and avoiding scratches also help.
What color works best for painted brass doors?
Flat black is the most common choice. It hides imperfections well and matches many design styles. Bronze and charcoal are also great for a more custom look.
Is it safe to paint the inside of the fireplace door?
I never paint the side exposed to direct flames. Only the exterior frame should be painted. Paints, even high-heat ones, are not rated for direct flame exposure.
Can I use a brush-on paint instead of spray paint?
Yes, if it’s high-heat and made for metal. I prefer spray paint for smoother finishes, but a good brush and slow, even strokes can work well too—especially in tight spaces or for touch-ups.
Fireplace brass trim can be painted to get an instant living room
Some Like It Hot Centsational Style Fireplace doors, Home

Painted Fireplace Doors : 6 Steps (with Pictures) – Instructables

How to Spray Paint a Brass Fireplace – Bright Green Door

How to Update Fireplace Brass – YouTube
Brass Fireplace Update East Coast Creative
How to paint a brass fireplace screen (without removing it
How to Spray Paint a Brass Fireplace Insert – A Butterfly House

Brass Fireplace Update East Coast Creative
Related Posts: