A DIY tile fireplace hearth project can transform the look and feel of a room, adding character, warmth, and personality to the space. Tiling a fireplace hearth allows homeowners to customize their design to suit their aesthetic preferences and enhance the room’s overall style. With a wide variety of tile options, from classic ceramic and porcelain to natural stone and glass, homeowners can unleash their creativity and create a unique focal point that reflects their individual tastes and style. Additionally, DIY tile projects offer the satisfaction of completing a home improvement project with one’s own hands, while also potentially saving on labor costs.
Images about DIY Tile Fireplace Hearth
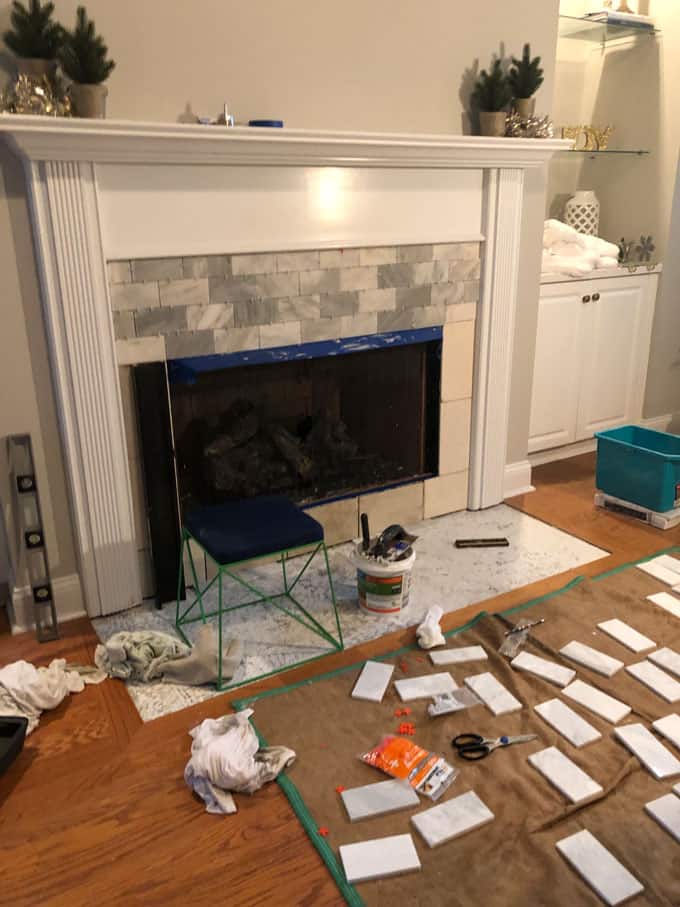
DIY Tile Fireplace Hearth

Before embarking on a DIY tile fireplace hearth project, it’s essential to plan and prepare the space carefully. This includes measuring the dimensions of the hearth, selecting the appropriate type and quantity of tiles, and ensuring that the surface is clean, level, and properly primed. Proper preparation is key to achieving professional-looking results and ensuring the longevity of the tiled hearth. Depending on the type of tile chosen, homeowners may also need to invest in additional materials such as adhesive, grout, spacers, and sealant to complete the project successfully.

When it comes to tile selection, homeowners have a plethora of options to choose from, each offering its own unique aesthetic and practical benefits. Ceramic and porcelain tiles are popular choices for fireplace hearths due to their durability, affordability, and wide range of colors and styles. Natural stone tiles such as slate, marble, and travertine lend a sense of luxury and sophistication to the hearth, while glass tiles add a modern and reflective touch. Regardless of the material chosen, it’s essential to consider factors such as heat resistance, slip resistance, and ease of maintenance when selecting tiles for a fireplace hearth.

Besides enhancing the aesthetic appeal of the fireplace, a DIY tile hearth also offers practical benefits such as heat resistance and easy maintenance. Unlike traditional hearth materials such as wood or carpet, tile is non-combustible and can withstand high temperatures without warping or discoloration. This makes it a safe and durable choice for use around fireplaces. Furthermore, tiled hearths are easy to clean and maintain, requiring only regular sweeping and occasional mopping to keep them looking pristine. With proper care and maintenance, a DIY tile fireplace hearth can provide years of enjoyment and beauty, serving as a focal point for cozy gatherings and creating lasting memories with family and friends.
How To Paint Fireplace Tile With A Stencil: Mistakes To Avoid On

DIY Fireplace Hearth Stencil Makeover Under $100 – Michaela Noelle

How To Tile Over A Brick Hearth – Shine Your Light

DIY Tiling a Fireplace Surround What We Learned Along the Way
Yes You Can! How to Tile a Fireplace Hearth » Jessica Brigham

How To Tile Over A Brick Hearth – Shine Your Light

One Room Challenge {Week 4}: How to Install Cement Tile – Making

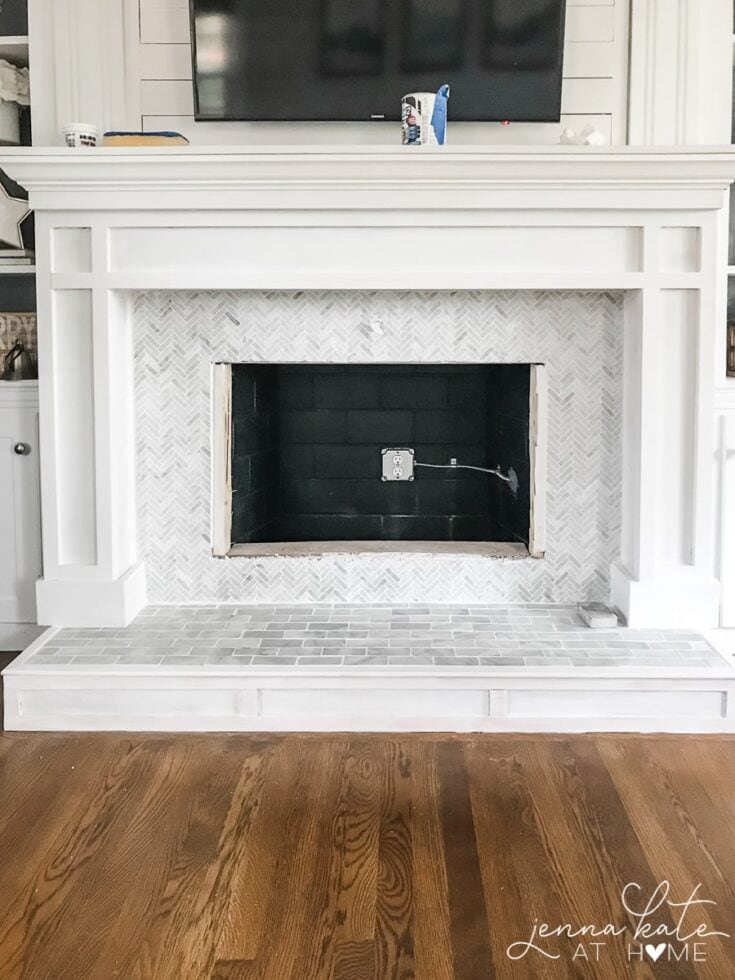
How to Tile a Brick Fireplace – Jenna Kate at Home
Related Posts:
- Retro Fireplace Tiles
- Rustic Tile Fireplace
- Farmhouse Fireplace Tile
- Slate Tile Fireplace Surround
- Modern Tile Fireplace Wall
- Mosaic Tile Fireplace DIY
- Quartz Fireplace Tile
- Ceramic Tiles Fireplace Surround
- Sandstone Tile Fireplace
- Spanish Tile Fireplace
When it comes to home improvement projects, a DIY tile fireplace hearth can add a touch of elegance and style to any room. Whether you are looking to update your existing fireplace hearth or create a new one from scratch, this project can be a fun and rewarding experience. In this article, we will guide you through the process of creating your own tile fireplace hearth, from planning and preparation to installation and finishing touches.
**Planning and Preparation**
The first step in creating a DIY tile fireplace hearth is to carefully plan out your project. Start by measuring the dimensions of your fireplace hearth area to determine how many tiles you will need. Next, choose the type and color of tiles that will best complement your existing decor. Porcelain, ceramic, or natural stone tiles are popular choices for fireplace hearths due to their durability and heat resistance.
After selecting your tiles, gather all necessary tools and materials for the project. This may include tile adhesive, grout, spacers, a trowel, a tile cutter, and safety gear such as gloves and goggles. Ensure that your fireplace hearth is clean and free of any debris before starting the tiling process.
**Installation**
Begin by applying a layer of tile adhesive to the prepared surface of the fireplace hearth using a trowel. Place the tiles onto the adhesive in your desired pattern, using spacers to ensure even spacing between each tile. Use a tile cutter to trim any tiles that need to be cut to fit around corners or edges.
Once all tiles are in place, allow the adhesive to dry completely before proceeding to grouting. Mix the grout according to the manufacturer’s instructions and apply it between the tiles using a grout float. Wipe away any excess grout with a damp sponge before it dries.
**Finishing Touches**
After the grout has fully cured, apply a sealant to protect your new tile fireplace hearth from stains and moisture. This step will also enhance the overall appearance of your project. Allow the sealant to dry completely before using your fireplace.
**Maintenance**
To keep your DIY tile fireplace hearth looking its best, regularly clean it with a mild soap and water solution. Avoid using harsh chemicals or abrasives that can damage the tiles or grout. Periodically inspect the grout lines for any signs of wear or cracking, and reapply sealant as needed to maintain its protective properties.
**Common Mistakes to Avoid**
1. Neglecting proper surface preparation before tiling can result in poor adhesion and uneven tile placement.
2. Using an incorrect type of adhesive or grout for high-heat areas like fireplace hearths can lead to premature failure.
3. Skipping the step of sealing your newly tiled fireplace hearth can leave it vulnerable to stains and damage over time.
4. Failing to regularly maintain and inspect your tile fireplace hearth can result in costly repairs down the line.
**FAQs**
1. Can I install a tile fireplace hearth over an existing surface?
Yes, as long as the surface is clean, level, and structurally sound.
2. How long does it take to complete a DIY tile fireplace hearth project?
The timeline can vary depending on the size of the area and complexity of the design, but typically it can be completed within a weekend.
3. Are natural stone tiles suitable for use on a fireplace hearth?
Yes, natural stone tiles are heat resistant and durable, making them an excellent choice for fireplace hearths.
4. Can I change the color of my grout after it has dried?
Once grout has dried, it cannot be easily changed without removing it entirely. It is important to choose a grout color that complements your tiles before starting the installation process.
5. Is it necessary to hire a professional for installing a tile fireplace hearth?
While hiring a professional can ensure a flawless finish, many homeowners find success with DIY projects by following proper guidelines and techniques like those outlined in this article.
What role do spacers play in the tiling process?
Spacers are small, plastic pieces that are used to create consistent gaps between tiles during installation. These gaps are necessary for several reasons:
1. Spacers help ensure that the tiles are properly aligned and straight, resulting in a professional-looking finish.
2. They allow space for grout to be applied evenly between the tiles, helping to prevent moisture buildup and potential damage over time.
3. Spacers also help compensate for slight variations in tile size, ensuring that the overall pattern remains consistent throughout the installation.
Overall, spacers play a crucial role in achieving a clean, polished look in your tile project.