An outdoor fireplace creates a natural gathering spot in your yard, extending your living space and adding value to your home. While pre-built models can be expensive, a DIY outdoor fireplace offers a budget-friendly alternative that can be customized to match your style. From rustic stone designs to modern concrete builds, there are numerous options to suit different skill levels and materials. This guide explores six key aspects of DIY outdoor fireplace construction, helping you create a functional and attractive centerpiece for your outdoor space.
Choosing the Right Location for Your Fireplace
Selecting the proper location is crucial for both safety and enjoyment of your outdoor fireplace. Start by checking local building codes regarding setback requirements from structures and property lines. Most areas require at least 10 feet clearance from combustible materials like wooden decks or overhanging trees. Consider prevailing wind patterns to minimize smoke blowing toward seating areas or neighbors’ yards.
The fireplace should be placed on stable, level ground that can support its weight. Avoid low-lying areas where water might pool after rain. Position it as a focal point within your outdoor living space, ideally with enough room for seating on at least three sides. Think about views from inside your home too – placing it where it can be seen through windows extends its visual appeal.
Accessibility is another important factor. Ensure there’s enough space for people to move comfortably around the fireplace while maintaining safe distances from the flames. If you plan to cook over the fire, include room for food preparation and serving areas nearby. Take time to observe sunlight patterns throughout the day to find a spot that offers the right balance of shade and sunlight.
Basic Materials Needed for Construction
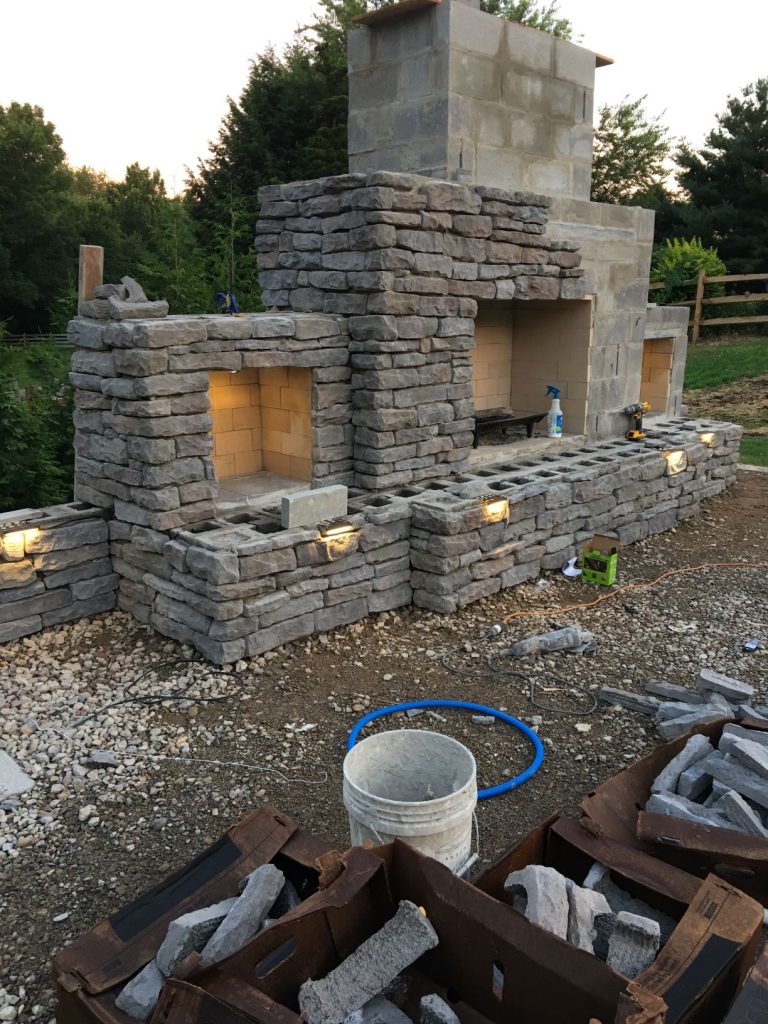
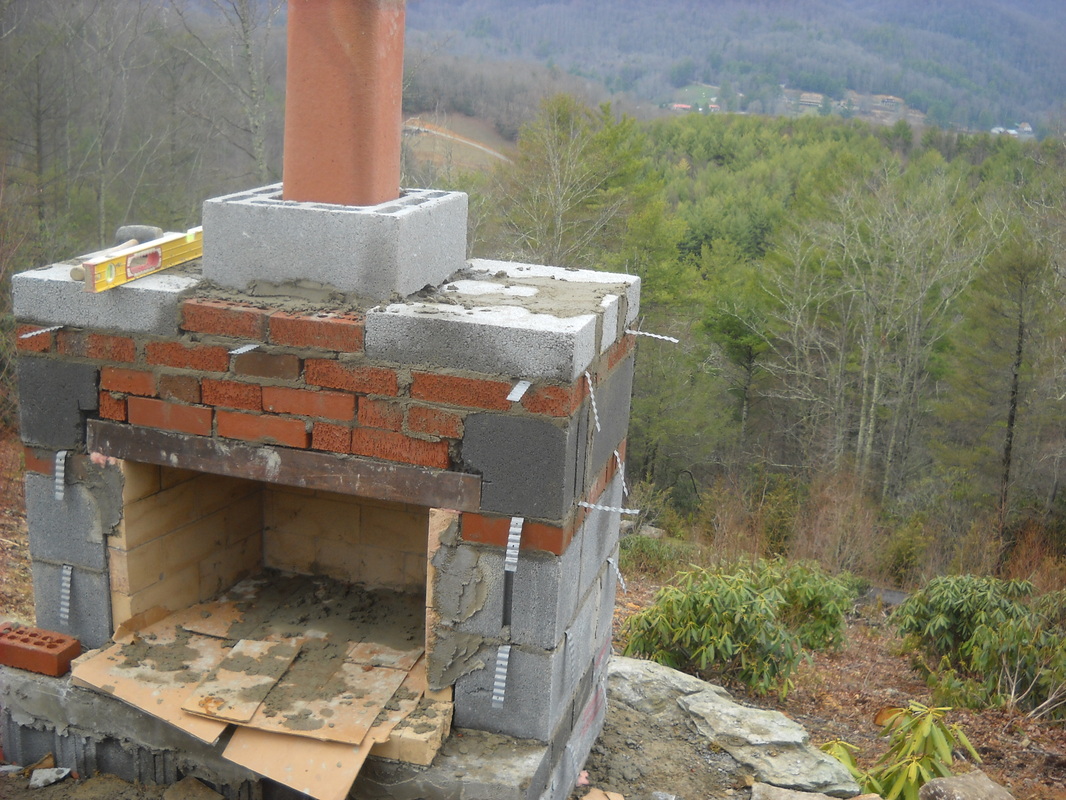
The foundation is the most critical component of any outdoor fireplace. You’ll need concrete footings that extend below the frost line to prevent shifting during freeze-thaw cycles. For the main structure, fire-rated materials like firebrick, refractory mortar, and concrete blocks are essential. These materials withstand high temperatures better than standard bricks or wood.
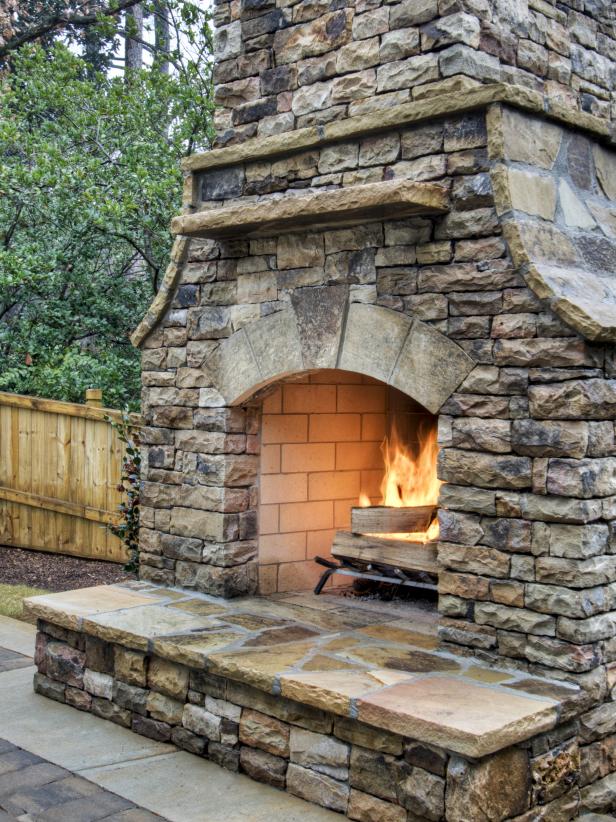
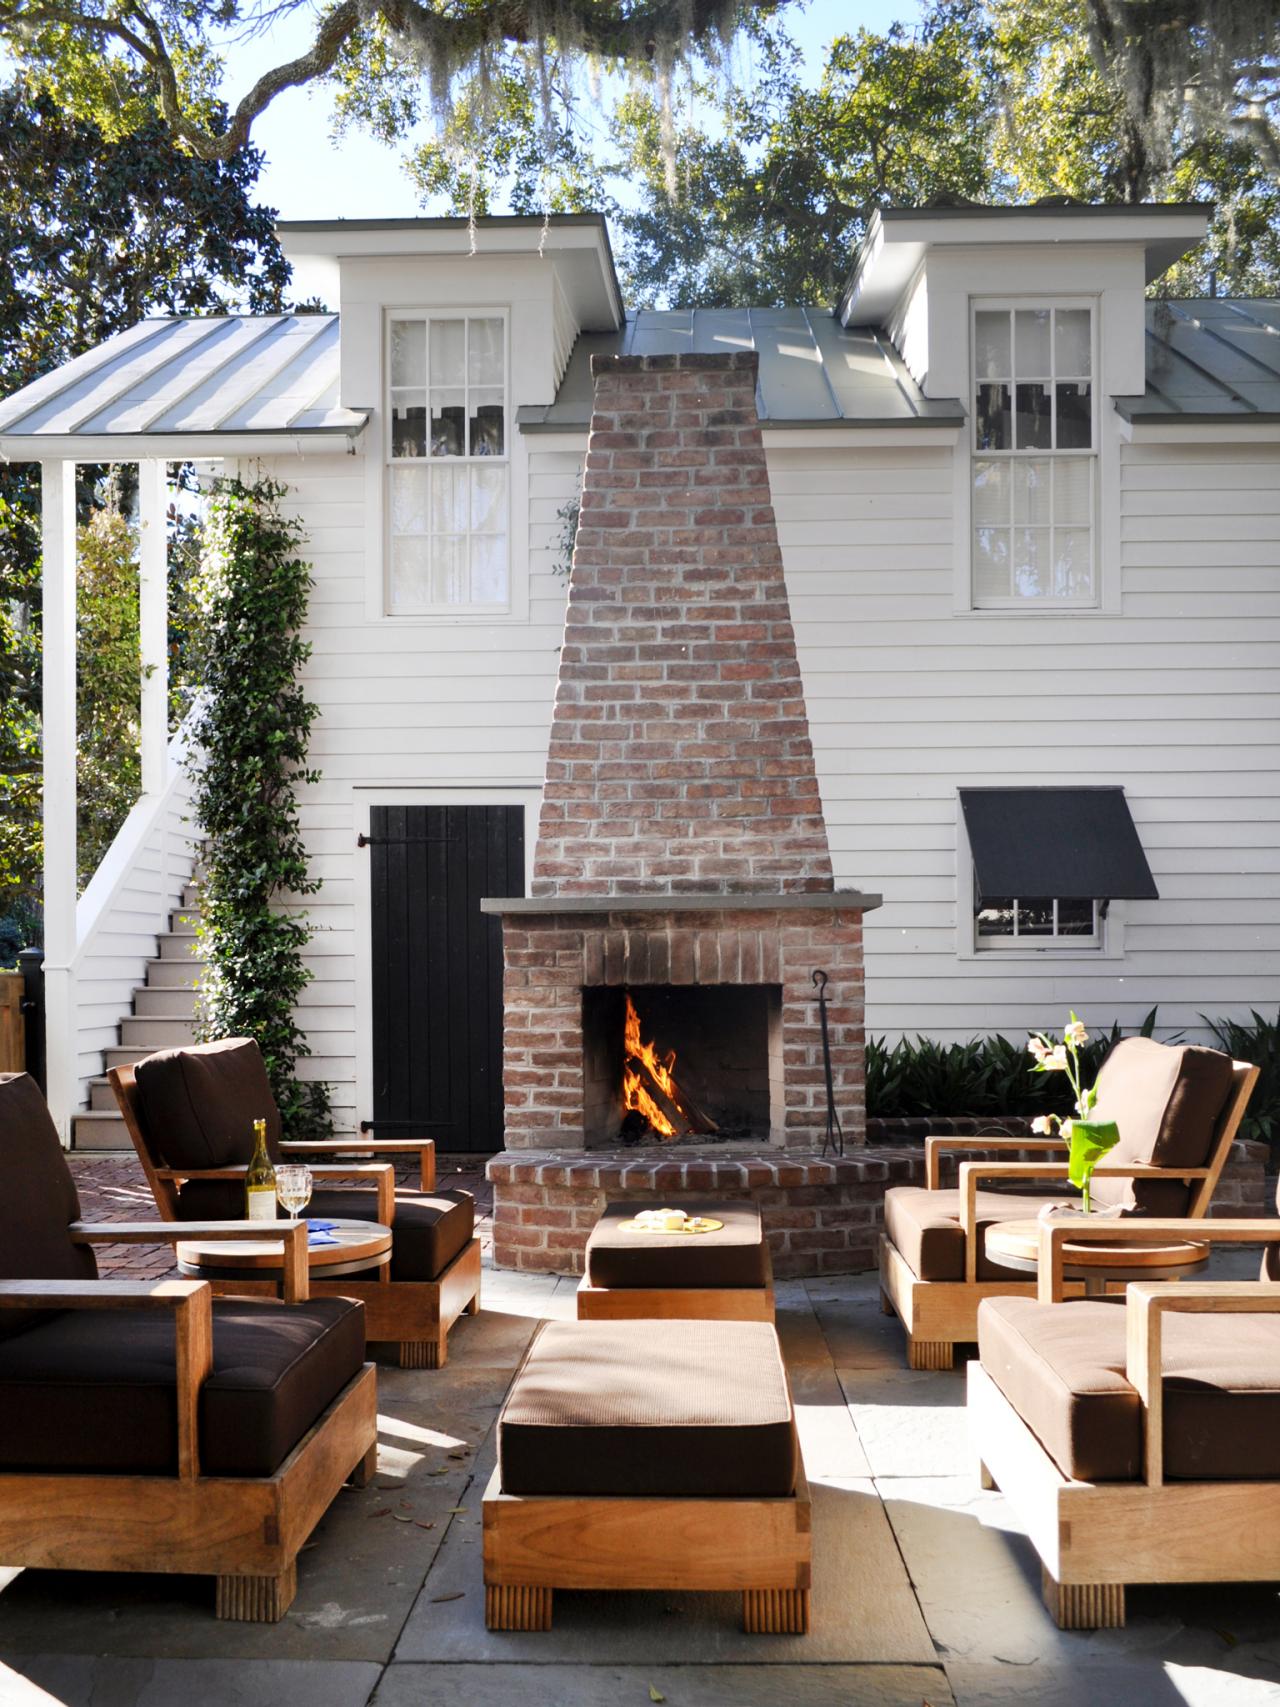
For the exterior finish, popular choices include natural stone, stucco, or tile. Stone offers a classic look but requires more skill to install neatly. Stucco provides a smooth, modern appearance and is easier to work with for beginners. Tile allows for creative patterns but needs proper waterproofing. Don’t forget steel lintels for supporting openings and a spark arrestor for safety.
Additional supplies include gravel for drainage, rebar for reinforcement, and proper tools like masonry trowels, levels, and a wet saw for cutting materials. Protective gear like gloves and safety glasses are must-haves. For those wanting a simpler project, pre-fabricated fireplace inserts can reduce construction time while still allowing for custom exterior finishes.
Simple DIY Fireplace Design Options
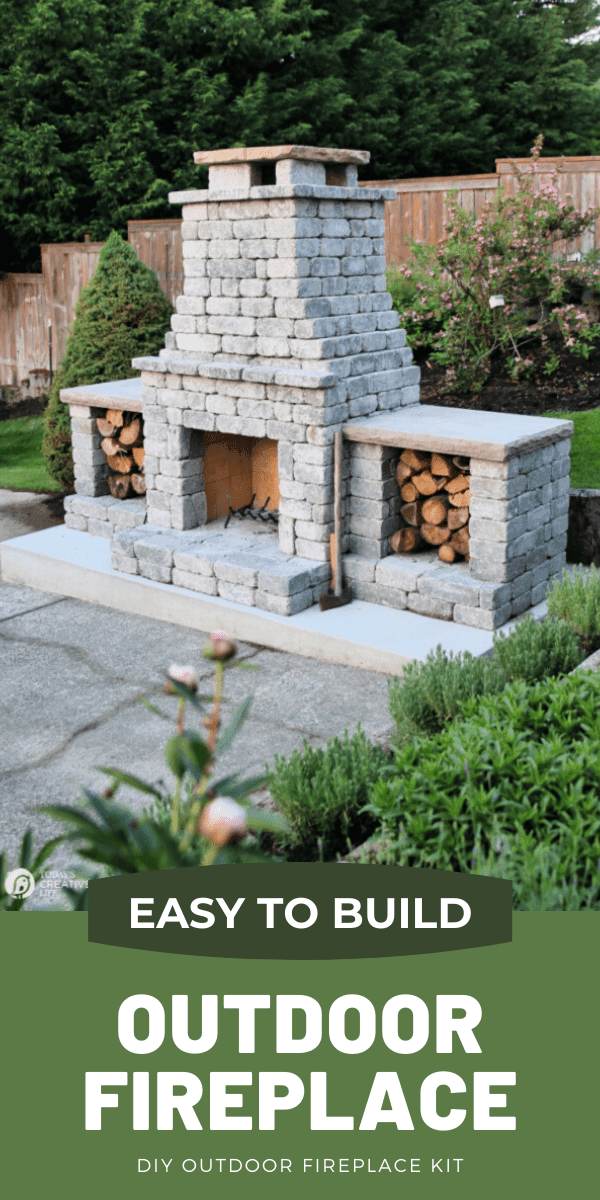
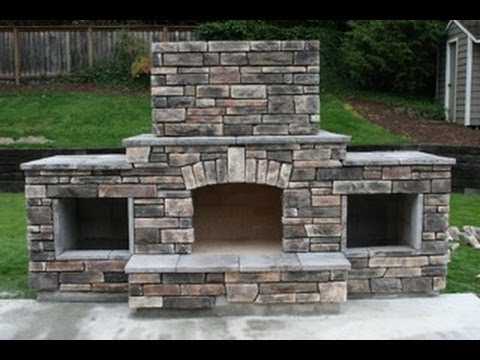
For beginners, a basic square or rectangular design using concrete blocks is the most straightforward approach. This shape requires simple cuts and provides good structural stability. You can enhance its appearance later with stone veneer or stucco. Another easy option is a fire pit with raised walls that create more of a fireplace feel while being simpler to build.
A rustic fieldstone fireplace offers natural charm but requires more skill in fitting irregular stones together. For this style, dry-stack construction (without mortar) works well for lower-height designs. Those wanting a modern look might opt for smooth concrete with clean lines and minimal ornamentation. This style hides construction imperfections well while creating a sleek aesthetic.
Prefabricated metal fireboxes simplify the building process significantly. These units contain all the necessary fireproof components, allowing you to focus on creating an attractive exterior shell. They’re available in various sizes and styles, from traditional to contemporary. This approach combines DIY satisfaction with professional-grade performance and safety.
Step-by-Step Construction Process
Begin by marking the footprint of your fireplace with stakes and string. Excavate the area to the required depth for your footings, typically 12-18 inches below grade. Pour and level the concrete footing, inserting rebar for reinforcement if needed. Allow it to cure completely before proceeding – usually about 48 hours in warm weather.
For the base, start laying your first course of blocks or stones using fireproof mortar. Use a level frequently to ensure each layer is perfectly horizontal. Build up the walls course by course, leaving openings for the firebox and chimney as planned. Install steel lintels over any large openings to support the weight above them.
As you near the top, create a smoke chamber that narrows toward the chimney opening to improve draft. Finish with a proper chimney that extends at least 2 feet above any roof line within 10 feet. Apply your chosen exterior finish once the basic structure is complete, allowing proper drying time between steps.

Safety Considerations and Building Codes
Always check local regulations before starting construction. Many areas require permits for permanent outdoor fireplaces, especially those over a certain height or connected to gas lines. There may be specific requirements for chimney height, spark arrestors, and clearance from combustible materials that must be followed.
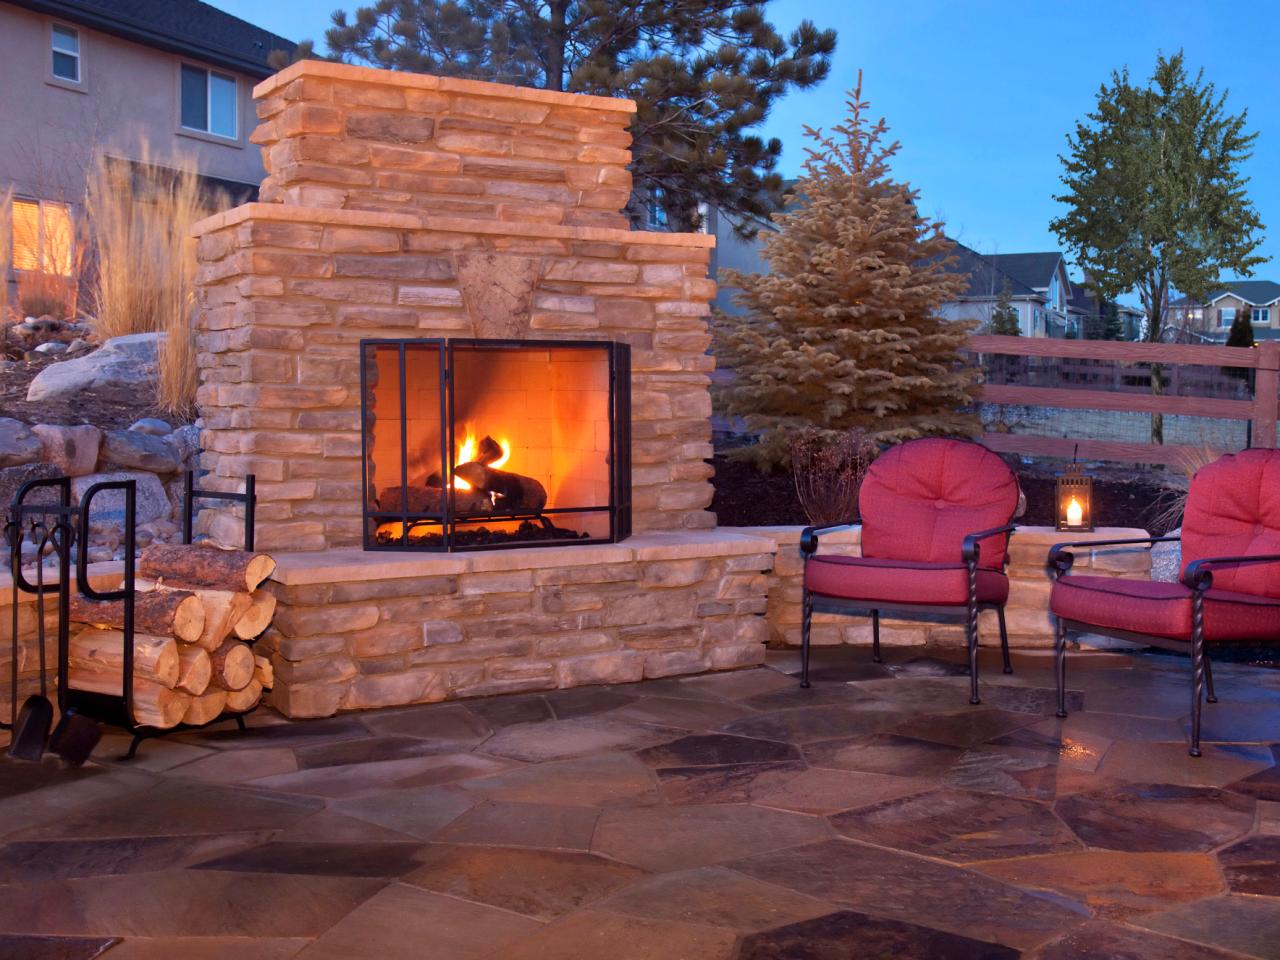
Proper ventilation is critical to prevent smoke from backing up into seating areas. The chimney should be tall enough to create good draft – generally at least 3 feet above the fireplace opening. The firebox interior should be lined with firebrick and refractory mortar to withstand high temperatures without cracking.
Create a non-combustible zone around the fireplace using stone, brick, or concrete. This safety perimeter should extend at least 3 feet in all directions. Keep a fire extinguisher nearby and never leave fires unattended. If using gas, have all connections professionally inspected before first use.
Finishing Touches and Maintenance
Once construction is complete, add personal touches to make the fireplace your own. Built-in seating walls, stone caps for leaning drinks, or integrated wood storage can enhance functionality. Landscape lighting around the area creates ambiance and improves safety when using the fireplace at night.
For maintenance, regularly inspect mortar joints and repair any cracks to prevent water damage. Cover the fireplace when not in use during rainy seasons to prolong its life. Clean the firebox after each use to prevent creosote buildup in wood-burning models. Touch up exterior finishes as needed to keep your fireplace looking its best.
Consider adding accessories like a swing-out grill grate for cooking or decorative fire glass for gas models. These finishing elements transform your DIY project from basic to exceptional. With proper care, your handmade outdoor fireplace will provide years of enjoyment and become a cherished feature of your outdoor living space.

Best Photographs Fireplace Outdoor how to build Tips Planning for

How to Plan for Building an Outdoor Fireplace HGTV
Stonetutorials – Living Stone Masonry
How to Build an Outdoor Stacked Stone Fireplace
DIY Outdoor Fireplace Ideas
Related Posts:
- Stacked Stone Outdoor Fireplace
- DIY Small Outdoor Fireplace
- Outdoor Fireplaces Firepits
- Simple Brick Outdoor Fireplace
- Ideas For Outdoor Fireplaces On Patios
- Outdoor Fireplace Ideas Stone
- Outdoor Rock Fireplace Designs
- DIY Outdoor Fireplace Designs
- Outdoor Fireplace Ideas Deck
- Outdoor Cooking Fireplace Designs