A DIY airstone fireplace is a fantastic project for homeowners looking to add a touch of rustic elegance to their living spaces. Airstone, a lightweight and versatile material made from recycled materials, mimics the appearance of real stone but is much easier to work with. This makes it an ideal choice for DIY enthusiasts who want to create a stunning fireplace without the hefty price tag and complex installation process associated with natural stone. With a DIY airstone fireplace, you can transform any ordinary room into a cozy retreat, whether it’s a living room, bedroom, or even an outdoor patio.
Images about DIY Airstone Fireplace
DIY Airstone Fireplace

To begin your DIY airstone fireplace project, you’ll first need to gather the necessary materials and tools. These typically include airstone panels, adhesive, a trowel, a saw, a level, a tape measure, and safety gear such as gloves and goggles. Airstone panels come in a variety of colors and textures, allowing you to customize the look of your fireplace to suit your aesthetic preferences. Once you have all your materials assembled, it’s time to start the installation process.
![]()
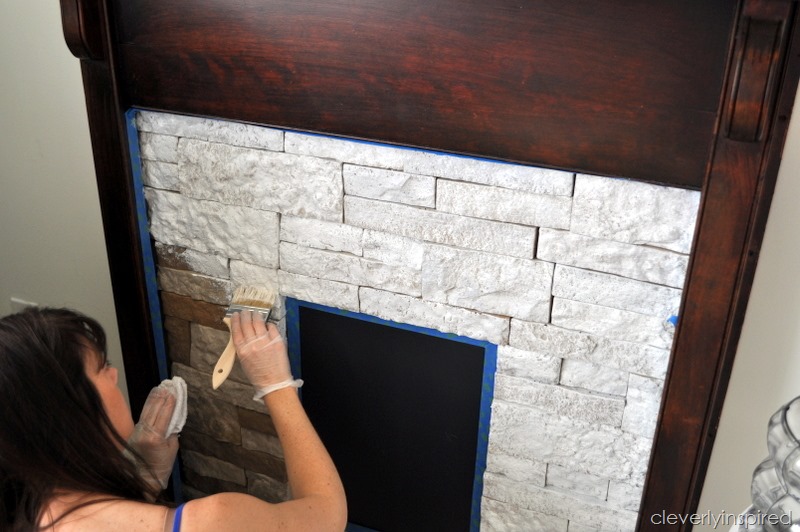
Start by preparing the surface of your fireplace. Clean it thoroughly and make any necessary repairs to ensure a smooth and even application of the airstone panels. Next, apply a layer of adhesive to the back of each panel using a trowel. Press the panels firmly onto the surface of the fireplace, starting from the bottom and working your way up. Use a level to ensure that each panel is straight and properly aligned. If needed, use a saw to trim the panels to fit around corners or other obstacles.

As you continue to add airstone panels to your fireplace, be sure to stagger the joints for a more natural and seamless look. This will help disguise the individual panels and create the illusion of a solid stone surface. Once all the panels are in place, allow the adhesive to dry completely before applying any finishing touches. You can further enhance the appearance of your DIY airstone fireplace by adding a mantel, hearth, or decorative accents such as candles or artwork.
Overall, a DIY airstone fireplace is a budget-friendly and relatively easy project that can dramatically enhance the look and feel of any room. Whether you’re a seasoned DIYer or a novice looking to tackle your first home improvement project, creating a stunning fireplace with airstone is sure to impress friends and family alike. So grab your tools and get ready to cozy up by the fire in style.

Family Room Makeover Part 4: AirStone Fireplace Makeover

So much fun!! DIY airstone electric fireplace, ambroise maple

Remodelaholic DIY Fireplace Makeover Part Three: AirStone

Creating a Faux fireplace: Airstone Tutorial
Family Room Makeover Part 4: AirStone Fireplace Makeover

Pin on House-great room ideas

DIY Fireplace Remodel Timelapse – Airstone Installation
AirStone Fireplace Makeover {From Ugly to Incredible!}

Remodelaholic DIY Fireplace Makeover Part Three: AirStone

DIY Fireplace Surround- Using AirStone Sweet Parrish Place

Related Posts:
- Country Stone Fireplace
- Rustic Stone Fireplace Ideas
- Farmhouse Stone Fireplace
- Corner Stone Fireplaces Ideas
- Log Cabin Stone Fireplace
- French Style Stone Fireplaces
- Portuguese Stone Fireplaces
- Indoor Stone Fireplace Designs
- Corner Stone Fireplace Ideas
- Natural Stacked Stone Fireplace
A DIY airstone fireplace is a stunning addition to any home, offering the ambiance of a traditional fireplace with a modern twist. Airstone is a lightweight faux stone material that is easy to install and can be used to create a variety of looks, from rustic to contemporary. In this article, we will guide you through the process of creating your own DIY airstone fireplace, from planning and preparation to installation and finishing touches.
Planning and Preparation
Before you begin your DIY airstone fireplace project, it is important to carefully plan out the design and gather all the necessary materials. Start by measuring the dimensions of your fireplace and determining how much airstone you will need. You can purchase airstone panels at most home improvement stores, or you may choose to cut your own from larger sheets.
Next, decide on the layout and pattern for your airstone fireplace. Will you cover the entire fireplace surround, or just a portion of it? Do you want to create a focal point with a herringbone or chevron pattern? Take some time to sketch out your design ideas and make sure you have all the tools you will need for installation.
How do I calculate how much airstone I need for my fireplace?
To calculate the square footage of your fireplace surround, measure the length and height of each section that you plan to cover with airstone. Multiply the length by the height to get the square footage of each section, then add them all together for the total amount of airstone needed.
Installation
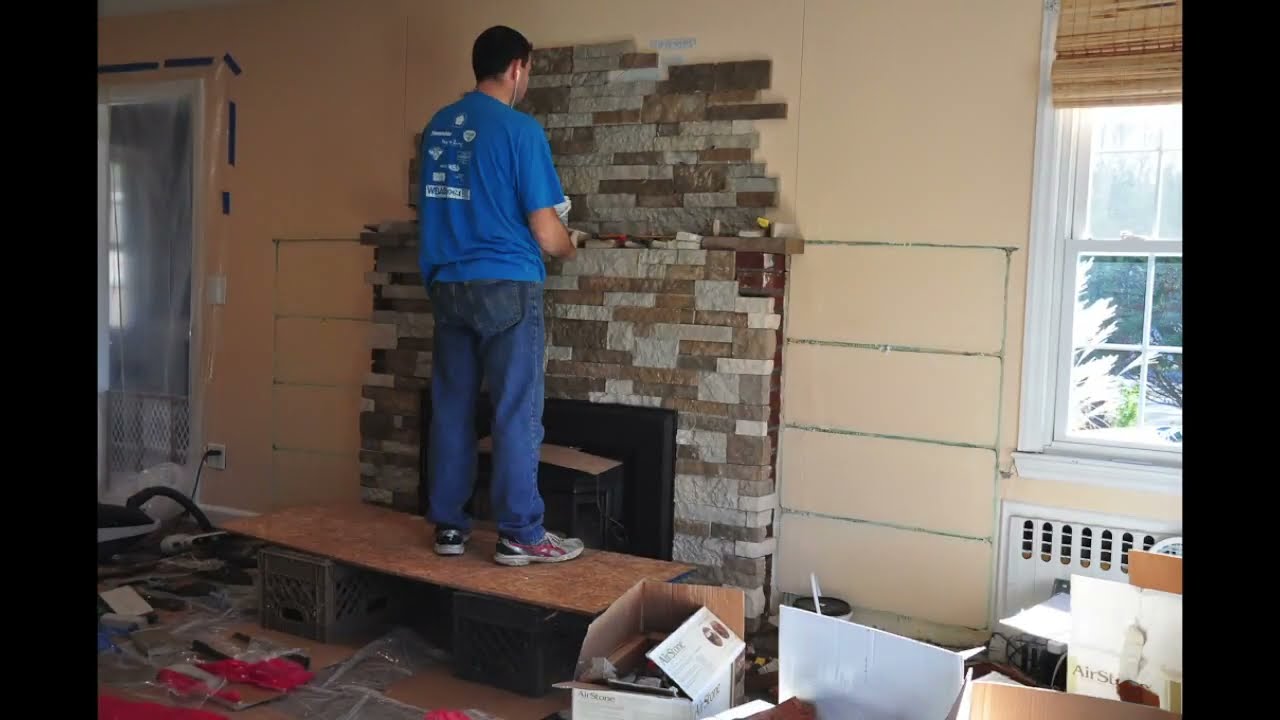
The first step in installing your DIY airstone fireplace is to prepare the surface. Clean the area thoroughly and use a stud finder to locate any studs in the wall. Install cement board over the existing surface to provide a stable base for the airstone panels.
Next, apply construction adhesive to the back of each airstone panel and press it firmly onto the wall. Use spacers between panels to ensure even spacing and straight lines. Cut panels as needed to fit around corners or edges, using a saw or utility knife.
As you work, step back frequently to check for alignment and adjust individual stones as necessary. Once all panels are in place, fill in any gaps with grout or caulk to complete the look of your DIY airstone fireplace.
Do I need any special tools for installing an airstone fireplace?
While basic tools such as a tape measure, level, and utility knife are essential for this project, you may also find it helpful to have a trowel, spacers, and a saw for cutting panels as needed.
Finishing Touches
Once your DIY airstone fireplace is installed, it is time to add finishing touches to enhance its appearance. Consider painting or staining the mantel in a complementary color that ties in with your overall design scheme. Add decorative accents such as candles, vases, or artwork above the fireplace to create a cohesive look.
You may also want to consider installing a mantel shelf or hearth extension to further enhance the visual impact of your new airstone fireplace. These additions can provide additional space for displaying photos or seasonal decor items and help frame the focal point of your room.
Can I use an airstone fireplace in an outdoor setting?
While airstone is technically suitable for outdoor use, it may not hold up as well in extreme weather conditions. If you plan to install an airstone fireplace outdoors, be sure to seal it properly with an outdoor sealant and take precautions to
What are the steps involved in planning and preparing for a DIY airstone fireplace project?
- Research and gather inspiration: Start by researching different types of airstone fireplace designs and gathering inspiration from various sources such as online platforms, magazines, and home improvement stores.
- Set a budget: Determine how much you are willing to spend on the project and make a list of all the materials and tools you will need to purchase.
- Measure and plan: Measure the space where you plan to install the airstone fireplace and create a detailed plan for the layout and design of the project.
- Purchase materials: Once you have your plan in place, purchase all the necessary materials including airstone veneers, adhesive, grout, mortar, a trowel, a level, a saw, and any other tools needed for installation.
- Prepare the space: Clear out the area where you will be installing the fireplace and ensure that it is clean and free of debris. Protect any surrounding surfaces with drop cloths or plastic sheeting.
- Install the airstone veneers: Begin by applying adhesive to the back of each airstone veneer and carefully adhere them to the surface of the fireplace in accordance with your design plan.
- Grout and finish: Once all the airstone veneers are in place, use grout to fill in any gaps between the stones and smooth out the surface. Allow the grout to dry completely before finishing with a sealant if desired.
- Enjoy your new fireplace: Once the project is complete, sit back and enjoy your newly transformed space with a beautiful DIY airstone fireplace.
What tools are essential for installing an airstone fireplace, and are there any optional tools that may be helpful?
Essential tools for installing an airstone fireplace include:
- Trowel or putty knife for applying adhesive
- Adhesive specifically designed for airstone installation
- Level to ensure the airstones are installed straight
- Saw for cutting airstones to fit around corners and edges
- Gloves and eye protection for safety
Optional tools that may be helpful include:
- Grout for filling in any gaps between airstones
- Spacers to help maintain consistent spacing between airstones
- Caulk gun for applying grout or caulk
- Paintbrush or sponge for cleaning off excess adhesive or grout
- Masonry sealant to protect the finished fireplace from stains and moisture damage
Having a variety of tools on hand can make the installation process smoother and more efficient. It is important to follow the manufacturer’s instructions and safety guidelines when using these tools.