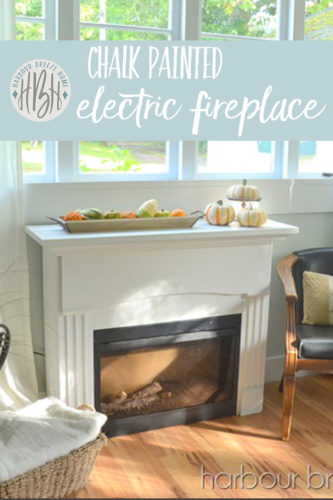
Giving your electric fireplace a chalk paint makeover can completely transform its appearance without the need for replacement. This versatile paint adheres to various surfaces found on electric fireplaces, including metal, wood, and composite materials. Whether you want to update an outdated unit or create a custom look that matches your decor, chalk paint offers an easy, low-commitment solution. This guide covers six essential aspects of using chalk paint on electric fireplaces, from preparation to finishing touches.
Choosing the Right Chalk Paint
Selecting quality chalk paint ensures good coverage and durability on your electric fireplace. Look for brands specifically formulated for high-heat areas if painting near the heating elements. Standard chalk paint works for the surround and mantel, but the firebox area may require heat-resistant varieties. Consider the paint’s viscosity—thicker formulas minimize drips on vertical surfaces but may need thinning for smooth application.
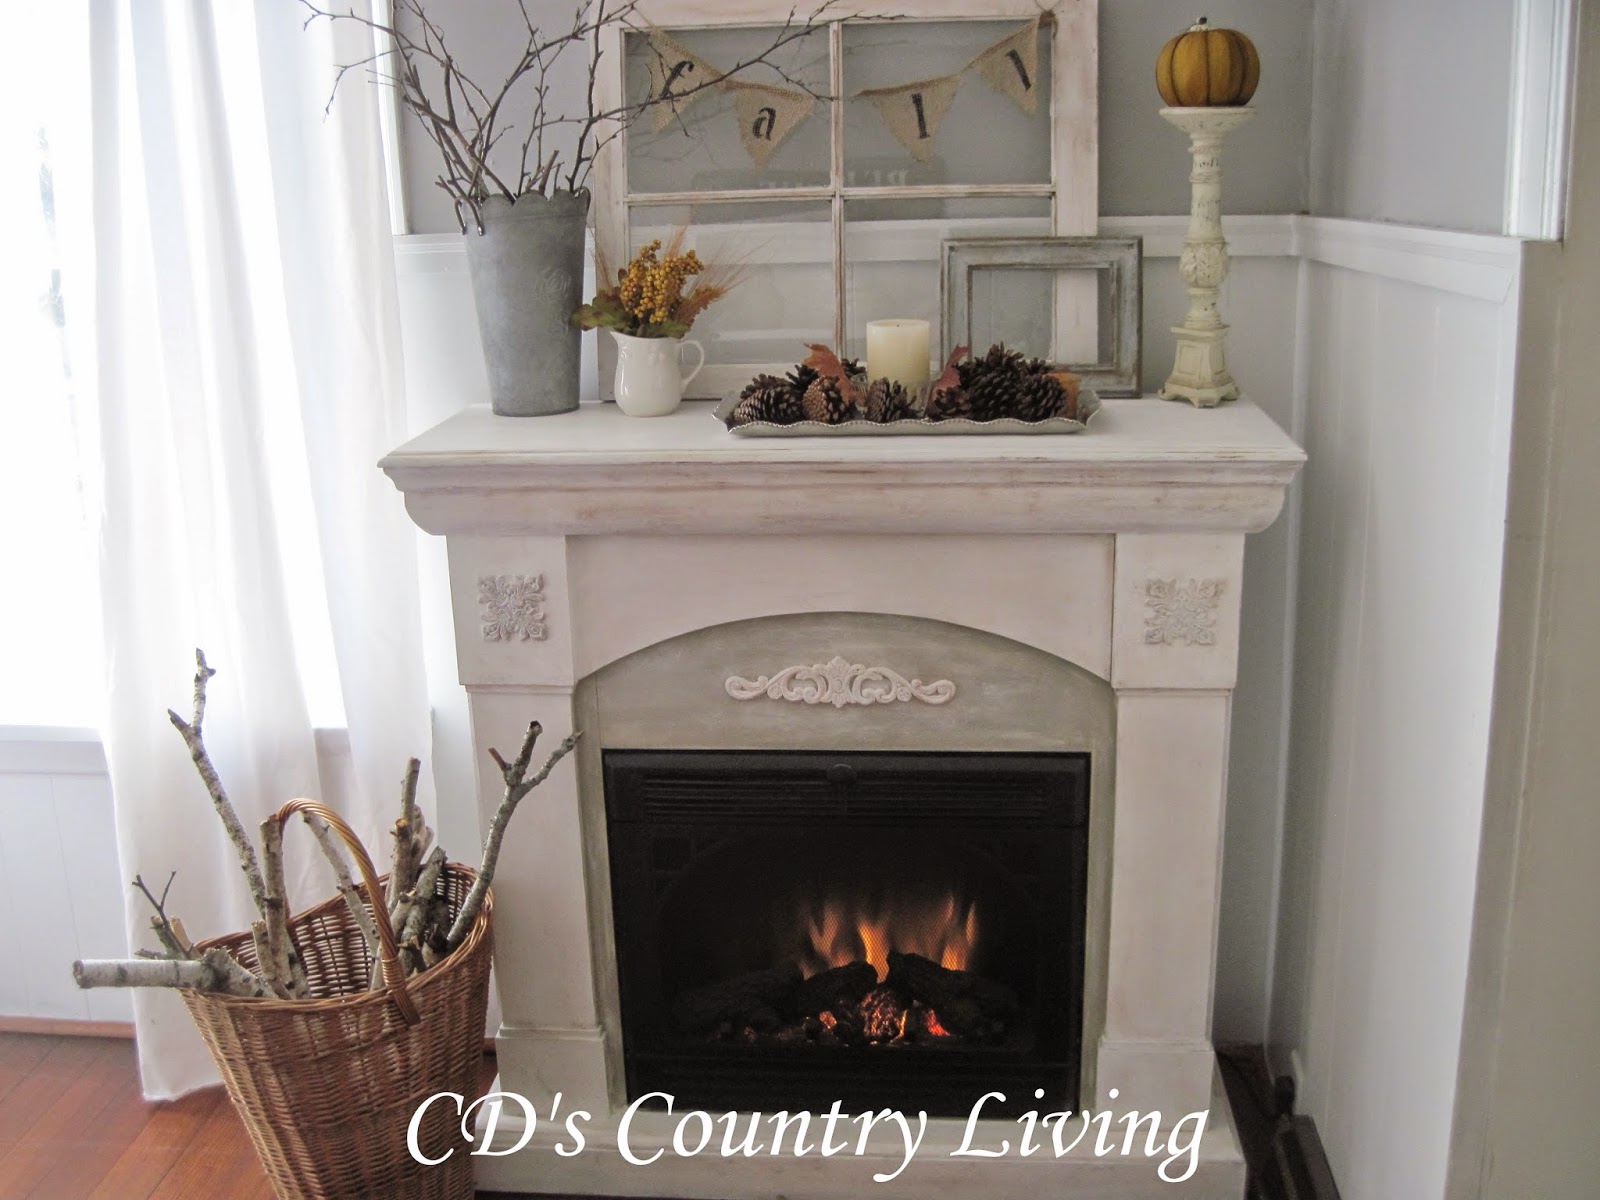
Color choice significantly impacts the fireplace’s new appearance. Light colors like whites and creams make small fireplaces appear larger and reflect more light. Darker shades create dramatic focal points but show dust more easily. Neutral tones provide flexibility to change room decor without repainting. Some homeowners opt for two-tone designs, using different colors on the mantel versus the firebox surround for visual interest.
Specialty chalk paint effects can elevate the fireplace’s design. Distressing techniques give vintage character, while color washing creates subtle depth. Metallic wax finishes over base coats add shimmer for glamorous styles. Chalk paint also accepts stenciling well for adding patterns. Consider the room’s overall aesthetic when selecting finishes—a heavily distressed look suits farmhouse decor, while sleek metallics complement modern spaces.
Surface Preparation Steps
Proper cleaning is essential for chalk paint adhesion. Wipe the entire fireplace with a degreaser to remove dust, wax, or polish residues. Pay special attention to areas near the firebox that may have accumulated soot or smoke-like deposits from the electric flames. For glossy surfaces, lightly sand with 220-grit sandpaper to create texture for the paint to grip.
Repair any damage before painting. Fill dents or scratches in wood surrounds with wood filler, and smooth uneven metal surfaces with automotive-grade filler. Sand repairs flush once dry. Remove any loose or flaking paint from previous finishes. Tape off glass panels, heating vents, and electrical components with painter’s tape. Cover the floor and nearby walls with drop cloths to protect from paint splatters.
Prime surfaces if the fireplace has stains or dramatic color changes. While chalk paint often advertises no-primer-needed claims, problematic surfaces benefit from a bonding primer. This is particularly important for metal fireboxes or surrounds that may have slick factory finishes. Allow primers to dry completely according to manufacturer instructions before painting.

Painting Techniques for Best Results
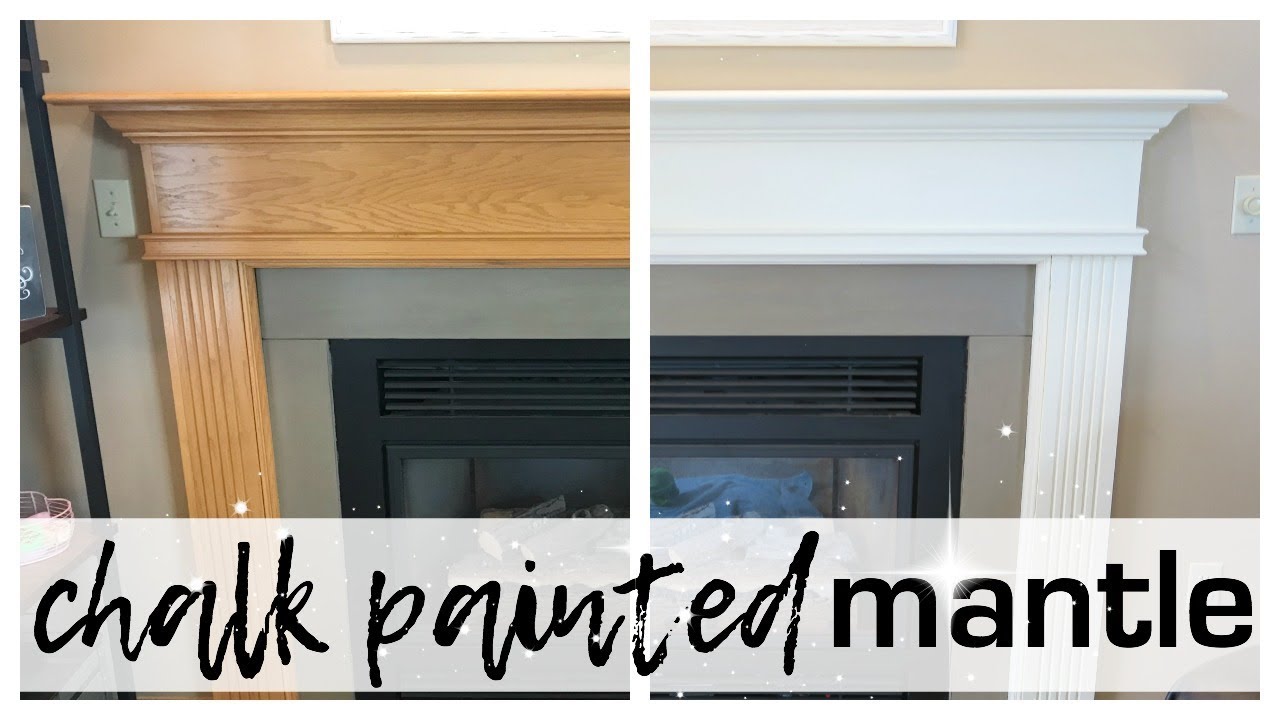
Apply chalk paint in thin, even coats using high-quality brushes or foam rollers. Angled brushes work well for cutting in around edges, while small foam rollers create smooth finishes on flat surfaces. Maintain a wet edge to prevent lap marks, working systematically from top to bottom. Most electric fireplaces require 2-3 coats for full coverage, with drying times between coats varying by brand.
Create intentional texture if desired by using specialty techniques. Dry brushing—using a barely-loaded brush—accentuates surface details on carved mantels. Layering slightly different colors builds depth, especially when lightly sanded between coats. For two-tone designs, paint the entire unit with the lighter color first, then add the darker shade to selected areas after the base coat dries.
Pay special attention to the firebox opening edges and any decorative trim. These high-visibility areas benefit from careful brushwork. If painting the interior firebox, use heat-resistant paint and avoid covering any heating elements or electrical components. Consider removing glass panels before painting the surround for cleaner edges, if the fireplace design allows.

Protecting the Painted Surface
Sealing chalk paint is crucial for electric fireplaces due to frequent touching and cleaning. Clear wax provides a traditional matte finish that’s easy to touch up. Apply with a lint-free cloth, working in small sections, then buff once dry. Polyacrylic sealers offer more durability with brush-on application, ideal for high-traffic areas. Multiple thin coats provide better protection than one thick coat.
For areas near the heat source, use heat-resistant clear coats. These specialty sealants withstand higher temperatures without yellowing or peeling. Always check the product’s temperature rating against your fireplace’s specifications. Avoid sealing the actual heating elements or any moving parts to prevent malfunction.
Maintain sealed surfaces with gentle cleaning. Dust regularly with a soft cloth to prevent buildup. For smudges or fingerprints, use a slightly damp microfiber cloth—excess water can damage the finish. Reapply protective wax or sealer annually in high-use areas to maintain the paint’s appearance and durability.
Styling the Painted Fireplace
Accessorizing enhances the chalk-painted fireplace’s new look. For farmhouse styles, layer vintage tools, wooden signs, or galvanized metal accents. Modern designs benefit from minimalist decor like a single sculptural piece or framed art leaning on the mantel. Consider the paint color when selecting accessories—brass tones pop against dark paints, while silver accents complement cooler hues.
Lighting impacts the painted finish’s appearance. Install sconces or picture lights to highlight textured paint techniques. LED strip lighting inside the firebox casts a glow that reflects off the painted surround. During daytime, position mirrors to bounce natural light onto the fireplace, making chalk paint’s matte finish appear softer.
Seasonal decor changes keep the fireplace looking fresh. Switch out accessories for holidays—evergreen garlands for winter, pastel ceramics for spring. The neutral backdrop of chalk paint accommodates various color schemes. For temporary seasonal changes, removable decals or chalkboard-painted sections allow creative expression without permanent alterations.

Safety Considerations
Verify your electric fireplace manufacturer’s guidelines before painting. Some warranties may void if certain components are painted. Never paint over ventilation grilles, heating elements, or electrical connections. Maintain all manufacturer-specified clearances around heat-producing areas after painting.
Use proper ventilation when applying chalk paint and sealers. Open windows and use fans to circulate air, especially when working with oil-based waxes or sealants. Wear a respirator mask when sanding or spraying finishes. Keep the area well-ventilated until all paint odors completely dissipate.
Monitor the fireplace after painting during initial uses. Watch for any unusual odors when first operating the heater after the makeover. Check that no paint has accidentally covered temperature sensors or airflow channels. If the unit shows signs of overheating or malfunction, discontinue use immediately and consult an electrician.
With proper materials and techniques, a chalk paint transformation can give your electric fireplace new life at minimal cost. The project typically takes a weekend from prep to final sealing, offering immediate gratification. Unlike replacement, this approach allows you to test colors and styles without permanent commitment. As your decor evolves, the fireplace can be easily repainted to match, making chalk paint an ideal solution for customizable, budget-friendly updates.

Oak electric fireplace transformed with chalk paint and glass tile

Fireplace Makeover – at home with Ashley

How to Paint a Laminate Fireplace – MomAdvice
I CHALK PAINTED OUR MANTLE!
Pin on For the Home

A Fireplace Makeover! – Pallet and Pantry
Refurbished “Fireplace” u2014 Ashley Diann Designs
Easy DIY fireplace makeover

Related Posts:
- Small Free Standing Electric Fireplace
- Electric Fireplaces White Finish
- Limestone Electric Fireplace
- Electric Fireplace Surround DIY
- Electric Fireplace With TV
- The Most Realistic Electric Fireplace
- Chalk Paint Electric Fireplace
- Victorian Style Electric Fireplace
- Electric Fireplace Real Looking Flame
- Amish Mantel Electric Fireplace