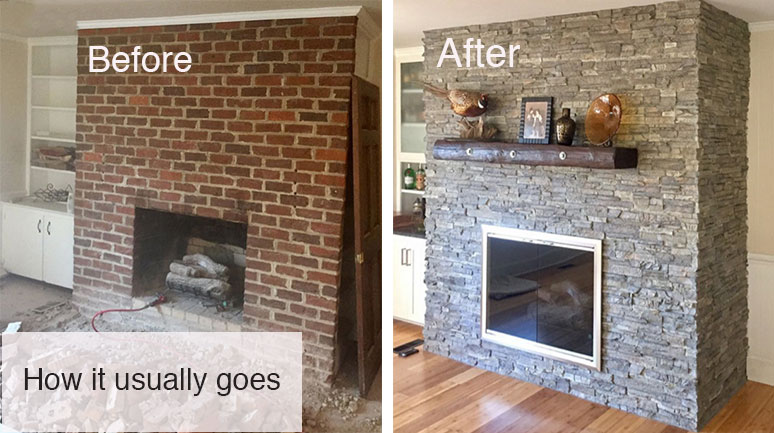
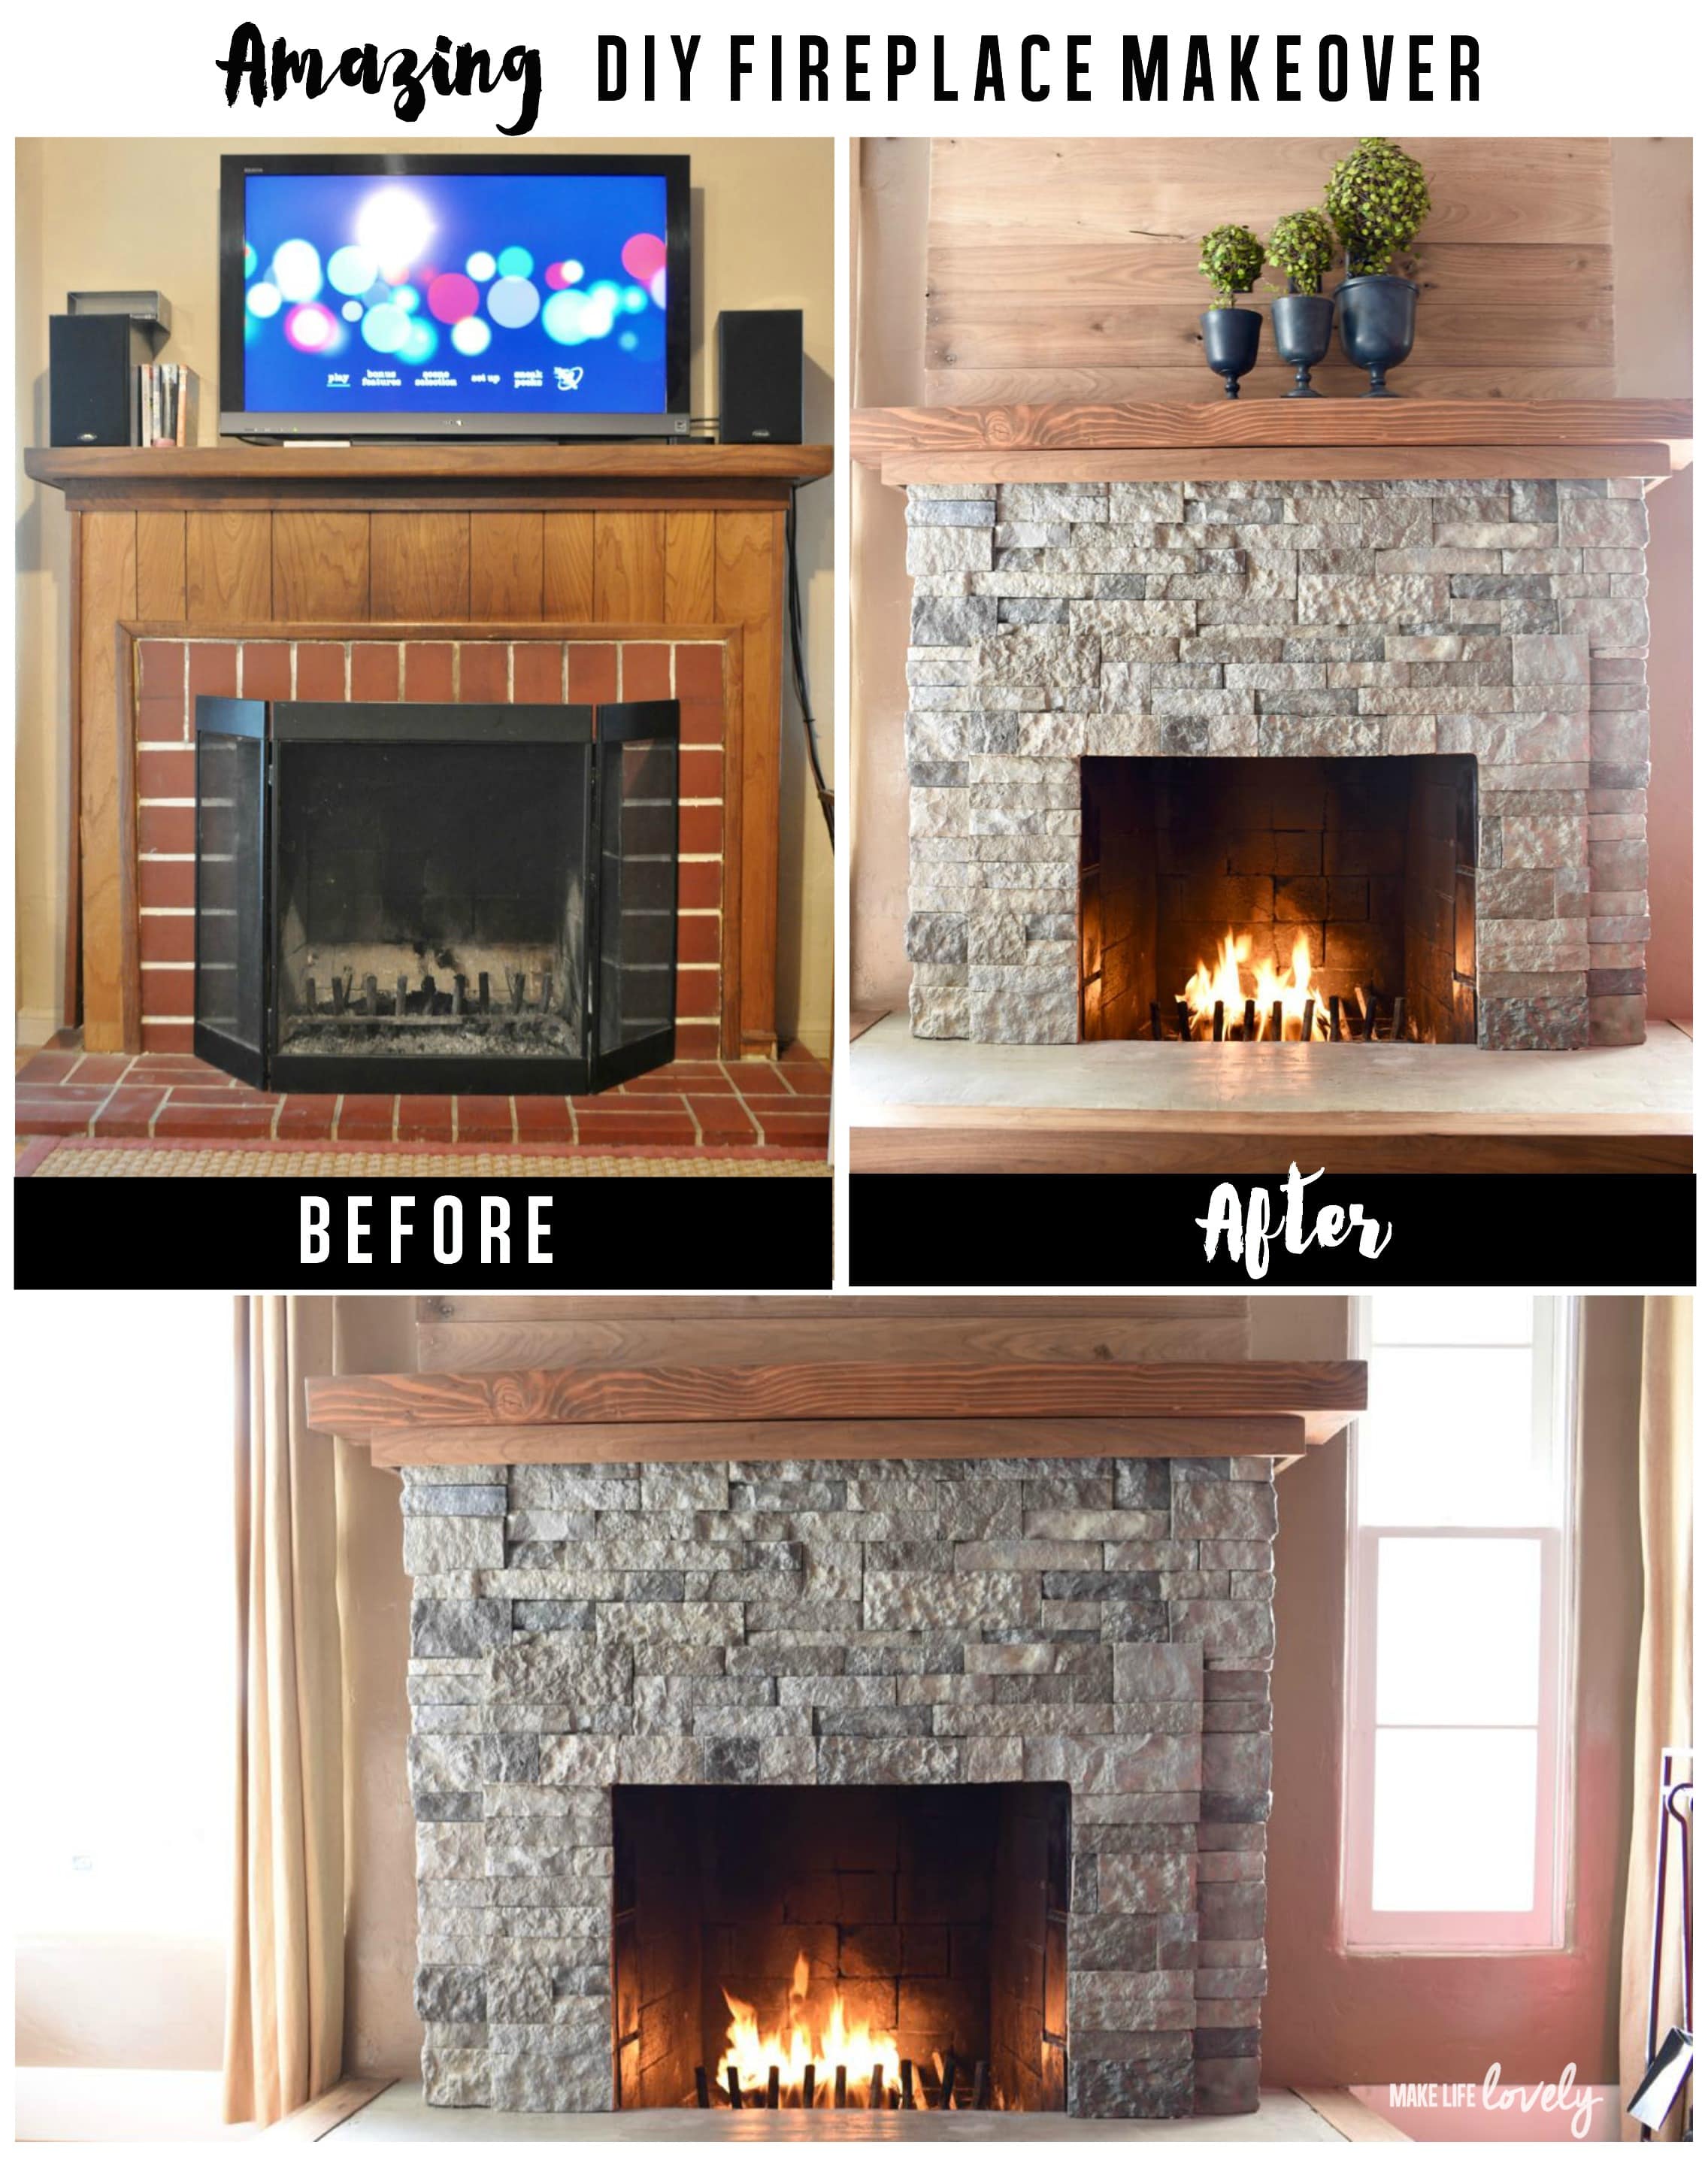
A brick fireplace is generally the focal point of a room, but outdated or weathered brick can make your area feel drab. Replacing brick with stone results in a dramatic alteration that takes your fireplace from utilitarian to magnificent. Whether you prefer the rustic beauty of fieldstone or the sleek elegance of stacked stone, this update provides texture, depth, and timeless appeal. As someone who has executed multiple fireplace restorations, I will walk you through the process, material options, and design considerations to ensure you get amazing results.
Inspecting Your Existing Brick Fireplace
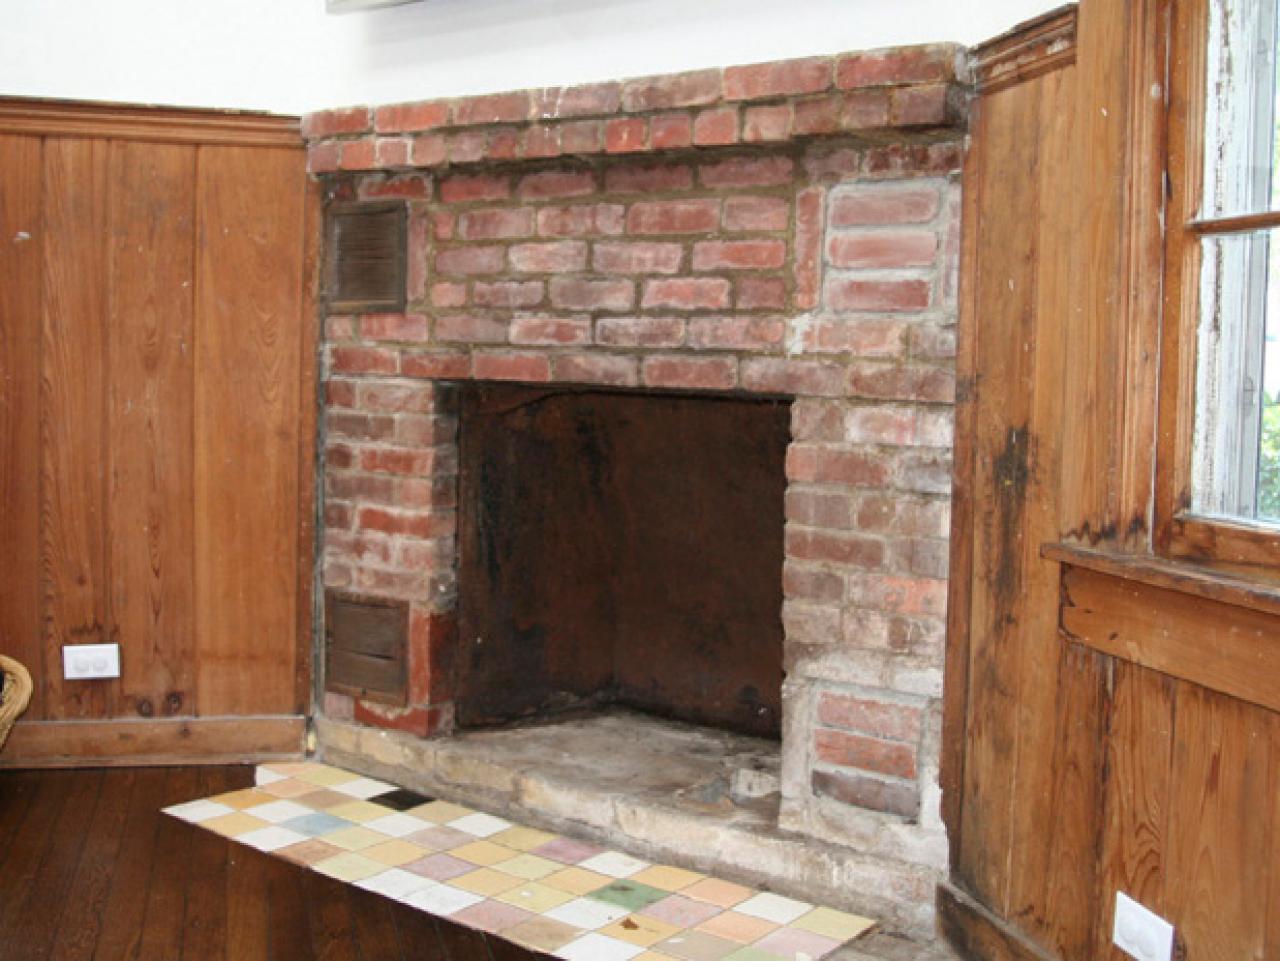
Before you begin any stone remodeling, assess the present state of your brick fireplace. Strong, well-built bricks require different preparation than disintegrating or broken constructions. Look for loose bricks, fractures in the mortar, and signs of water damage. Minor difficulties, in my experience, may frequently be addressed during the remodel, but severe structural problems may necessitate professional intervention initially. Also, evaluate the texture of the brick; smooth areas may require roughening to improve mortar adhesion.
Measure your fireplace carefully, taking note of its dimensions and any architectural characteristics. The surround, hearth, and mantel all influence your stone selection and installation strategy. Before I begin, I always draw the current layout and photograph it from several perspectives. This is useful when determining stone sizes and designing pattern layouts. If you have a working fireplace, pay careful attention to clearance restrictions, as certain objects cannot be placed too close to the firebox.
Consider how much of the brick you want to cover. Some homeowners choose to leave pieces of the brick exposed for contrast, while others prefer full coverage. I recently worked on a project where we left the brick hearth alone but covered the surround with stone, resulting in a fascinating material interaction. Your decision influences both the project scope and the final aesthetic.
Choosing the Right Stone Material
Natural stone provides authentic beauty, yet it comes in a variety of weights and installation needs. Fieldstone offers organic, uneven shapes ideal for rustic designs, whilst stacked stone has a more consistent, contemporary appearance. Thinner veneer stones (approximately 1-2 inches thick) are ideal for most residential remodels since they are lighter and easier to install than full-thickness stone.
Another great alternative is manufactured stone veneer, which has the appearance of natural stone but is less expensive and lighter in weight. Today’s high-quality artificial stones are almost indistinguishable from natural stone, with realistic color changes and textures. I frequently recommend these for DIYers and homes where weight is an issue. They are also more uniform in size, making pattern layout more predictable.
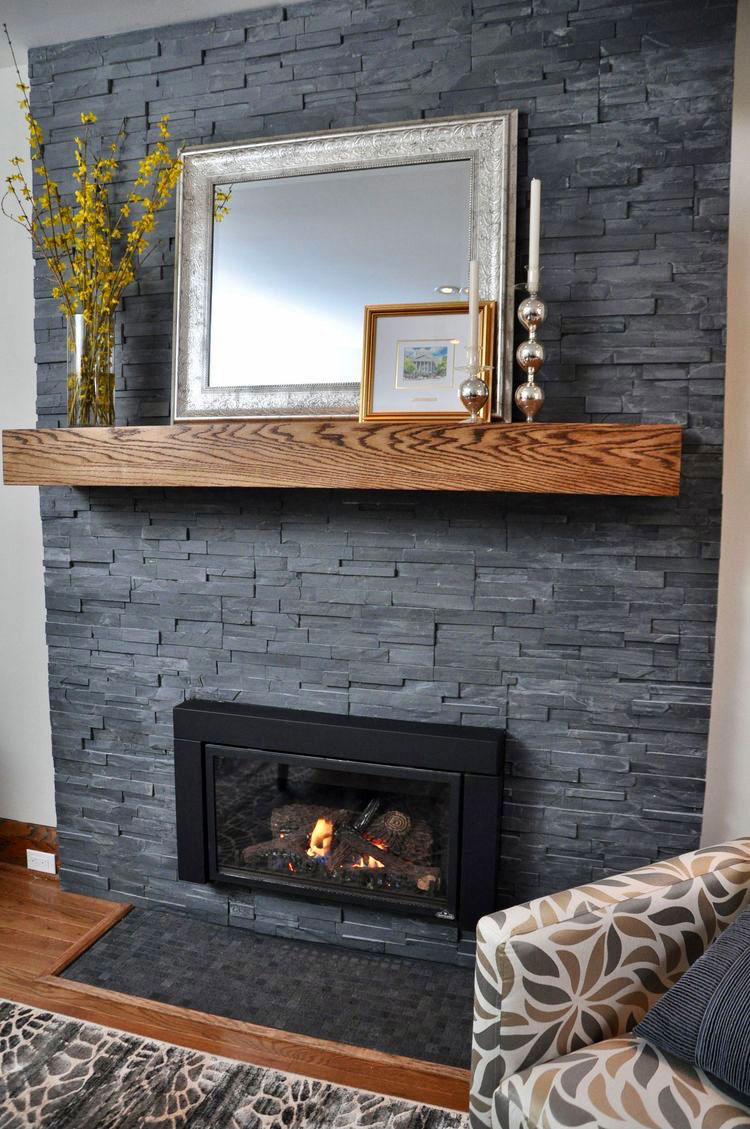
Consider how the color and texture of the stone will complement the current pieces in your room. Light-colored stones can lighten a dark room, but darker tones provide a comfortable atmosphere. I recently utilized a combination of grays and taupes in a living room to tie together the varied wood tones in the furnishings. Bring home multiple samples to test in your actual lighting before making a final decision.
Preparation and Surface Treatment
Proper preparation ensures that your stone application will last for years. Start by properly cleaning the brick to remove soot, dust, and grease. For thick filth, I use a stiff brush and a trisodium phosphate (TSP) solution, then rinse. Consider if you want to remove the paint or place stone straight over it; each method requires different preparation.
Next, decide whether you need a moisture barrier or metal lath. These enhancements avoid moisture problems and promote adhesion in damp areas or with particular stone kinds. I usually use lath when working with heavier natural stones or in humid regions. For lighter veneers over solid brick, a bonding agent applied to the clean brick surface is usually sufficient.
If your design calls for removing the existing mantel or hearth, be careful not to damage the surrounding walls. I recommend identifying components if you intend to reuse them. Consider using cement board to build up the surface of stone surrounds to provide depth. This little extra step might make the finished fireplace appear larger.

Installation Techniques and Patterns
The installation procedure differs depending on the stone type. Mortar application necessitates proper mixing consistency; too wet and it will not support the stone, too dry and it will not adhere properly. To avoid drying out, I mix in small portions while working. Start at the bottom and work your way up, using spacers as needed to ensure consistent joints. To visualize the arrangement of irregular stones, I first dry-lay the design on the floor.
Pattern choices have a significant impact on the overall appearance. Random ashlar patterns work well with a variety of stone sizes, whereas coursed patterns provide tidy lines. In a recent job, we used a combination of ordered horizontal lines across the firebox and random placement along the borders. This focused attention on the flames while retaining visual appeal throughout.
Pay great attention to the corners and edges. Some stone types include pre-made corner pieces, while others necessitate precise cutting or overlapping. I frequently devote extra care to these nuances since they are so noticeable. Maintain uniform joint widths and depths for a professional finish, and tool the mortar before it has entirely set. Keep a pail of water and a sponge nearby to remove excess mortar from stone faces as you work.

Grouting and Final Touches
Grout color has a big impact on the overall appearance. Contrasting grout highlights the stone pattern, whilst matching grout produces a more uniform appearance. I usually use sanded grout for broader joints (more than 1/8 inch) and unsanded for tighter fittings. For natural stone installations, I favor earth-toned grouts that fit in with the stone’s inherent variations over glaring white or gray.
After grouting, appropriate curing is required. Protect the area from drafts and excessive temperatures for at least 48 hours. Throughout this time, I softly wet the stone regularly to prevent quick drying, which might cause cracking. Once cured, use a quality sealant that is appropriate for your stone type. Penetrating sealers protect without altering the stone’s look, whilst enhancing sealers deepen colors significantly.
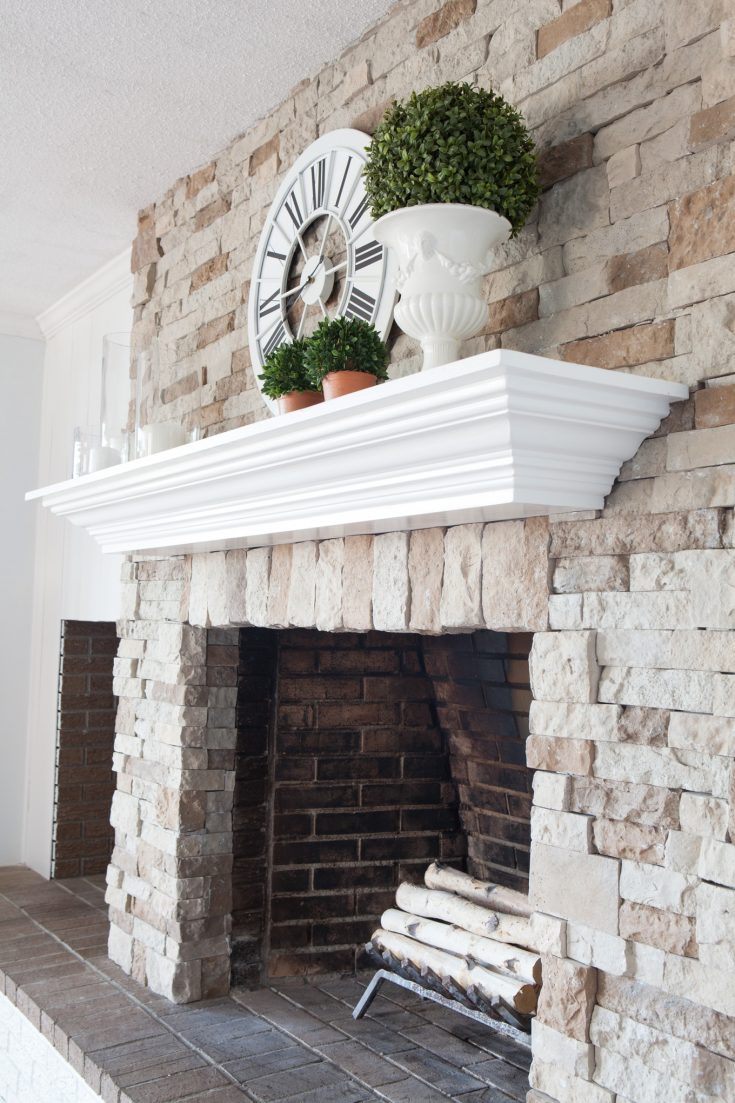
Consider including complementary parts to complete the transition. A new mantel made of salvaged wood or elegant metal can accentuate the stone’s character. I frequently match the hearth material with the stone selection, either using the same stone or picking a contrasting material such as slate or marble. These final touches bring the design together while also allowing you to showcase your flair.

Maintenance and Long-term Care
Stone fireplaces demand different maintenance than their brick counterparts. Regular dusting with a soft brush avoids dirt buildup on uneven surfaces. For more thorough cleaning, use stone-specific cleaners; avoid acidic solutions, which can scratch certain stones. In my home, I clean the stone surround on a monthly basis and inspect the mortar joints once a year for any necessary repairs.
Resealing schedules vary according on stone type and application. High-traffic areas or fireplaces that are used regularly may require resealing every 1-2 years, although others can last longer. I recommend evaluating the sealer’s effectiveness each year by sprinkling water on the stone; if it beads up, the seal is still intact; if it absorbs rapidly, it’s time to reseal.
Minor repairs should be completed as soon as possible to avoid worse problems. Small mortar cracks are usually repairable with color-matched caulk or compound. Many manufacturers provide repair kits to address stone chips or stains. I save leftover stones from installations for any future repairs; they’re vital for properly matching color and texture if damage occurs.

Can I install stone over an existing brick fireplace myself?
Many DIYers are successful with this endeavor, particularly with lighter veneer stones. However, it needs patience and attention to detail. I recommend beginning with a small section to learn mortar application and stone placement. The most difficult portions are usually keeping joints even and making cuts around corners or openings. If your fireplace is enormous or you choose hefty natural stone, professional installation may be worthwhile. Always verify your local building codes, particularly for wood-burning fireplaces.
What is the cost of remodeling a brick fireplace with stone?
Costs vary greatly depending on materials and project scope. Manufactured stone veneer costs $8-$12 per square foot, whereas raw stone costs $15-$30. Materials for a conventional fireplace surround (approximately 40 square feet) range between $500 and $1,200. Professional installation costs $1,000 to $3,000, depending on complexity. In my opinion, mid-range synthetic stones frequently provide the best value, delivering a natural stone appearance at around half the price. If you’re doing it yourself, don’t forget to budget for tools and supplies.
What is the best stone for a modern fireplace design?
For contemporary designs, I propose stacked stone veneers with consistent sizes and clear lines. Light grays, whites, and monochromatic color schemes all work well. Smooth-finished ledger stone or linear stone tiles give an extremely elegant appearance. In recent projects, I’ve used quartzite or honed limestone in modern settings; their modest texture adds interest without appearing rustic. If you want to achieve a trendy look, avoid excessively uneven stones and rainbow mixtures.
How do I prepare painted brick for stone installation?
To ensure appropriate mortar adhesion, painted brick needs to be well cleaned and roughened. After cleaning with TSP, I use a wire brush or sanding disk to scrape the painted surface. Some pros propose using a bonding agent designed for slick surfaces. In extreme circumstances, you may need to completely remove the paint or place metal lath over the brick. Test a small area first; if the mortar does not adhere effectively to your prepared surface, consider visiting a professional.

Can I mix stone kinds for my fireplace remodel?
Absolutely! Combining various stone kinds can result in beautiful focal points. I frequently select a different stone for the hearth than the surround, or use a contrasting stone as an accent band. The goal is to preserve equilibrium by selecting stones with complementary hues or textures. In one memorable project, we used rough fieldstone as the outer border and polished slate around the firebox hole. If you have a working fireplace, make sure all of your materials can take the heat.
How long does a stone fireplace makeover usually take?
DIYers working weekends should budget for 2-3 weeks from preparation to final sealing. Professional installers usually finish the task in 3-5 days. The timetable is determined by the type of stone (made is faster than natural), whether the mantel or hearth is being replaced, and the drying period between steps. In my experience, speeding the curing process causes problems later. It is preferable to provide extra time for adequate mortar and grout setting than to deal with cracks or loose stones later.
Red brick fireplace makeover ideas
AirStone Fireplace Makeover
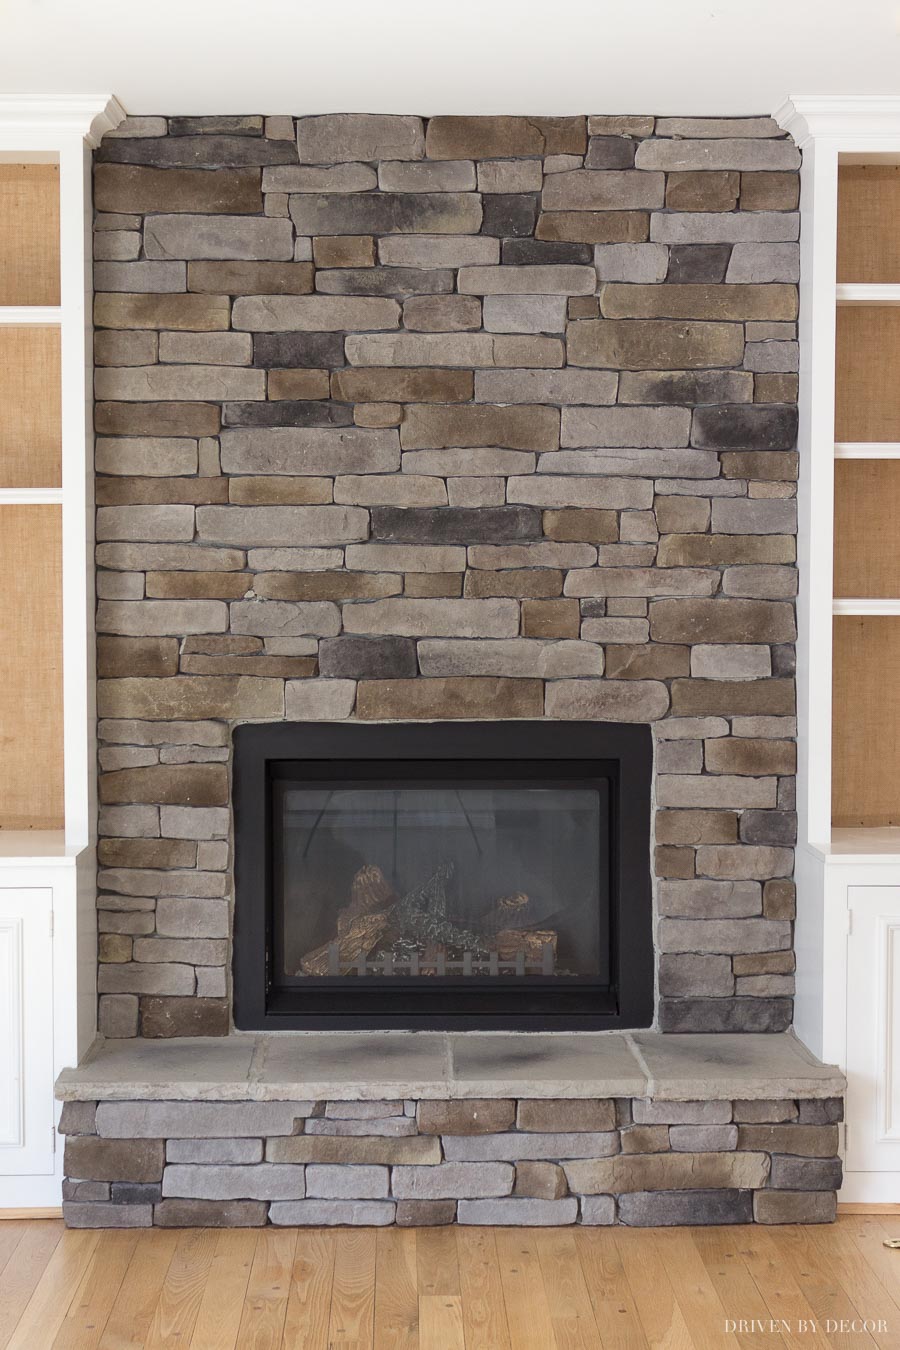
Designing a Stone Fireplace: Tips for Getting it Right! – Driven
Related Posts: